Thursday, May 7, 2015

A Polka-Dot Lego Dress, Onesie and Necklaces (Also: Fun with Block Printing!)

Block-printed Lego Dress + Bodyshirt

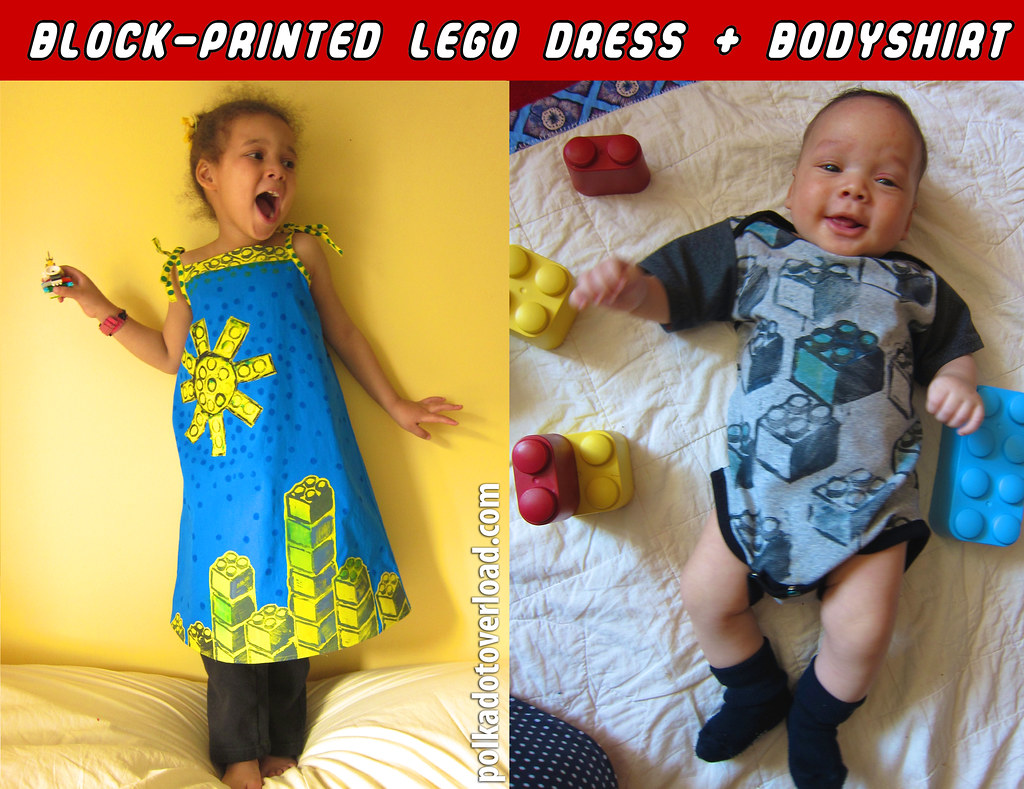
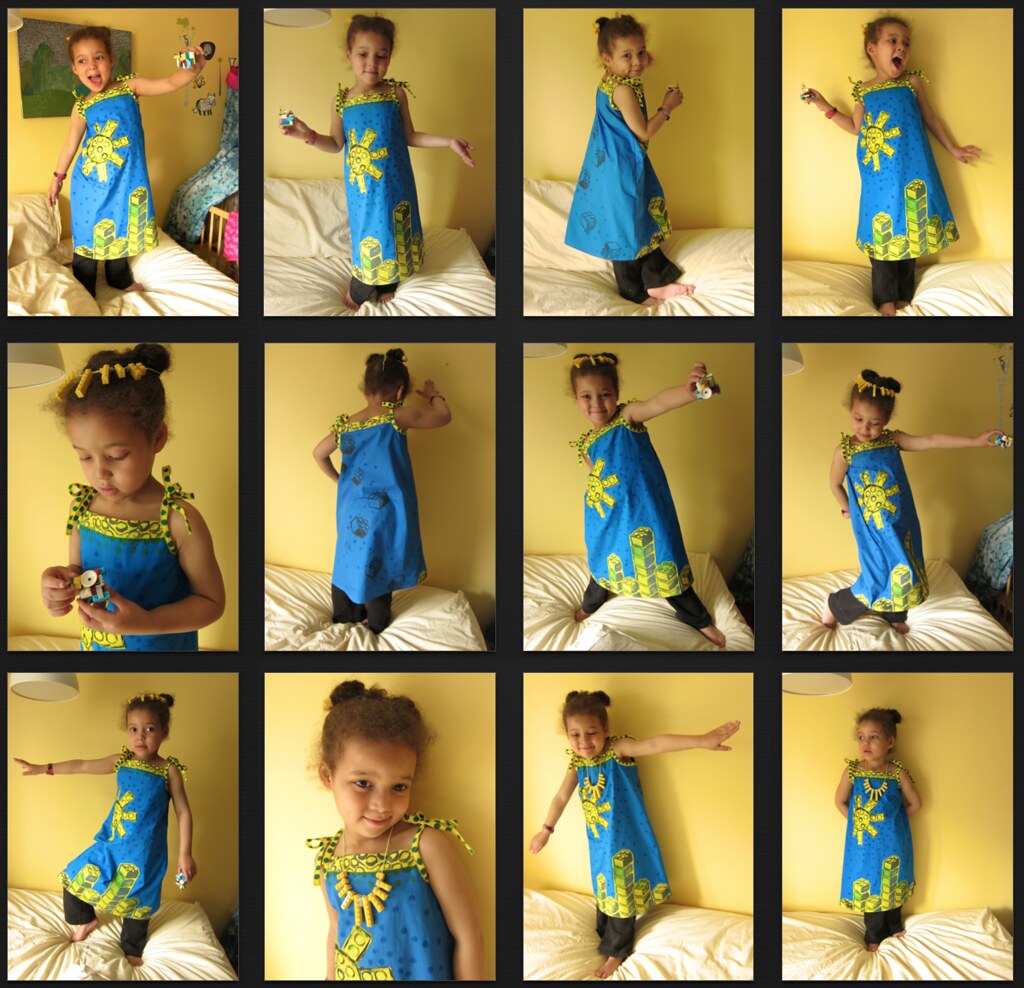
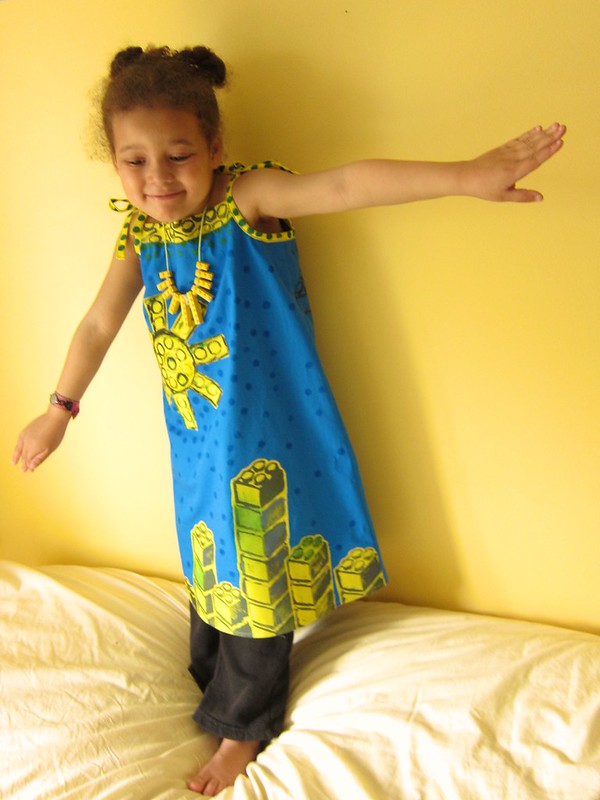
What with all the Small Human Being-focused sewing going on, I think my daughter was feeling a little left out. So I pulled out one of the unfinished (unstarted?) objects I felt most guilty about: her Lego Cityscape sundress. I sort of meant to make it for Kids Clothes Week, but baby wasn't really napping, and I fell down the crafty rabbit hole of experimenting with block printing and... well, here it is.

She loves it, if it isn't obvious. I really struggled to edit down the photos on this one!

Block-Printed Lego Cityscapes Dress (Oliver +  S Popover Sundress)

Backstory: As some of you may recall, about a year ago, I had a little "Lego Dress Showdown" to choose which blocks-themed dress idea to make for my daughter's Lego-themed fourth birthday party.

Can't Decide: Lego Dress Ideas for My Daughter's 4th Birthday Party

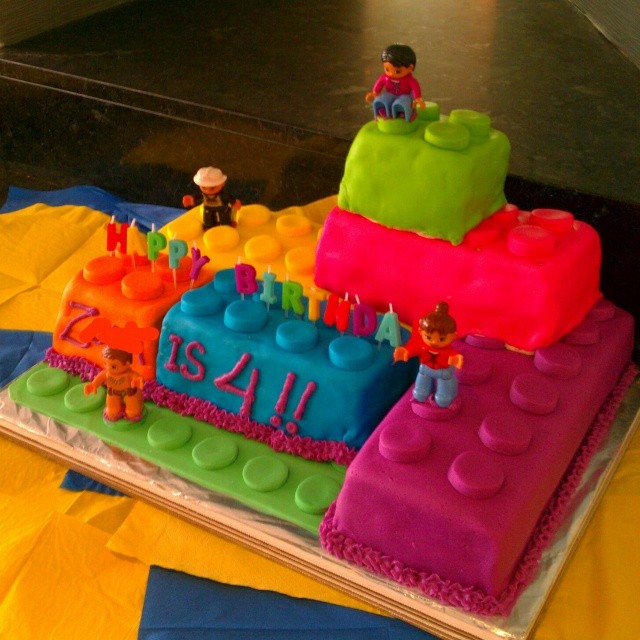
The cityscape design with the sun (which was partly inspired by this Oliver + S tutorial on raw edge appliqué) was by far the most popular, but alas, I was so tired and nauseous from my pregnancy it never happened. And her Lego birthday party was a disaster — shortly before the other kids showed up, little Z started throwing up EVERYWHERE. It was too late to cancel the party (which was in the lobby of our building) but she was so sick she didn't even eat a single bite of the amazing allergy-free Lego cake my mom made for her (no dairy, eggs or nuts):

The #allergyfree #Lego cake awaits the birthday party guests... #dairyfree #eggfree #nutfree #sesamefree and more #foodallergy

The other kids came and played with all the Duplos and games we had set up, and we recorded a video of them singing happy birthday to her and wishing her well. She recovered by the evening but is still sad about missing her birthday party to this day.

But I digress. Back to the dress!

Block-Printed Lego Cityscapes Dress (Oliver +  S Popover Sundress)

Lego dress basics:

The pattern: The Oliver + S patterns free Popover Sundress pattern. I actually own a bunch of not-free-at-all Oliver + S dress patterns, but I went with this free shoulder-tie dress because it is so simple — the plain front makes a great blank canvas for embellishment. It was a fun and quick sew, and the directions are just as great and detailed as with their paid patterns. My only quibble is that there isn't much ease across the tummy; if I make it again, I'll add some width and gather or pleat the dress front to the yoke.

Sizing: I made the size 7 (probably about two sizes too big) as I'd like her to be able to wear it for a good long while.

Fabric: Bright blue and yellow broadcloth from Tru-Mart Discount Fabrics (a crowded little store over by FIT that has some great deals sometimes).

Notions & tools, etc: Steam-A-Seam Lite 2 (for the appliqué). Fabric paint (Jacquard Neopaque nontoxic paints, which I already had around because I am a craft supplies semi-hoarder), Speedball Lino Cutters, Tee Juice Classic fabric markers (for the dots), some Blick EZ Cut block printing material, a foam brayer and foam brushes.

Blockprinting references used: I already had Lotta Jansdotter's Lotta Prints: How to Print With Anything From Potatoes to Linoleum... which is very inspiring, but slightly vague on the technical info and handholding needed to get good results. Luckily my local library had a more nitty-gritty detail book available, Fabric Printing at Home by Julie Booth.

Techniques used: Mock French seams (my first time trying this), homemade bias binding (for the straps) with a Clover 1" bias tape maker.

It took a lot of experimenting to get my DIY rubber blocks to print clearly on my fabric. Deepika has a cool tutorial on the Pattern Review blog using wood blocks but I wasn't about to start wood (or lino) carving, so I used E-Z Cut Printing blocks:

Trying #blockprinting on fabric for the 1st time to make clothes for the kids for #kidsclothesweek & #SHBsewalong but it's not going well... I carved a stamp from EZ Cut & it works fine on paper, but...

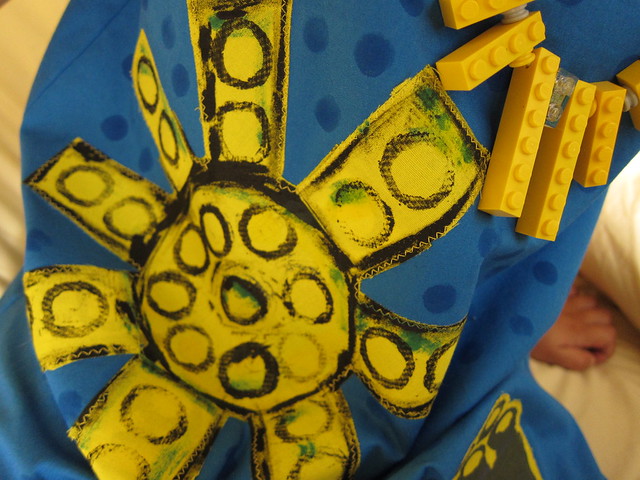
After I got the impressions looking fairly good, I blockprinted the Lego towers and sun onto the yellow fabric, and the yokes. (It's all the same block, I just painted different parts of it before stamping to get some partial impressions). I heat set them (oh goodness, it takes FOREVER to heatset with an iron on so much fabric!), used fusible web to stitck them to the dress front, then stitched them down with a zig zag for extra security:

Block-Printed Lego Cityscapes Dress (Oliver +  S Popover Sundress)

For the back I decided to make it look like the blocks were tumbling down:

Block-Printed Lego Cityscapes Dress (Oliver +  S Popover Sundress)

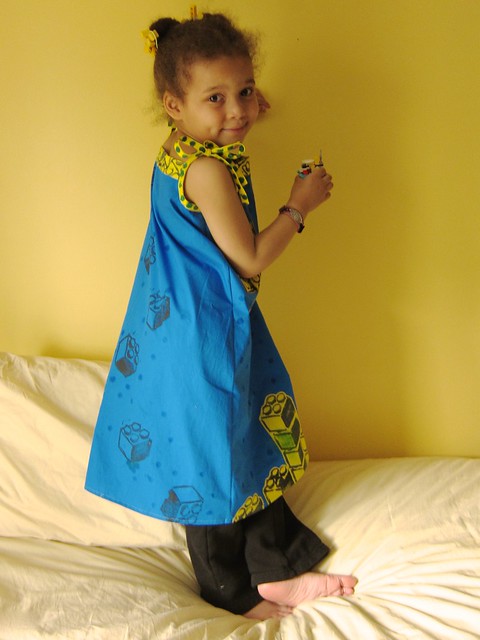
I had a moment of panic when she tried it on and declared it resembled an IKEA apron (the yellow and blue?) but once I added the dark green polka dots with a Tee Juice marker, the resemblance faded.

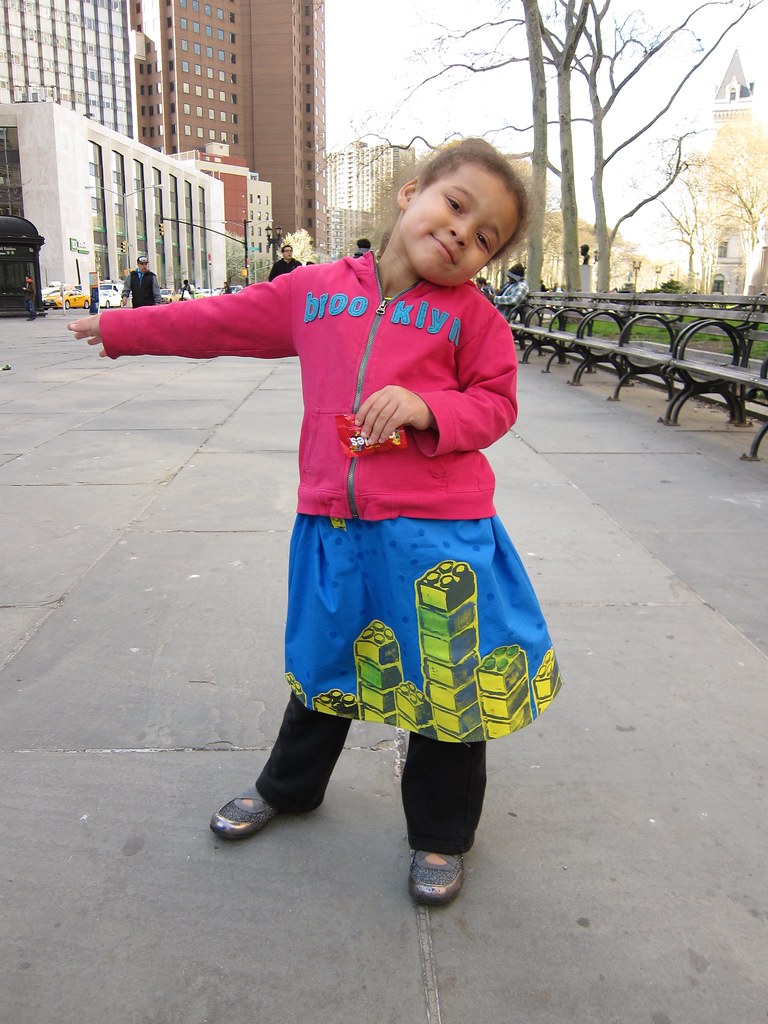
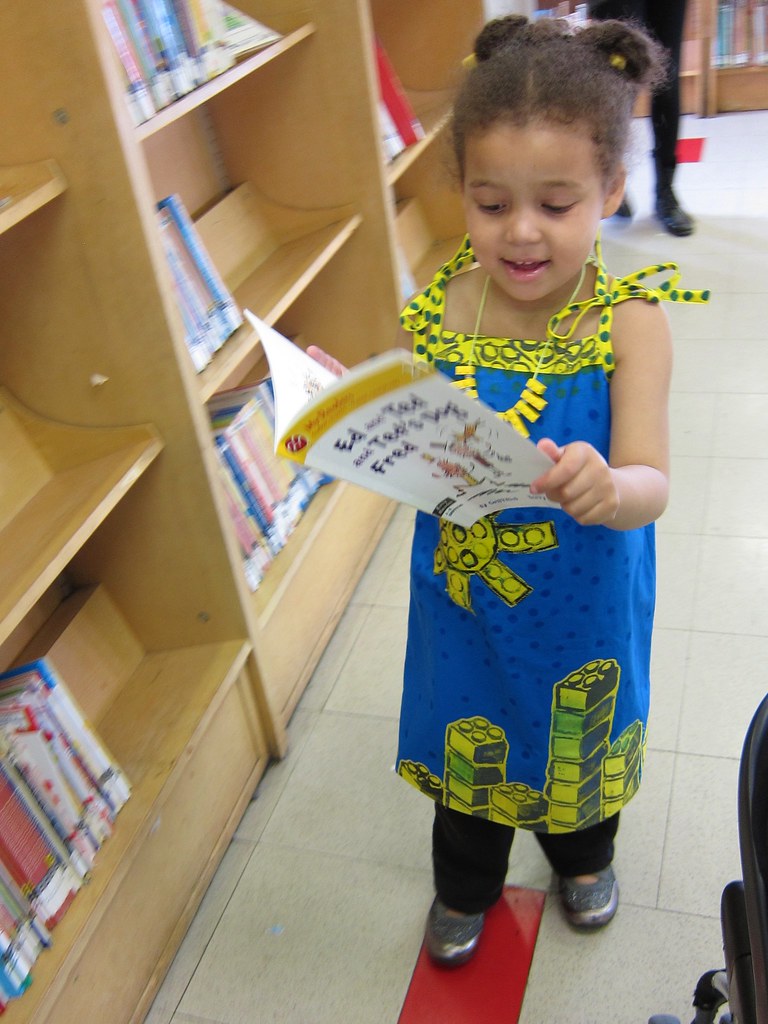
Z wore the dress on a walk to our local branch of the Brooklyn Public Library (doesn't it look cute peeking out as a skirt?)...

Block-Printed Lego Cityscapes Dress (Oliver +  S Popover Sundress)

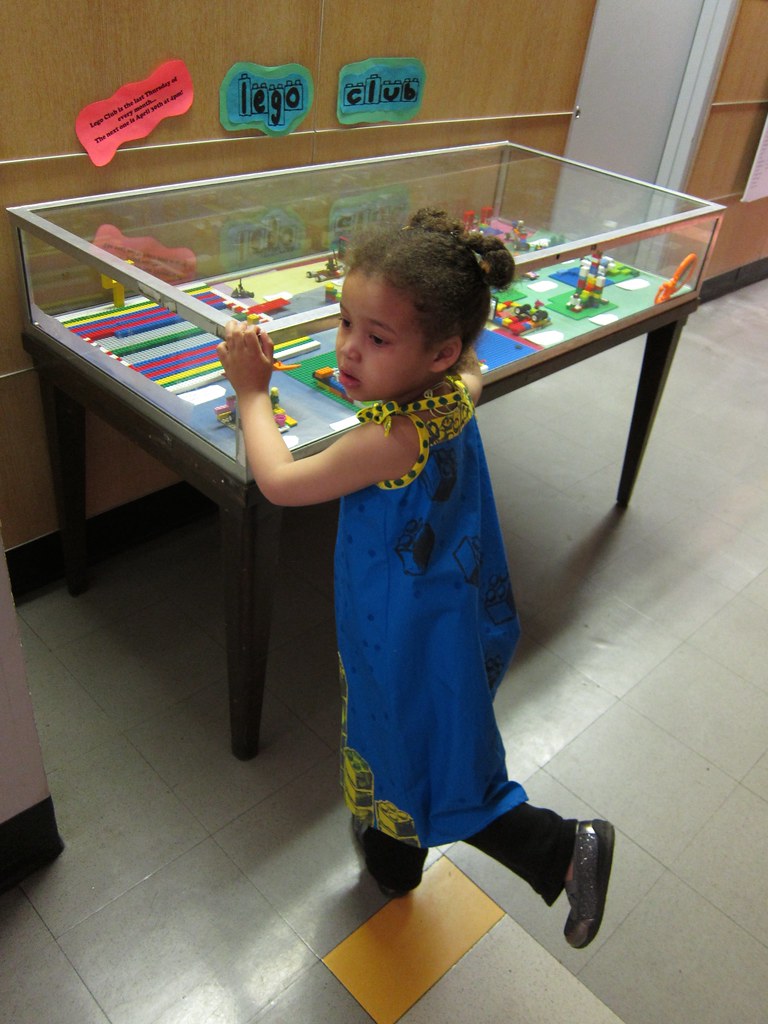
The librarians loved it and invited her to the monthly Lego Club.

Block-Printed Lego Cityscapes Dress (Oliver +  S Popover Sundress)

She had a blast building a "Flying House Pirate Ship" with some mermaids and wizards on it).

Block-Printed Lego Cityscapes Dress (Oliver +  S Popover Sundress)

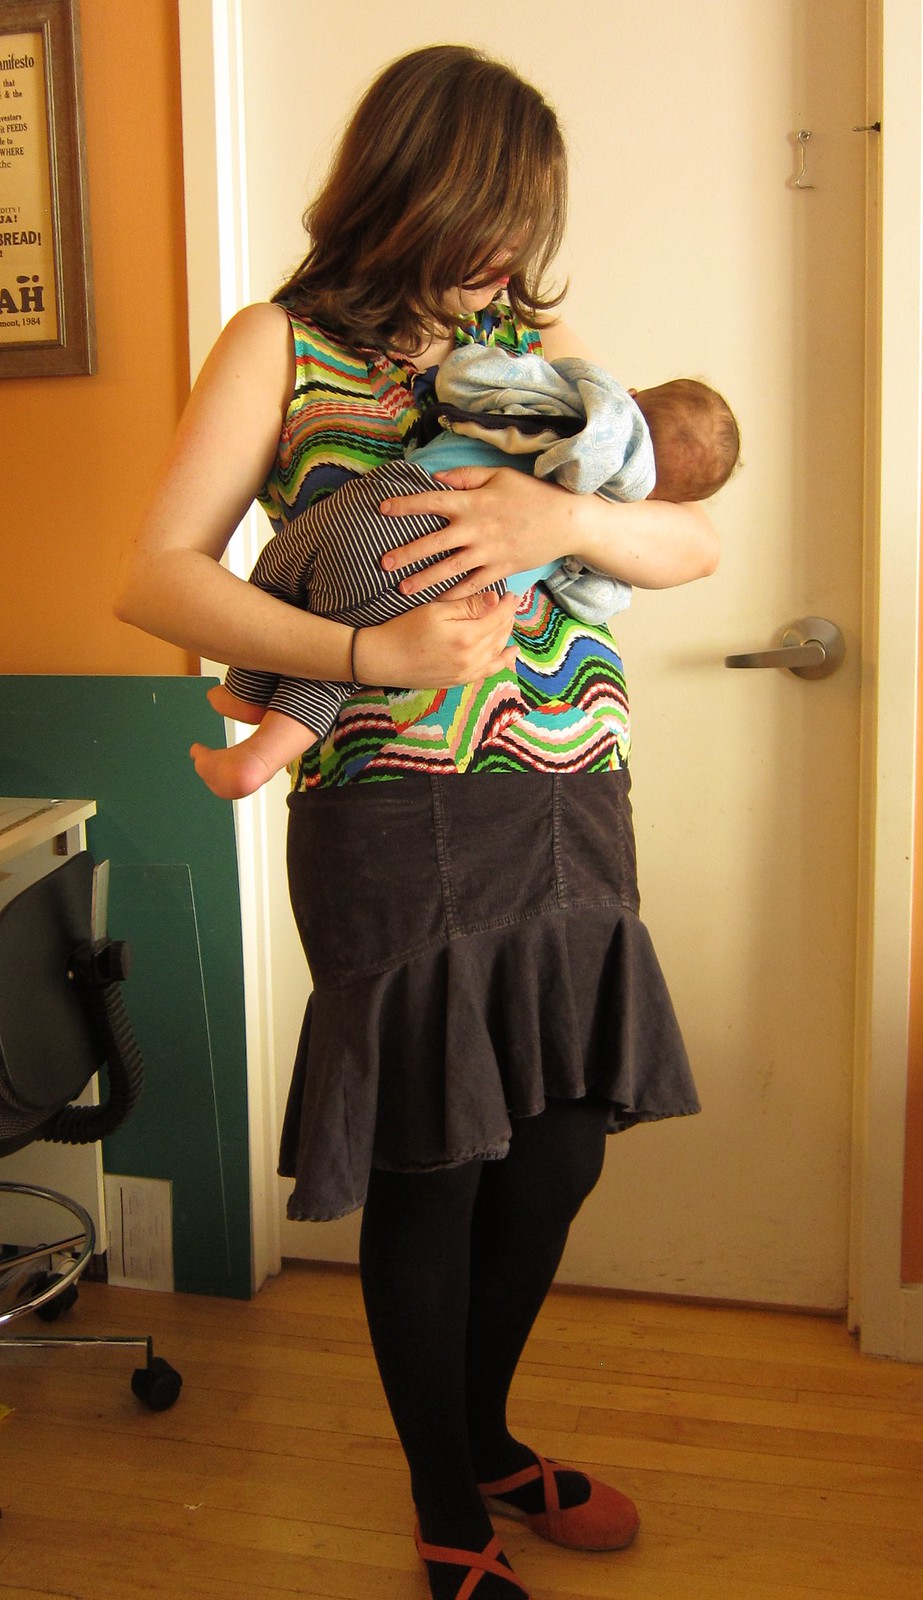
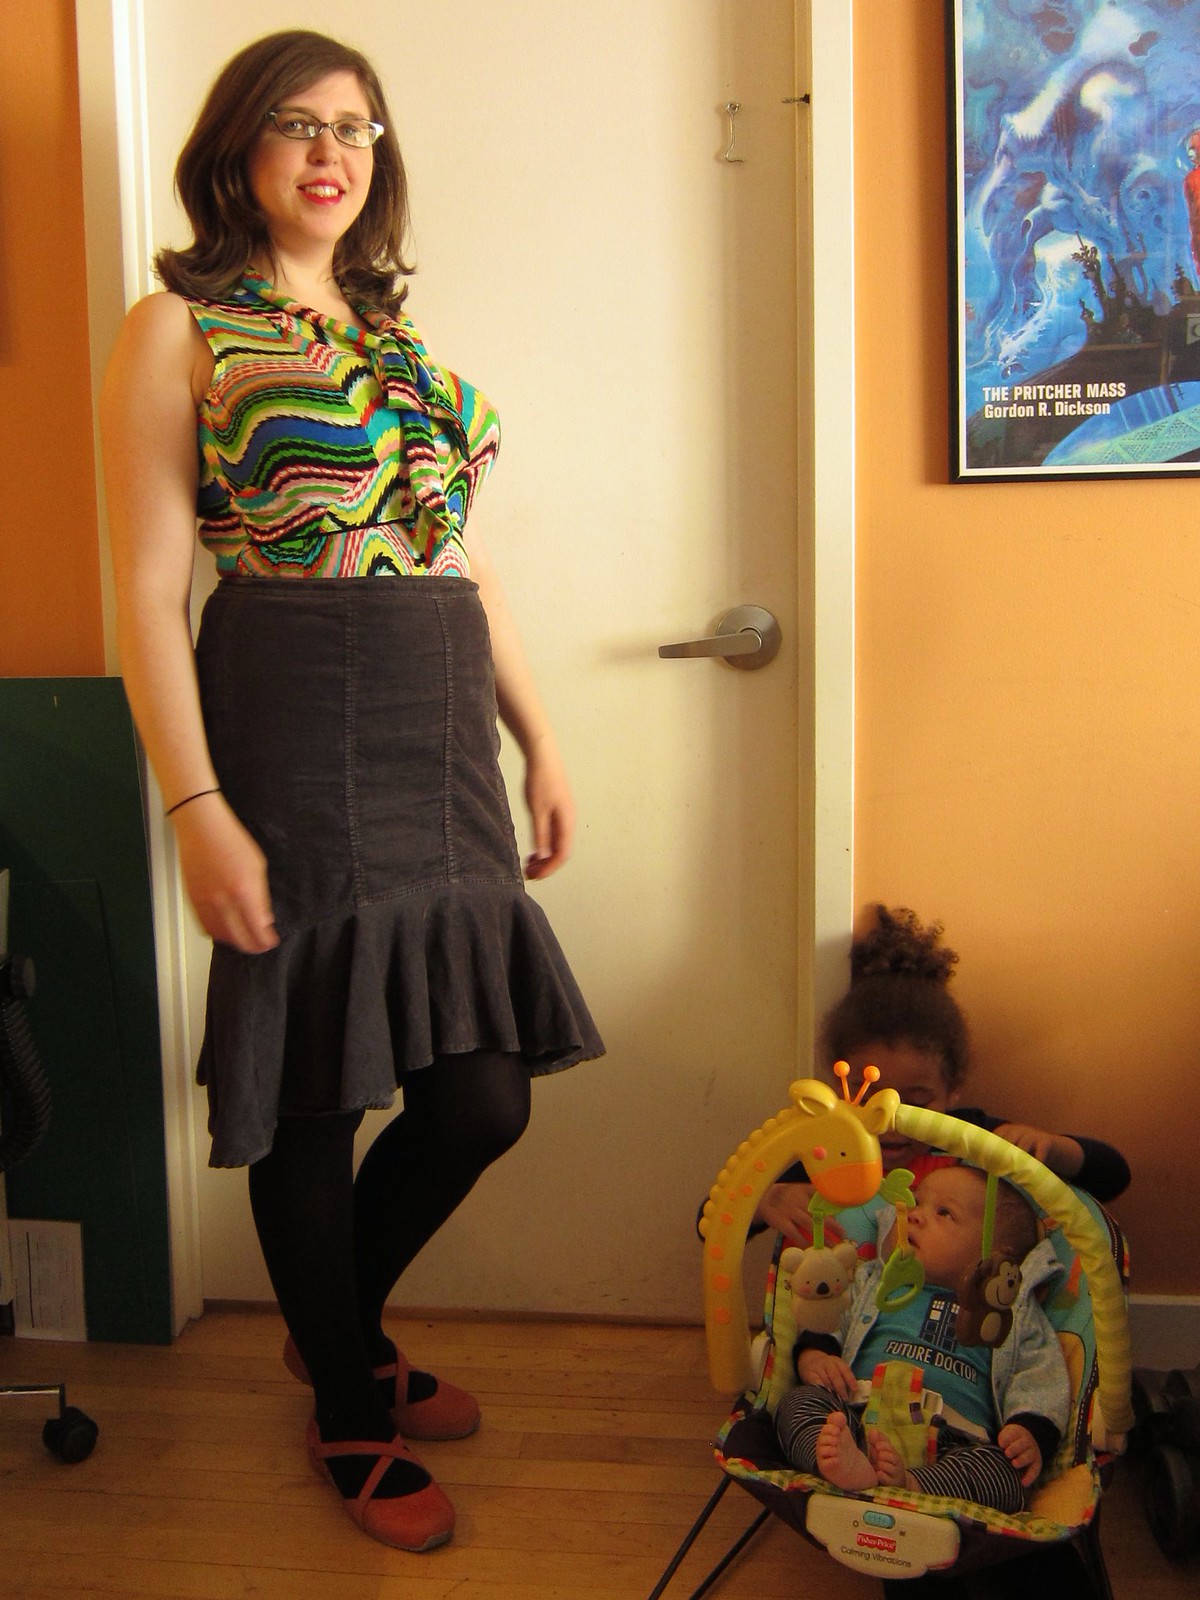
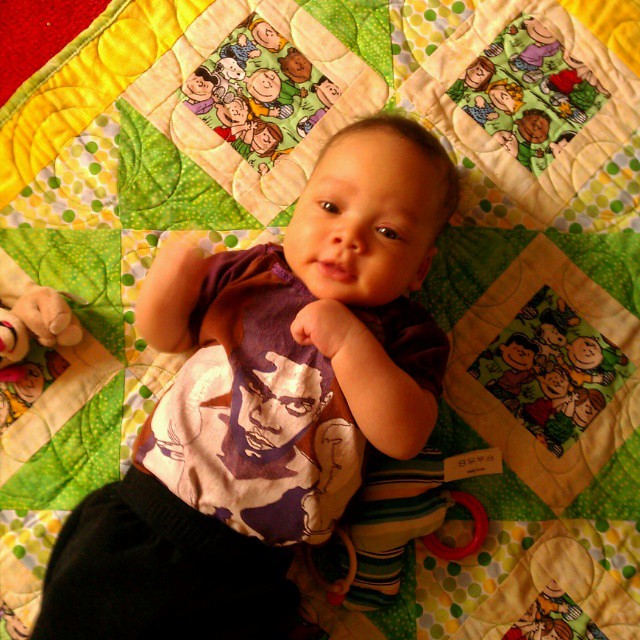
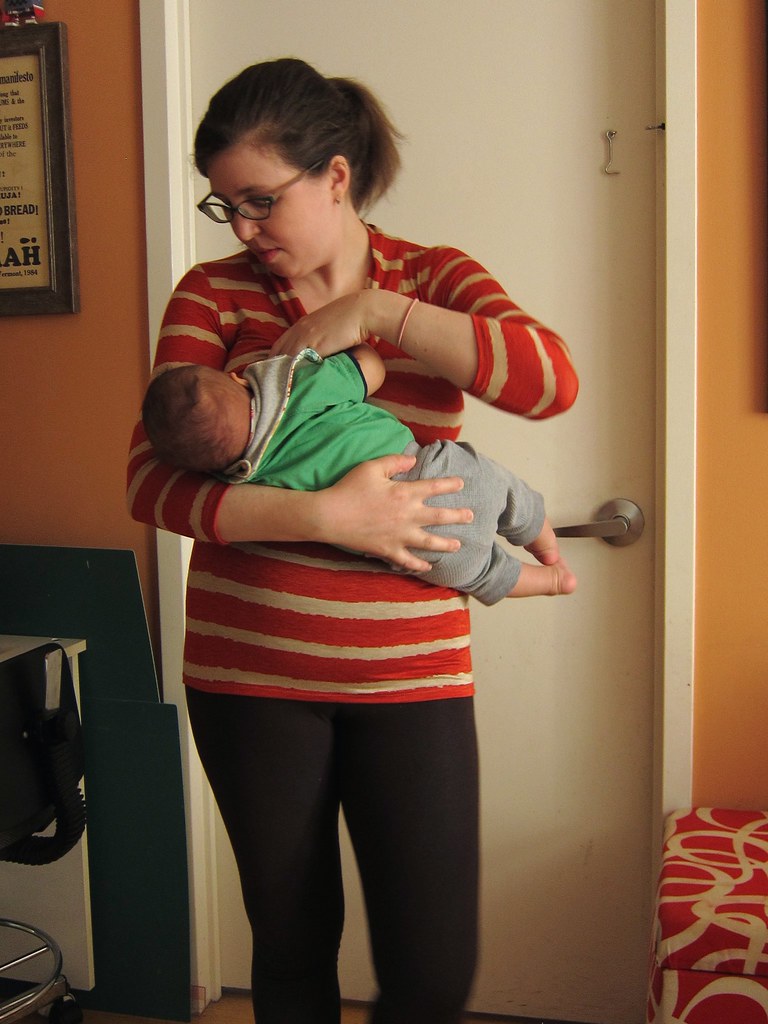
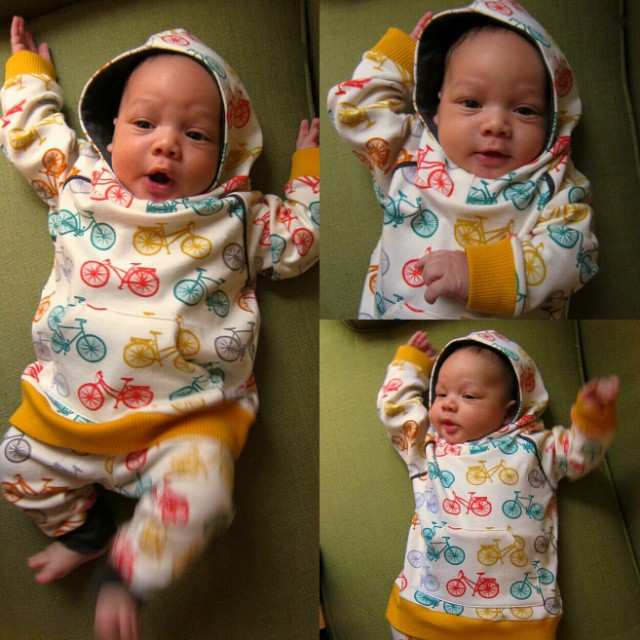
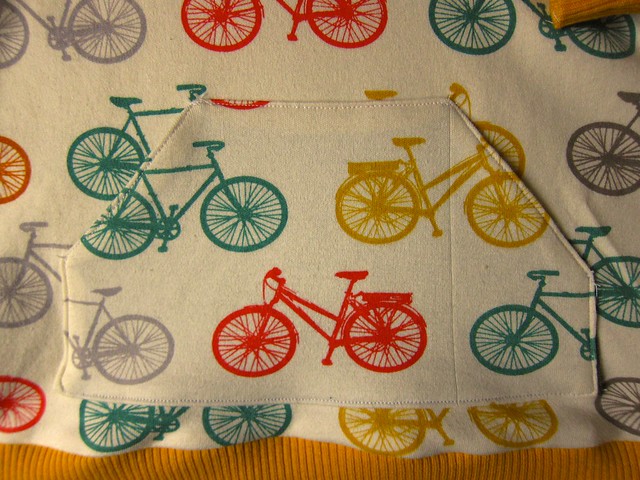
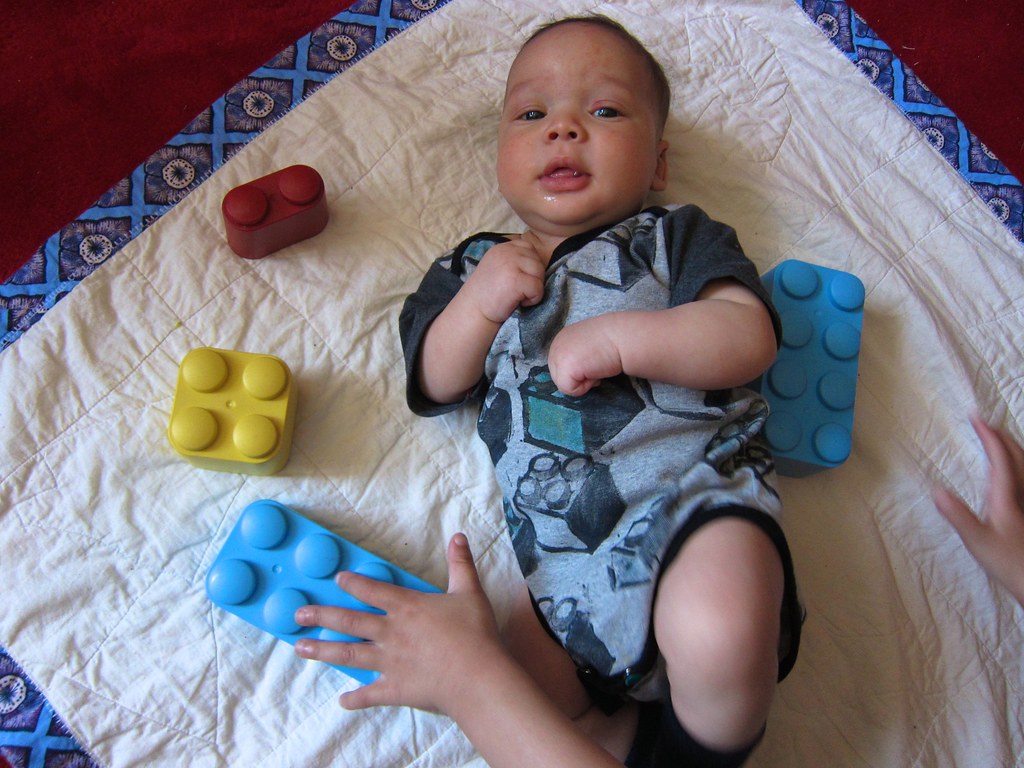
While I had the paints and block out, I decided to make a blocks onesie for the little guy as well using my Kwik Sew 2433 baby layette pattern and some random knit scraps left over from other projects. I made the 9-12 month size, so it's HUGE on my 3-month old, but he's growing fast.

Block-printed Lego Blocks Onesie/Bodyshirt

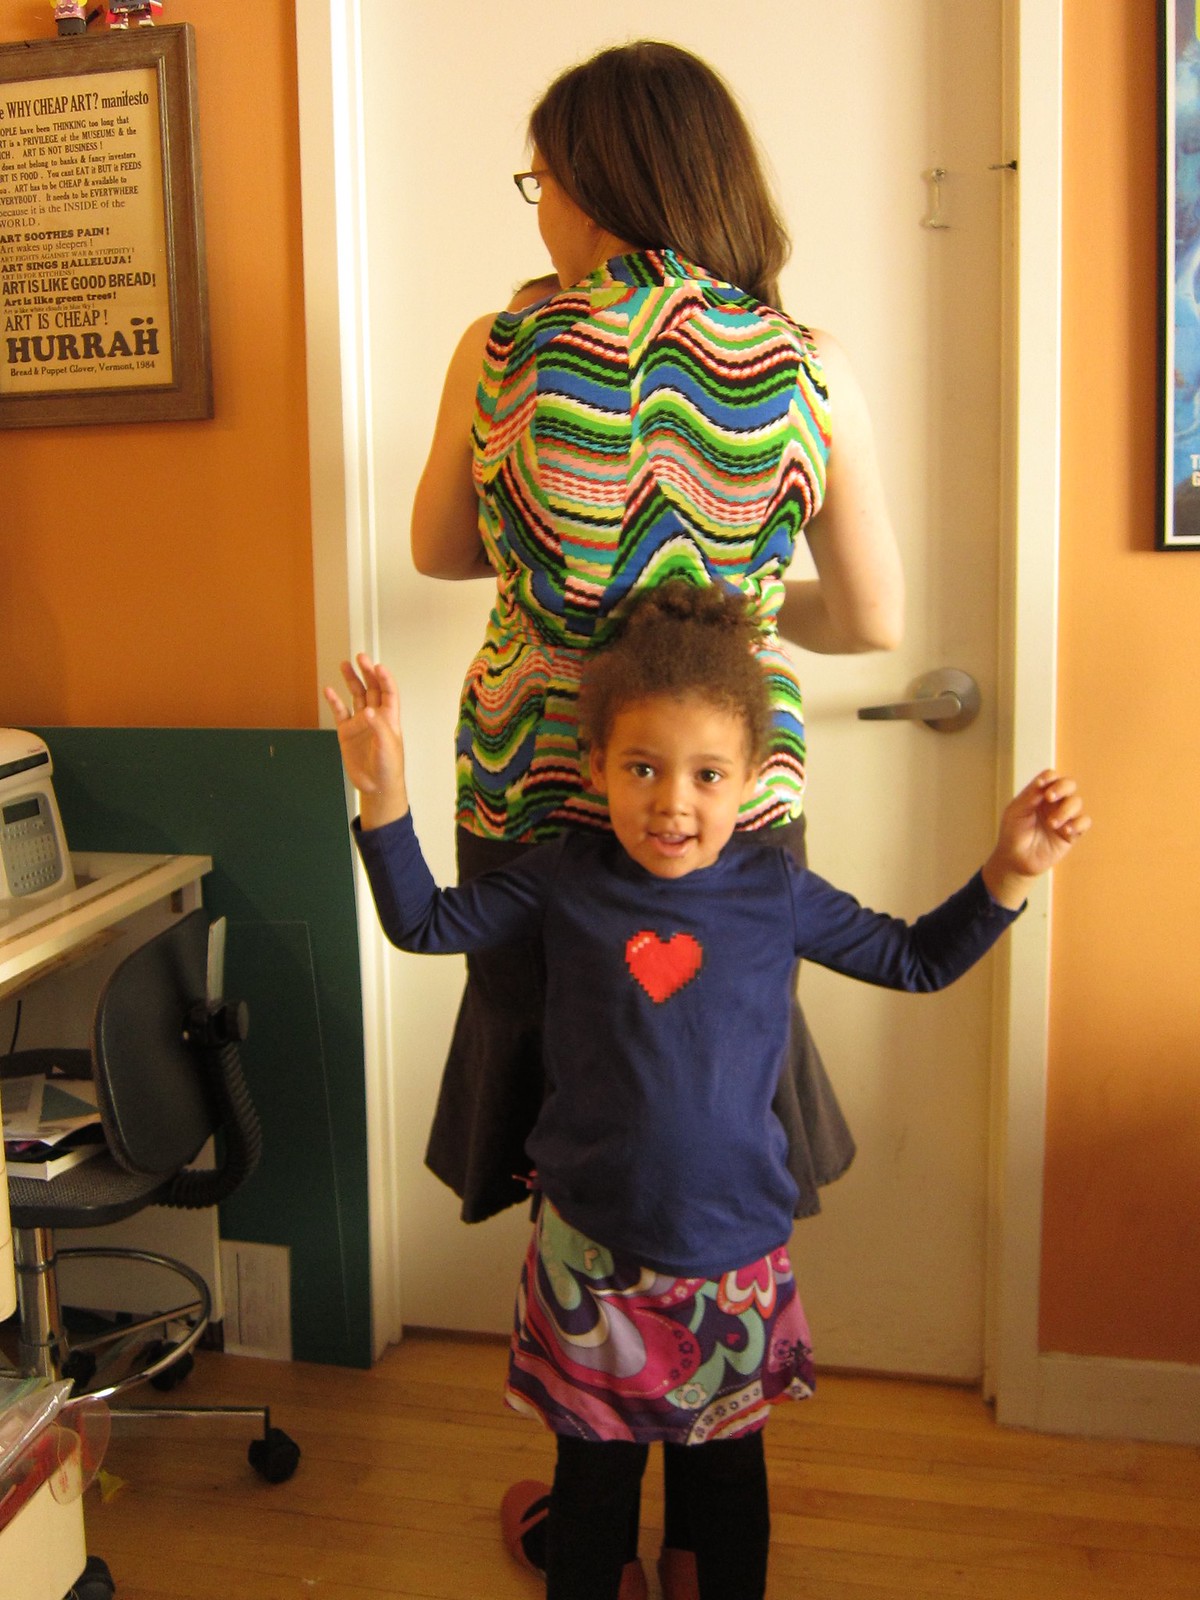
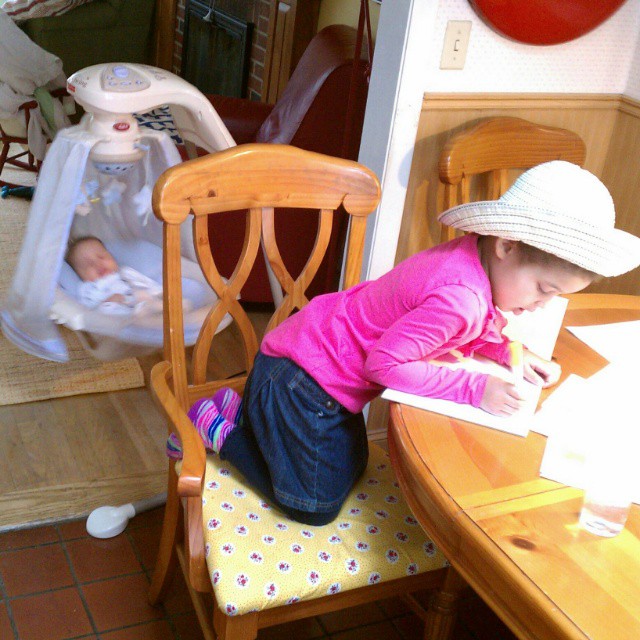
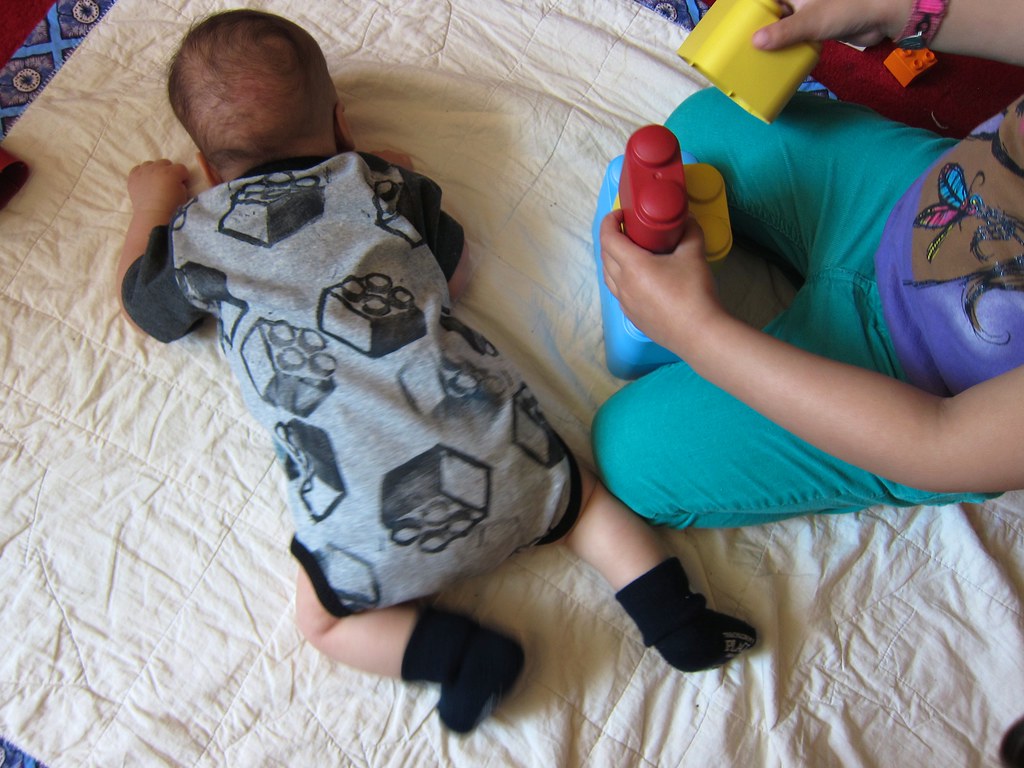
Big Sis tried to give him some building tips using her old Green Toys "My First Blocks" but he was skeptical:

Block-printed Lego Blocks Onesie/Bodyshirt

So she gave up and played with the blocks herself:

Block-printed Lego Blocks Onesie/Bodyshirt

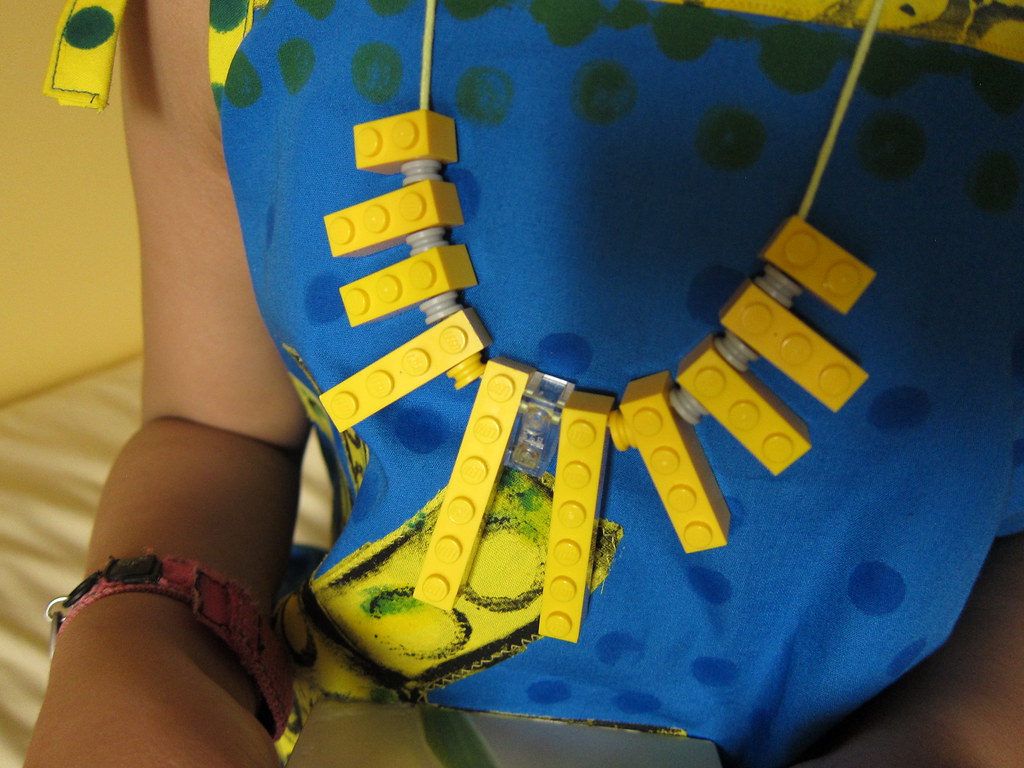
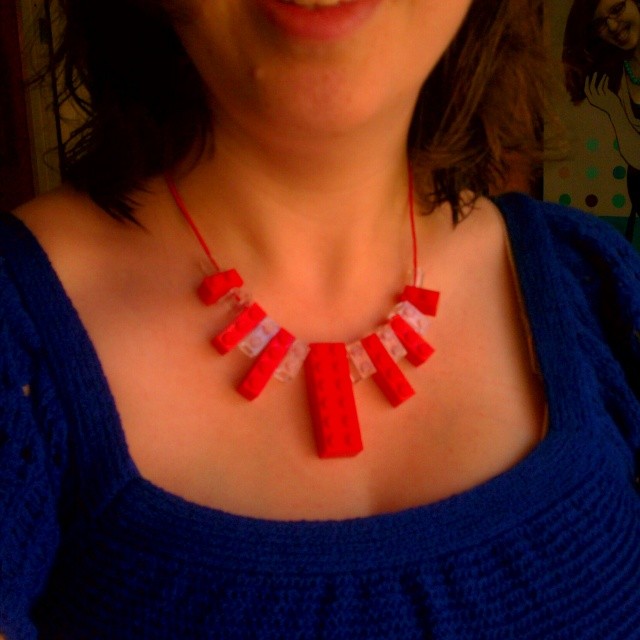
For the necklace, my husband drilled holes in some Legos and Z and I arranged them until we got something we liked. Hers:

Block-Printed Lego Cityscapes Dress (Oliver +  S Popover Sundress)

And mine (shown here on the day of her ill-fated party):

Been sick for a few weeks and didn't get to sew special #Lego dresses for Z's birthday party today but I did make matching mother/daughter Lego necklaces.

Conclusion: Neither garment is perfect (but whatever, perfect is the enemy of good, etc), but I had a lot of fun and feel like I learned a lot in my block printing experiments and am now a bit obsessed with thinking about how I can decorate my own fabrics. While at the library I also picked up A Field Guide to Fabric Design: Design, Print & Sell Your Own Fabric (Traditional & Digital Techniques) by Kim Kight (formerly of True Up blog, now a fabric designer for Cotton and Steel) and it made me want to experiment more with Spoonflower again. (We'll see if that actually happens).

In the meantime, Z is loving her Lego dress, and I am thrilled that I finally finished it.

Block-Printed Lego Cityscapes Dress (Oliver +  S Popover Sundress)

**Disclosure: Actions you take from hyperlinks within this blog post may yield commissions for polkadotoverload.com (quite likely to be spent on yarn or fabric or possibly diapers).

Monday, May 4, 2015

An Eye-Searing Top + Me Made May 2015 pledge

Eye-Searing Jalie Top (w/ So Zo nursing top hack)

This top ticks all my sewing form and function happiness boxes. It's loud, colorful and super close-fitting. It's also soft, stretchy, comfortable and stain-camouflaging: I DARE you to find any spit-up in this wild print. (OK, there isn't any — yet — but it is a daily hazard in my life as the mother of a 3-month-old baby).

And of course it's great for discreet(ish) breastfeeding!

Eye-Searing Jalie Top (w/ So Zo nursing top hack)

Yes, I made the Jalie 2921 scarf-collar jersey top for the fourth time, my second time making it in a nursing version using the 'So, Zo...' breastfeeding top tutorial. This is my fifth and almost-final piece for the Small Human Being Sew-Along I did in April with Cindy and Clio (reminder: submit your sew-along projects here by May 7 to be part of the giveaways and roundup!).

See my wearable muslin version post for all the basic details.

So what's different in Version 4.0?

Well, the fabric, of course — this is a really lovely, soft, but sturdy and substantial rayon lycra knit from Mood with excellent recovery. Rayon lycra jersey ranges so widely in quality, and I've been disappointed many times before (curse you, Fabric.com!), but this is the good stuff. I've been wearing my first nursing version of this top constantly but I am always worried it is about to tear apart it is so thin.

I also changed up the elastic — I found the clear elastic recommended in the tutorial felt too flimsy to me for an opening that needed to be tugged at again and again. So I used a soft black ruffle-edged lingerie elastic from the stash, bought at Daytona Trimming some time back... you can see it here on the underlayer:

Eye-Searing Jalie Top (w/ So Zo nursing top hack)

And I made the sleeveless version this time, though I ended up with the Dreaded Armhole Gape (I have the same problem with ready-to-wear sleeveless tops) and ended up sewing some random tucks to tighten the armholes and keep my bra covered. I know there is a way to fix this at the pattern stage, but I didn't bother.

Back view, sort of:

Eye-Searing Jalie Top (w/ So Zo nursing top hack)

And yes, I used a zig-zag for topstitching, as I've been having some technical problems with twin needling. I'm going to make the attempt again, but I figured zig zags went with the zig-zag print. Right?

This top makes me really happy! I want to wear it EVERY day, but it's so distinctive I think people might notice? Maybe?

Eye-Searing Jalie Top (w/ So Zo nursing top hack)

Though I gotta say having two kids makes even my cluttery sewing corner photo shoots night impossible... I was trying to get some photos of the top tucked in, but baby woke from his post-nursing nap and started to fuss, so I asked big girl to entertain her brother...

Which she happily did...

Eye-Searing Jalie Top (w/ So Zo nursing top hack)

... Until he accidentally scratched her in the face with his baby Wolverine claws (we DID almost name him Logan, so maybe this is our fault) and I had to separate them.

Eye-Searing Jalie Top (w/ So Zo nursing top hack)

Don't worry, they were best buddies again a few minutes later:

IMG_1341.JPG

And here we are in me-made sweaters and hoodies in our official Me Made May 2 picture, on our way to get comics for Free Comic Book Day (husband took photo, as he had no me-mades on):

IMG_1345.JPG

Oh, yes: Me Made May! Here's what I wrote in my signup:

I always love Me Made May! But I just had a baby and almost none of my me-mades fit, so I'm going to have to go easy on myself for this one: 'I, Mikhaela Reid of Polka Dot Overload, sign up as a participant of Me-Made-May '15. I endeavour to wear a me-made item at least three days per week for the duration of May 2015 (well, at least until I have to return to work at the end of the month)'

I'm not even sure if I'm going to recap my outfits here each week, but you can catch them all on my Instagram and I will do a big photo collage at the end.

But the embarrassment of wearing old maternity tops on Instagram has already inspired some frantic sewing and identification of wardrobe gaps (or chasms, really). I have an almost-complete gored denim skirt on the sewing table and a striped ruched-bust top copied from ready-to-wear in progress.

What are your criteria for a really happy make?

Thursday, April 30, 2015

SHB Sew-Along: Giveaways & Wrap-up (Comment by May 7!)

So I startled awake in a sleep-deprived haze this morning to realize "Oh, hey! Today is the last official day of the SHB Sew-Along!" (see here if you don't know what I'm talking about). The good news was: I did it! Somehow despite having a tiny baby and a four-year-old I managed to sew things. Lots of things, actually. OK, so I mostly had to sew in 15-minute chunks when baby was catnapping (or stay up too late and really deprive myself of sleep), but I still managed to finish four baby garments, a bib, two nursing tops and a baby carrier.

But I'll save a summary of all my makes for another post: this one is to share yours! Cindy of Cation Designs, Clio of Clio & Phineas and I have been following all the awesome, quirky, nerdy, pretty and/or cute things you all have been posting to the Flickr group, Instagram, Twitter and your blogs, and we are super glad you decided to sew along with us -- whether you were a new parent, pregnant, or sewing for friends and family.

And we have prizes for you!

Prize #1: a free copy of the adorable Oliver + S Lullaby Layette PDF pattern (random giveaway)

We have two copies of this cute and comfy layette set to give away, sized for babies and toddlers up to 24 months. At least one of you already made this during the sew-along--this romper with coordinating hat is from Laurel of Dart & Gather (who is too busy to blog these days, but still sews many lovely things):

NL6360 Hat & Oliver and S Layette Set

Prize #2: A year's subscription to Ottobre Design magazine (one chosen from each category)

We have three one-year subscriptions to Ottobre Design children and youth sewing pattern magazine to give away!

That's four thick issues packed with stylish patterns — from sweet and classic to modern and edgy — for babies, toddlers, and kids. All modeled in inspiring fabrics by adorable children. Cindy, Clio and I are going to put our heads together and pick a winner from each sew-along category (baby clothes, baby accessories/quilts/toys, stuff for parents/maternity/nursing). Please don't ask me what our exact criteria are, because we're too tired and covered in spit-up to know yet.

The rules

In order to enter both of these giveaways, please:

  1. Leave a comment on this post linking to one (or more) of your favorite makes for the Sew-Along (whether on Flickr, Instagram, or your blog/website), with your...
  2. Email address or other way to contact you should you win.
  3. Basic details of what pattern and materials you used (if not already mentioned on the Flickr page or blog post)...
  4. A bit about who you sewed the for (your 6-month-old baby, a pregnant friend, whoever!)...
  5. And how you managed to find the time/inspiration to sew at all!
  6. Deadline: May 7 at midnight (yes, we know it was an April sew-along, but we won't tell if you use an extra day or two to finish up your projects... I still have a half-finished nursing top and a few not-done baby bibs sitting next to my serger).

Once all the entries are in, give us tired mamas a few days to select and notify the winners, and post a roundup featuring your fantastic creations (spoiler alert: there will be lots of nerdy Lord of the Rings themed-items).

Baby D says: thanks for joining us! (shown here in a Basquiat bodyshirt I originally made for his big sister, on a polka-dot Peanuts quilt made for him by a friend):

Baby D enjoying a beautiful handmade gift from a quilter friend - a polka dot Peanuts quilt (we both used to work for the company that licensed Peanuts) . Little dude is wearing a #memade Basquiat onesie upcycled from his Daddy's T-shirt.

Sunday, April 19, 2015

Finished: Quick & Cheap DIY Tablecloth Ring Sling (& Thoughts on Finding Time to Blog AND Sew)

Better photos of my DIY tablecloth ring sling, with actual baby. #SHBsewalong #babywearing #babyDWood #isew #tcrs

Becoming a sewing blogger is contradictory: blogging can inspire you to sew and can be creative in itself, but it can also be a time suck that takes you away from your sewing machine. Suddenly you have to find time not only to to make your project but to photograph (and photoedit) it, write it up (and edit it), answer comments — and, if you're really intense, provide detailed tips, tutorials and even patterns.

So given my limited free time lately as the mother of an 11-week-old boy and a 4-year-old girl I've been trying — and failing — to shorten my blog posts, limit the excessive amounts of detail and cut back on all the sketching and sewing planning and organizing of fabric and patterns I enjoy so much, but which rarely turns into actual sewing. And I'm giving myself permission to take really quick photographs in front of the only spot in my apartment which is vaguely clean and not worry that I can't crop out all the clutter.

I do think planning and sketching can help ensure a garment fits and flatters and actually gets worn ... but since I'm trying to break out of a sewing lull and seriously squeezed for time, it's probably better just to grab a pattern and fabric and just SEW.

(And yes, of course I realize it is possible to sew or knit without publicly documenting it... but at this point, it's almost a compulsion. Part of me just doesn't feel a project is truly complete until I've blogged it, Raveled it or Pattern Reviewed it... or at least Instagrammed it.)

So, anyway. I made a baby carrier out of a fuschia Mahogany brand tablecloth for the Small Human Being Sew-Along and it was ridiculously easy and satisfying. Start to finish the whole project took less than an hour for pressing, pinning and sewing, and that was INCLUDING watching the video tutorials and reading the instructions. It probably took less time than typing up this blog post.

DIY Fuschia Tablecloth Ring Sling

The details:

Pattern: Used the free "A simple un-padded sling" ring sling tutorial with gathered shoulder option from Jan Andrea's Sleeping Baby Productions baby crafts page — she has a huge wealth of free baby carrier sewing patterns, with great videos and essential tips on selecting safe and supportive fabric, weight-bearing rings and strong thread. I didn't bother with a pocket as I didn't have enough extra fabric.

Fabric: Half of a 90" x 60" Mahogany fuschia and yellow tablecloth (100% cotton jacquard). After washing, my piece was about 87" x 29", and the final sling measureds 75" (12" is taken up by the rings area).

It can be hard to find high-quality, supportive and pretty fabrics at a budget price for babywearing, but Mahogany cotton jacquard tablecloths have been road-tested extensively by many babywearers, come in many cool patterns and colorways, and are quite popular for DIY wraps as well.

Notions: Weight-tested size large silver aluminum rings from SlingRings.com, high-quality polyester thread (I used Mettler Metrosene, but Guttermann is also popular for sling-making).

Cost: About $25 for the tablecloth half and sling rings together. Which is pretty sweet as commercial ring slings often cost between $85-$200.

I split the other half of the tablecloth with Clio, so we're going to be babywearing twinsies.

DIY Fuschia Tablecloth Ring Sling

I cannot emphasize enough how much I ADORE this carrier. I've been wearing it all over the place for the last few days — even for outings of several hours. I love the bright pink color, I love how soft and supportive it is, and how "grippy" the fabric is (it really grips the rings and stays put once well-tightened). Baby D seems to love it too, as he falls asleep very quickly in it! And it is much more comfortable than it might look, as most of the weight is spread across the back, not the shoulder.

DIY Fuschia Tablecloth Ring Sling

I'll probably get more practical use out of this sling than anything I've sewn.

This shot probably best shows the actual color:

DIY Fuschia Tablecloth Ring Sling

Again, I'm trying to keep this post short, but the Sleeping Baby Productions instructions are great and easy to follow. Do read them carefully, though, especially in regard to fabric selection — you are going to be carrying a precious baby in that thing, so you want to make sure you select good fabric and sew it carefully and securely with strong thread (she recommends three parallel lines of stitching, spaced about 1/4" apart).

A word or two about safety:

Making your own carrier can be a quick sewing high, but please make sure you know how to use it SAFELY — that baby is high, tight, secure to your chest (tummy to tummy), breathing freely, and seated in a nice deep pocket. I took a little free babywearing class with professional educations when I had my daughter, and I've also been to some great babywearing meetups with volunteer educators who can (I've just joined my local NYC chapter of Babywearing International, and besides meetups and baby carrier education and troubleshooting they have an awesome baby carrier lending library!)

YouTube is also a great babywearing resource. Here are my two favorite ring sling troubleshooting videos by WrappingRachel: "How to Use a Ring Sling With a Newborn" and "Ring Sling Troubleshooting: Keeping the Rings at Corsage Level".

But don't be too intimidated — wearing your baby should be done carefully in a safe carrier, but once you get the hang of it, it's easy, fun and life-changing. Ring slings are great for sleepy little snuggly newborns who need to nurse a lot (you can nurse in the sling and use the tail as a cover), or tired toddlers who can only walk so far before they want up on your hip. And they don't need to cost a fortune, either — if you sew, you can make a sling.

I have one more pair of sling rings and I think I want to do a brightly-colored double-layer silk dupioni or shantung sling with a pocket (I own one and it is AMAZING, but the color is rather subdued). I think I need about 2.5" yards of 56"+ wide fabric... I've been eyeing this lime silk dupioni from Fabric.com...

... and I have a 20% off coupon, but it is only 54" wide, so that might be a bit narrow once folded and sewn into a double layer... I think I'll keep my eye out for bright-colored nubbly silk on sale.

Or maybe I'll just get another tablecloth!

DIY Fuschia Tablecloth Ring Sling

DIY Fuschia Tablecloth Ring Sling

**Disclosure: Actions you take from hyperlinks within this blog post may yield commissions for polkadotoverload.com (quite likely to be spent on yarn or fabric).

Friday, April 17, 2015

Done: A striped Jalie 2921 Scarf-Collar Top, hacked for nursing (SHB Sew-Along)

Baby only took catnaps today but somehow I finished my #jalie scarf top hacked for #SHBsewalong as a #nursingtop ...

"Rip!"

Is not the sound you want to hear when you have a project that is actually turning out awesome, and you are managing to sew in ten-minute baby catnap-sized chunks, and it is just SO close to done, and...

I had snagged this tissue-thin unstable rayon-lycra jersey on a broken plastic piece of my sewing table insert while hemming, opening up a hole right over the bust area. I was not about to scrap this thing, given how hard it had been to cut out (like slicing through water, argh!), so I repaired it with a little hand-stitching, and I hope no one is looking close enough to notice!

This breastfeeding hack of my beloved Jalie 2921 scarf-collar jersey top is my fourth piece for the Small Human Being Sew-Along this month with Cindy and Clio.

Jalie 2921 scarf-collar top--hacked for nursing

The inspiration: Specialty nursing tops aren't necessary for breastfeeding – but I love them anyway. Any top that can be pulled up or down or unbuttoned can work... but I like to be able to get baby his lunch quickly without a cover, and I don't want to show off my belly. So easy access is key, and tops that open right above or right under the bust fit the bill.

Recently, I acquired a few nursing tops in a great front overlap style by Boob Designs, and while I love the way they work, I foolishly bought light, solid-colored ones that developed breastmilk stains almost immediately. Here's how the Boob Nursingwear tops function (in a smarter colorway, too):

So I decided to make my own versions in distracting stain-hiding prints.

The basics:

Pattern: Jalie 2921 scarf-collar top (basically a knit version of a bow-neck blouse!), hacked with the So Zo nursing top tutorial. I'd previously made this fantastic top pattern (not hacked for nursing) in a floral and polka-dot version, both of which I wear, and get complimented on, constantly, so it is a real TNT.

Fabric: Slippery thin striped (rayon lycra?) jersey knit with good recovery that I got for free in a fabric swap. Horribly thin and unstable while cutting and sewing (I was swearing a LOT while cutting) so I can see why its former owner ditched it.

Size: Because I still seem to be shrinking slowly post-birth and this fabric is super stretchy, I decided to stick with my usual size even though my bust, waist and hips are all 3" bigger than last time I made this thing. Which is a size S (34" bust) overall, but a size V (37") for the bust and front sleeve armhole. My actual bust is 41.5" right now, so there's a lot of negative ease going on here.

Notions: 1/4" clear elastic for the bottom of the overlap and the top of the underlap. But I think next time I will use a heftier knit elastic, the clear stuff seems too flimsy to me for frequent nursing.

So it's maybe slightly TOO thin and clingy, but I think it will loosen up over time, and I personally rather a top be slightly too tight than too loose.

Jalie 2921 scarf-collar top--hacked for nursing

Instructions: Zoe's free tutorial was clear and thorough, and I found it easy to apply to this pattern I had already made several times. I did cheat a bit by just adding marks to my existing traced front pattern piece rather than creating new pattern pieces for the overlap and underlap, and it worked out fine.

Modifications: In her tutorial Zoe recommends the overlap ending 3/4 down the bust instead of under the bust, but I personally prefer the underbust line, so I moved it down. And the overlap front piece is split down the middle, but I made the underlap a single piece cut on the fold.

Construction notes: I made this all on the sewing machine with a zig-zag stitch, as I was visiting my mom and she doesn't have a serger. The fabric was so thin that it practically seemed to tear apart as I stitched, so I hope it holds up over time.

Side seam stripe matching win (nevermind the sleeves and shoulders):

Jalie 2921 scarf-collar top--hacked for nursing

How I found the time: I was visiting my parents when I cut and sewed most of this, and they held the little guy quite a bit while he was awake. I finished it when we returned to Brooklyn in very small chunks during baby's way-too-short naps.

Pretend nursing shot (baby was actually full, but you get the idea):

Jalie 2921 scarf-collar top--hacked for nursing

I've been trying to be more minimalist when going out with baby — no large bag, stroller, nursing cover, etc. So here I am about to pick up my daughter from Pre-K and take both kids to the playground... just wearing baby in a ring sling and carrying a diaper clutch with diapers, wipes, a change of clothes and my keys, ID and debit card. (My daughter wears her own small backpack with her Epi-Pens, water bottle and an allergy-friendly snack.):

Jalie 2921 scarf-collar top--hacked for nursing

Outfit details

Top: Made by Me
Leggings: Yummie Tummie by Heather Thomson compact shapewear leggings (scored on eBay for $3.50 due to a tiny flaw).
Diaper clutch: Skip Hop Pronto diaper changing clutch/station in a Jonathan Adler print, also scored on eBay.
Orange flats: Ahnu Karma ballet flats in Red Clay, bought on deep sale at Amazon. Ring sling: Sakura Bloom essential double-layered dupioni silk ring sling, can't remember the colorway as I bought it in 2010.

By the way, I do realize leggings are not actually trousers/pants/jeans. But since I don't have a single pair of non-maternity jeans that fit at the moment, I hope you'll forgive me. And these Yummie Tummie high-waisted tummy-control leggings are pretty amazing — thick and supportive and comfortable, and I immediately had people telling me "wow, you look great, getting in shape!" etc, even though my actual size and weight have not changed in over six weeks.

Oh, and I'll definitely make this top again, as this striped version was intended to be a wearable muslin. Next time in this chaotic Mood rayon lycra jersey, maybe in a sleeveless version: Amazing chaotic rayon/lycra print knit ...

**Disclosure: Actions you take from hyperlinks within this blog post may yield commissions for polkadotoverload.com (quite likely to be spent on yarn or fabric).

Monday, April 13, 2015

SHB Sew-Along: Bicycle-Print hoodie, pants & bib (Brindille & Twig Free Raglan Hoodie)

My first sewing project since D was born 9 weeks ago. Little dude doesn't mind it's two sizes too big. #SHBsewalong #brindilleandtwig #raglanhoodie #sewingforboys #bicycleprint

Somehow, despite having a 10-week-old and a four-year-old I actually SEWED something. Three somethings in fact!

So I am very glad that Cindy, Clio and I decided to do a little Small Human Being Sew-Along this month, as it has given me the extra kick I needed to push on through the sleep deprivation and squeeze in time at the sewing machine again. (Not that giving birth to and parenting a small human being isn't in itself creative, but I thrive on MAKING and SEWING and DRAWING and KNITTING).

This outfit isn't quite as geeky as say, Cindy's AMAZING Hobbit outfit for her baby boy, but it still makes me super happy. I am a sucker for baby hooded jackets and bicycles, not to mention bicycle-themed baby jackets. So: fun all around!

The hoodie:

The basics:

Pattern: The sweatshirt is the free raglan hoodie pattern from Brindille & Twig, a new-to-me pattern company with lots of great modern designs for baby and toddler knitwear (found via So Zo).

Fabric: About 2/3 of a yard of bicycle-print organic cotton interlock from Birch Fabrics ("Just For Fun Bike It Multi") purchased at my fantastic neighborhood sewing/knitting shop, Brooklyn General (but out of stock at the moment on Fabric.com), plus golden yellow rib-knit from Sew Baby and some thin gray soft cotton lycra knit from my mom's stash.

Size: I agonized over this, but since he already had two me-made hoodies in size 3-6 months, I went for the 9-12 month size. It's way too big, but totally wearable for my big two-month-old guy — and he'll grow into it.

Pattern thoughts: I love the style of the hoodie—something about the shaping, especially of the hood and neckline, just feels very clean and modern to me. And I'm a sucker for piping, even if mine came out a bit wobbly (flat knit piping always seems to stretch on me!) It was also fun to make a pull-over hoodie—no snaps or zippers required this time! The lined hood is a nice touch, and the ribbed cuffs and waistband mean NO HEMMING.

Bicycle print baby hoodie and pants

Instructions: The photo instructions were very clear and helpful, but I do have one small quibble — there weren't a lot of notches on the pattern for matching up pieces, so I added my own.

Modifications: I made the piping 1/8" wider than directed, as I was afraid it would disappear into the seam allowance, and I'm glad I did (So Zo also mentioned this was an issue).

Construction notes: I made this all on the sewing machine, as I was visiting my mom and she doesn't have a serger—I just used one of those stretchy fake overlock stitches on her Husqvarna Viking so any interior seams would look neat.

It didn't occur to me until I started cutting that this bicycle pattern behaves like a large, off-grain stripe. ARGH. But I didn't have enough of the fabric to match everything perfectly, and somehow I went wrong with my attempt to match the pocket to the front—not even CLOSE. I seem to have incorporated a fabric run in there as well:

Bicycle print baby hoodie and pants

Luckily, Baby D cares not a whit (especially since babies have little practical use for pockets):

Bicycle print baby hoodie and pants

Whatever, Mama!

How I found the time: I was visiting my parents and would sneak away to the sewing machine at night once baby was asleep in the portable crib. I even got some daytime cutting and sewing in while baby was sleeping in the swing (oh how I wish it fit in our apartment! lately he only naps in a carrier at our place) and big girl was drawing or playing with her grandparents.

Newborn is asleep, big girl is busy drawing. #timetosew

And a flat view:

Bicycle print baby hoodie and pants

Pressing really saved this project. I turned the presser foot pressure down to 2 and was careful in my sewing, but I still got a fair amount of stretching and waving ... all of which totally pressed out. (I am slowly learned to love the iron.)

For the little knit pants/trousers, I just traced a pattern from a pair of Baby Gap jersey knit pants in size 6-12 months (I had accidentally left my entire stash of Ottobre magazines in Brooklyn!) It's just one pattern piece, but it's not symmetrical—the back is lower than the front for diaper room.

Tracing a pair of knit baby pants to make a #sewing pattern but the perfectionist in me worries the curve will be off by a few millimeters and wishes I hadn't left all my baby patterns at home in Brooklyn. #SHBsewalong #sewingforbabies. I decided to go for cuffed legs for laziness/cuteness, and a doubled knit waistband with no elastic (the jersey has some lycra, so it's sort of a yoga pants effect, very comfortable).

I think the little dude likes them!

I traced the pattern for the matching pants from a Baby Gap pair, then added cuffs & a wide waistband so I wouldn't have to mess with hemming or elastic. #SHBsewalong #sewingforbabies

Again, too big: but he'll grow into them. Next time I may shorten the rise and deepen the waistband bit.

Tummy time view:

Bicycle print baby hoodie and pants

Oh, and the fabric was way too expensive and cute to waste the scraps, so I pieced together a little reversible appliquéd handkerchief bib from the scraps (I just traced a bib a friend sewed for him, but there are loads of free patterns online) with yellow snaps.

Reversible appliquéd bicycle-print handkerchief bib

Holding Daddy's hand

Reversible appliquéd bicycle-print handkerchief bib

No print matching effort by mama

My husband thought there should be four bicycles to represent the four of us, and I think he was right:

Reversible handkerchief bicycle bib flat view

So that's what I've finished so far. I'm also halfway through a (barely) wearable muslin nursing hack of the Jalie scarf-collar top, but I think I need to go pass out now before baby wakes up hungry again.

Also, a question: do my posts lately seem more disjointed/ungrammatical than usual? I can't help fighting this feeling that I am so tired I am not speaking/typing with any true coherence! So... sorry about that. If it is actually true. Or maybe not sorry?

P.S. Here are all of the official April 2015 SHB Sew-Along posts and inspiration so far:

  1. Cation Designs: Introducing the Small Human Being Sew-Along!
  2. B is for Baby, S is for Sew-Along!"
  3. The Small Human Being Sew-Along: Sewing Stuff for Babies and Parents. Join Us! (that's the post with the badges you can grab, by the way).
  4. Polka Dot Overload: Baby Girl Clothes
  5. Cation Designs: Baby Boy Clothes
  6. Clio & Phineas: Gender-Neutral Baby Clothes ("So You're Having a Gender-Neutral Baby")
  7. Cation Designs: Baby Accessories
  8. Clio & Phineas: Sewing for Moms & Dads (diaper bags, baby carriers and more)

LinkWithin

Related Posts Plugin for WordPress, Blogger...