Showing posts with label refashion. Show all posts

Saturday, December 6, 2014

Last-Minute Baby Sewing Binge (Before Being Stuck in Bed) — With Tools and Robots!

Last-Minute Baby Sewing & Knitting Binge

Up until last week, the only item I had actually finished for Baby Wood was a single pair of Better Than Booties baby socks (the green ones shown above, Raveled here). Then I looked through my stash of newborn and tiny baby items and completely panicked, because I have almost NO gender-neutral clothes for tiny babies (what if we have a boy?!), and very few warm winter clothes (Z was a summer baby).

I made a thrifting expedition and scored 15 cute little second-hand gender-neutral baby things for $26, but dressing baby in store-bought clothes isn't as SPECIAL or FUN as putting him/her in something me-made, now is it?

So I ramped up my baby knitting queue... and last Sunday, while the four-year-old was visiting her grandparents, I went on a bit of a mad sewing binge, tracing, cutting and sewing seven little itty bitty baby garments in one day--more than I've sewn in one day ever, and more than I've sewn for months total. AND all the fabric and patterns had been in my stash at least four years, or were secondhand, so—SCORE FOR STASHBUSTING and CUTTING UP OLD CLOTHES TO MAKE NEW ONES.

Mainly, I wanted to make some cute, snuggly, special baby outfits for the new one to wear home from the birthing center.

Orange & Blue Baby Set in Progress

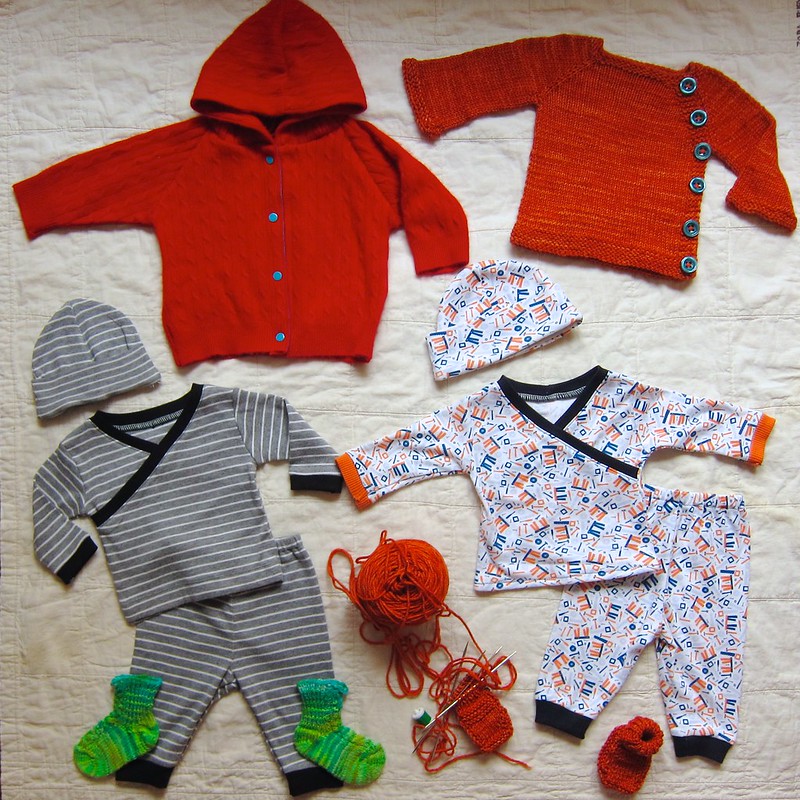
Set #1: Orange overload: A little cotton kimono knit top with contrast ribbed bands and cuffs in an orange tool-themed print with matching pants and hat, plus an orange merino wool side-buttoning cardigan and little wool booties (in progress).
  • The kimono top and pants are from the wonderful New Conceptions Baby Essentials layette sewing pattern set. Kimono tops are great for pulling over big wobbly newborn heads, and I love that the sleeves and pants are finished with cuffs instead of hems—I highly recommend this easy and versatile pattern. The main fabric is a soft cotton interlock with a tool pattern I bought ages ago from the Fabric Fairy, and the navy and orange ribbing were from a Sew Baby ribbing color assortment. I made the newborn size, and sewed everything but the top hem and the pants waistband on the serger.
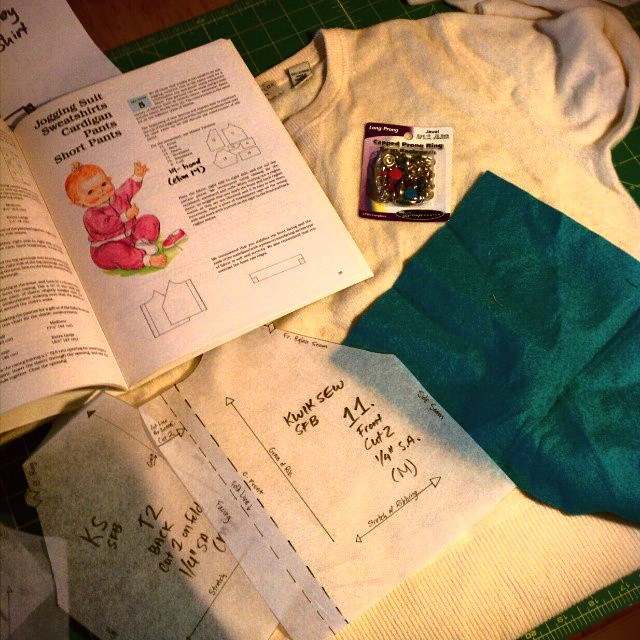
  • The super-simple hat pattern is part of Kwik Sew 2433, another great knit baby clothes layette pattern for rompers, jumpsuits, hats and booties.
  • The side-buttoning cardigan is the Beyond Puerperium cardigan pattern, a fun and simple raglan sweater (the newborn-size Puerperium is free, but I bought the version with more size and yarn weight options). The yarn is Malabrigo Rios in the color "Glazed Carrot", a soft, washable, squishy worsted-weight merino yarn. (Cardigan raveled here with full details).
  • The in-progress booties are knit from the free Gansey Booties pattern in the same yarn, and I have an earflap hat in progress (the free Aviatrix hat pattern) as well to finish off the ball.

I just love the tool pattern on this fabric—perfect for a little girl or boy from a family of makers, crafters and builders!
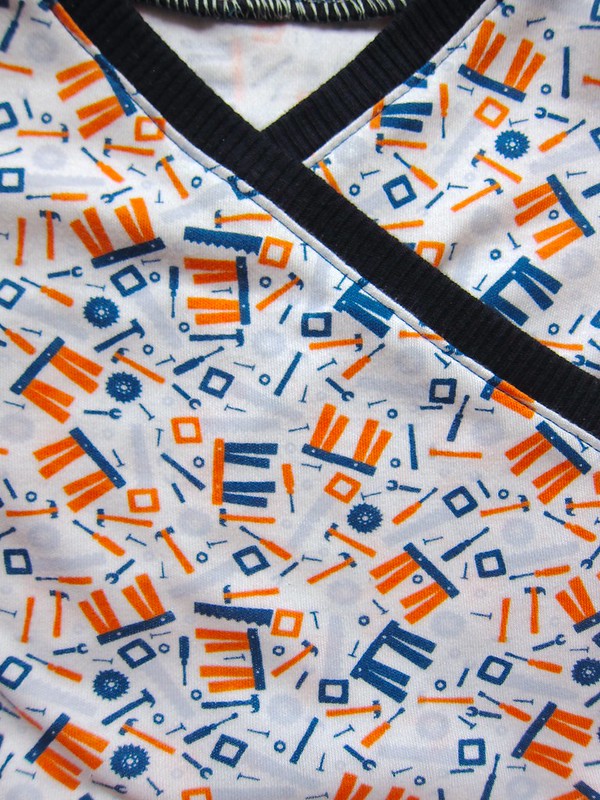
Tool fabric closeup

And aren't these buttons pretty? I do not want to talk about how much they cost, but I got them at La Casita Yarn Shop Café, an awesome local Brooklyn yarn store:
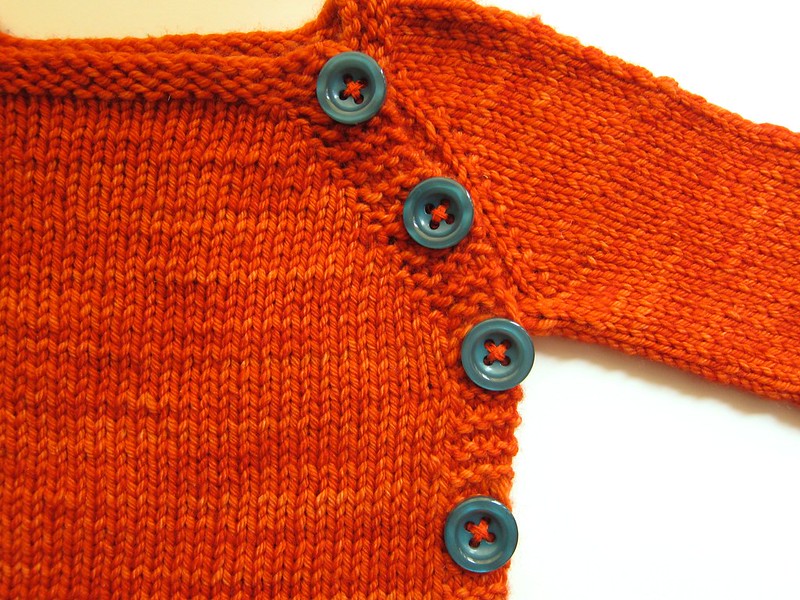
Pumpkin Beyond Puerperium Baby Cardigan

Next up:

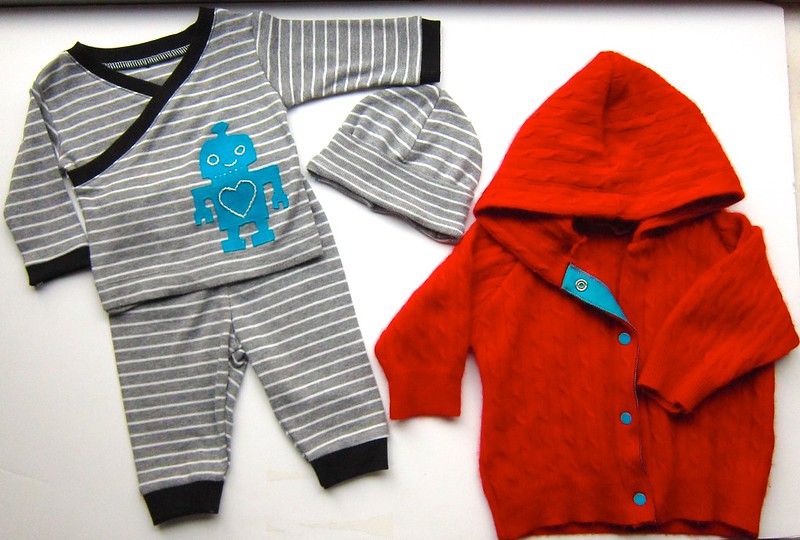
Baby kimono top set with blue robot appliqué and red cashmere baby hoodie

Set #2: Gray and red and blue with a robot: Another knit baby set, plus a red cabled cashmere cardigan hoodie.
  • The kimono top and pants and hat are from the same patterns as set #1. The main fabric is a super-soft cotton/rayon rib knit I cut out of a top from a giant bag of second-hand maternity clothes I bought for a song from a local mom (I have plenty of things to wear for the next 6-8 weeks, don't worry). Immediately after it was done I decided it was too boring and needed an appliqué—my husband suggested a robot would be just the thing, and I think he was right.
  • The red cashmere cardigan hoodie is my TNT baby hoodie from Kwik Sew's Sewing For Baby—this is my fourth version. I cut it from a super-soft designer thrift-store sweater that had some stains and snags. The best part was I didn't have to attach any sleeve cuffs or bottom waistband—I just cut the pattern to include the original ribbing. I stabilized the front facings with bright turquoise petersham ribbon from Pacific Trimming and applied blue snaps from Sew Baby. I was going to put an appliqué on this piece too, but decided it didn't really need one.

Don't you love a pretty piece of petersham or grosgrain in a sweater? (And no, I haven't finished applying the inside snaps yet).
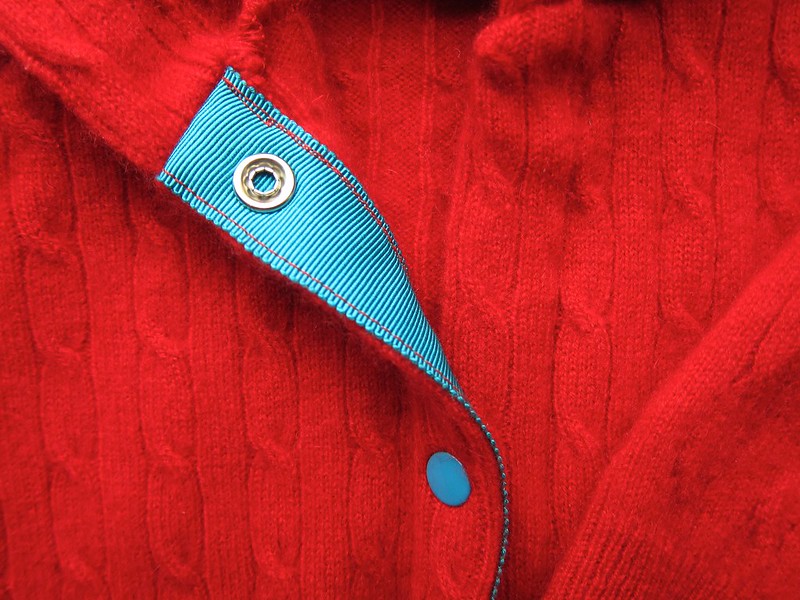
Red baby cashmere hoodie cardigan closeup

Here was the original sweater... there is something SO satisfying about cutting up ruined garments to make pretty new ones, isn't there? Not to mention that cashmere knits can cost $60-$175 a yard if you can even FIND them or that new cashmere baby sweaters run $100-$300... whereas this one came to less than $5 in materials:
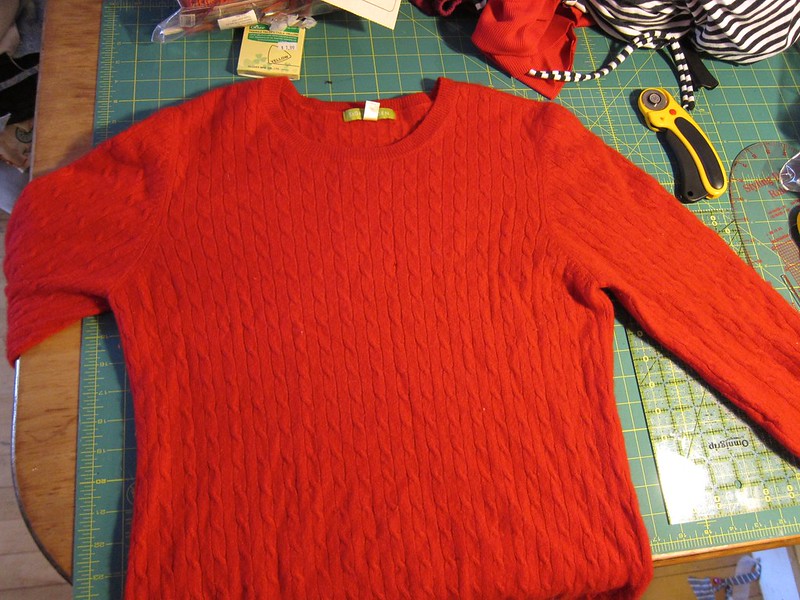
Old sweater I cut up to make a new cashmere baby hoodie

Here's the robot appliqué in progress—it's just a scrap of bright turqoise ponté, applied with fusible webbing, then stitched down around the edges by machine:
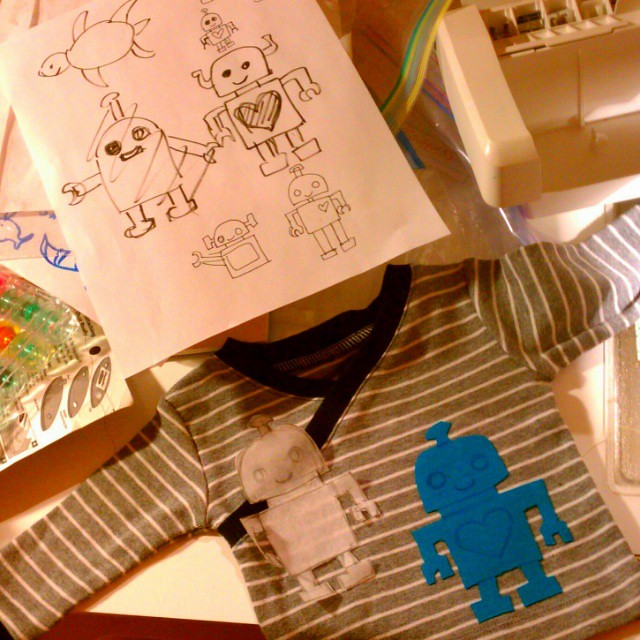
Sewed a newborn kimono top set, then decided it was too boring and needed an appliqué robot with embroidered face. I kind of want to appliqué everything at the moment. #sewingforbabies #sewing

The eyes and heart I embroidered by hand. Which is something I'm really into lately:
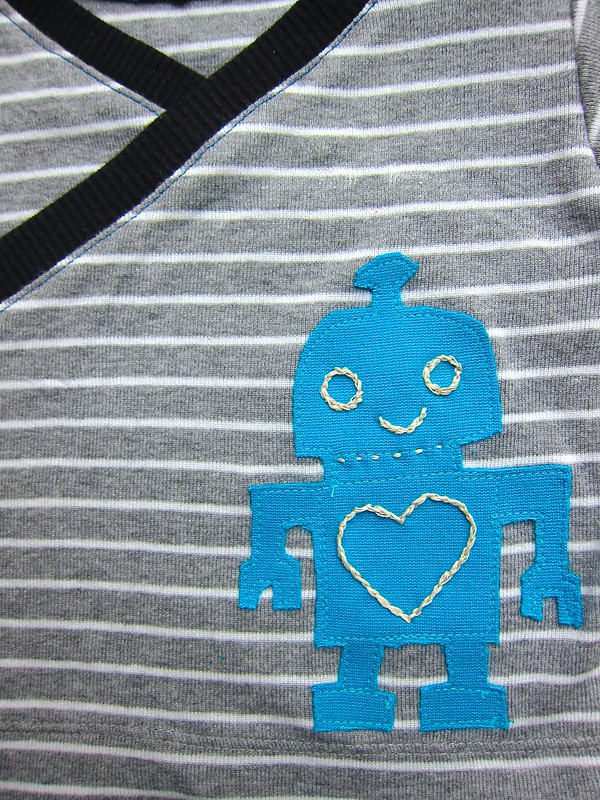
Blue robot knit appliqué closeup

And that's good, because yesterday my midwife ordered me onto scheduling resting (basically part-time bedrest) due to some severe swelling in my legs and feet and other assorted reasons. I need to spend half my days in bed lying on my left side, and minimize time standing/sitting. So... I sense a lot of embroidery and knitting in the next weeks, and not so much the sewing machine.

Anyone else been through this? The thought of lying down so much is driving me crazy... I'm a doer and a maker and I've got a demanding full-time job to do and a four-year-old to chase around! And my apartment is so NOT baby-ready, and I know I'll be too exhausted once baby actually arrives to do much of anything but nurse and sleep (when I can).

Bonus photo: my four-year-old came with me to the yarn store to buy the buttons for the orange cardigan, and she insisted we had to make a list first to remember we needed 6 buttons:

Tuesday, November 25, 2014

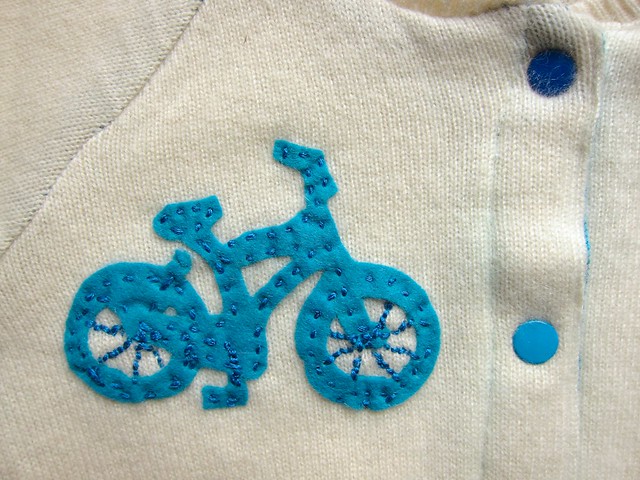
Done: Bicycle appliqué cashmere cardigan with matching hat refashion

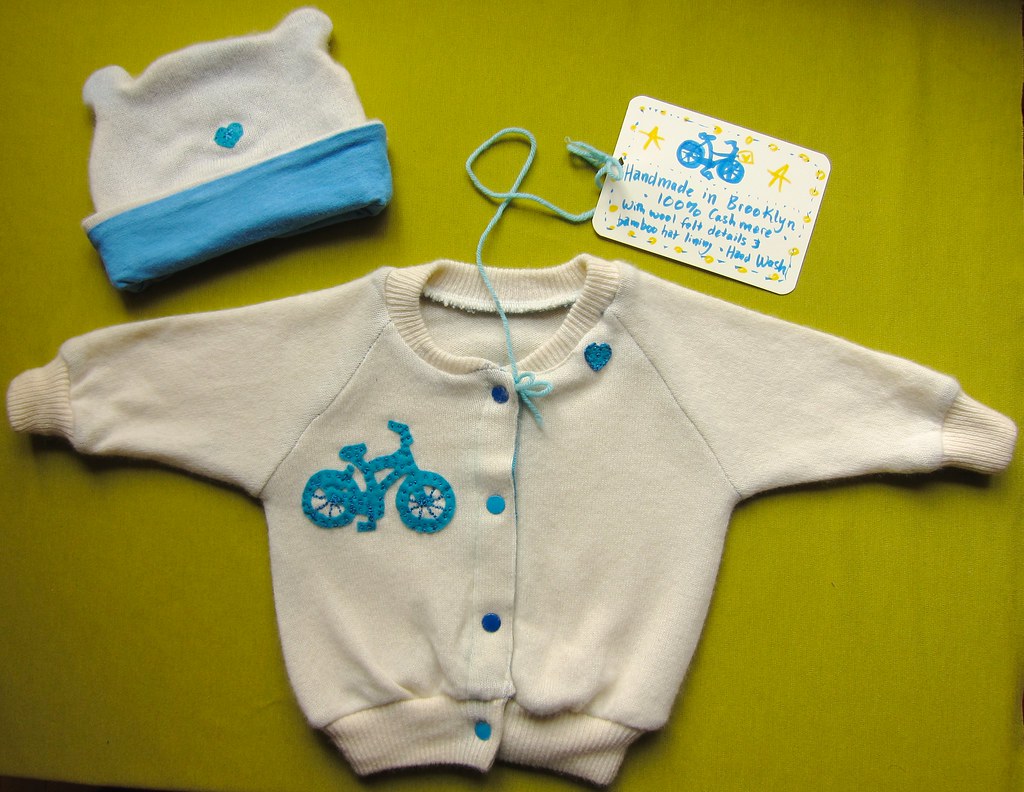
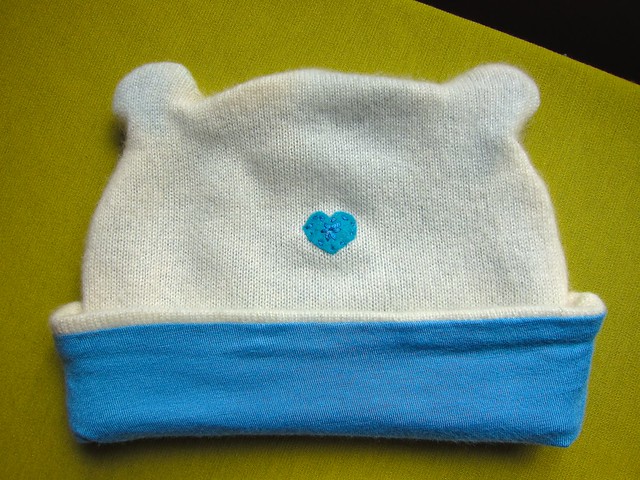
Cashmere Baby Cardigan with Bike Appliqué and Matching Hat

Four years ago I picked up two lovely, soft — and totally shapeless — cashmere cardigans at a thrift store for a few dollars each, with the vague dream of refashioning/upcycling them into warm and snuggly baby leggings for my then-tiny daughter.

Those snuggly leggings never came to be... but I thought a cashmere cardigan and matching hat would make a perfect baby gift for a bicycle-loving knitterly (i.e. unafraid of handwashing) friend of mine who had her baby girl last week, and so here we are:

Cashmere Baby Cardigan with Bike Appliqué and Matching Hat

The basics

Patterns:

Fabric: A cut-up thrifted Lord and Taylor two-ply cashmere pullover sweater, plus some scraps of blue bamboo knit and some turquoise wool felt for the appliqué. Much better than buying actual cashmere yardage, since I could repurpose the ribbing as well.

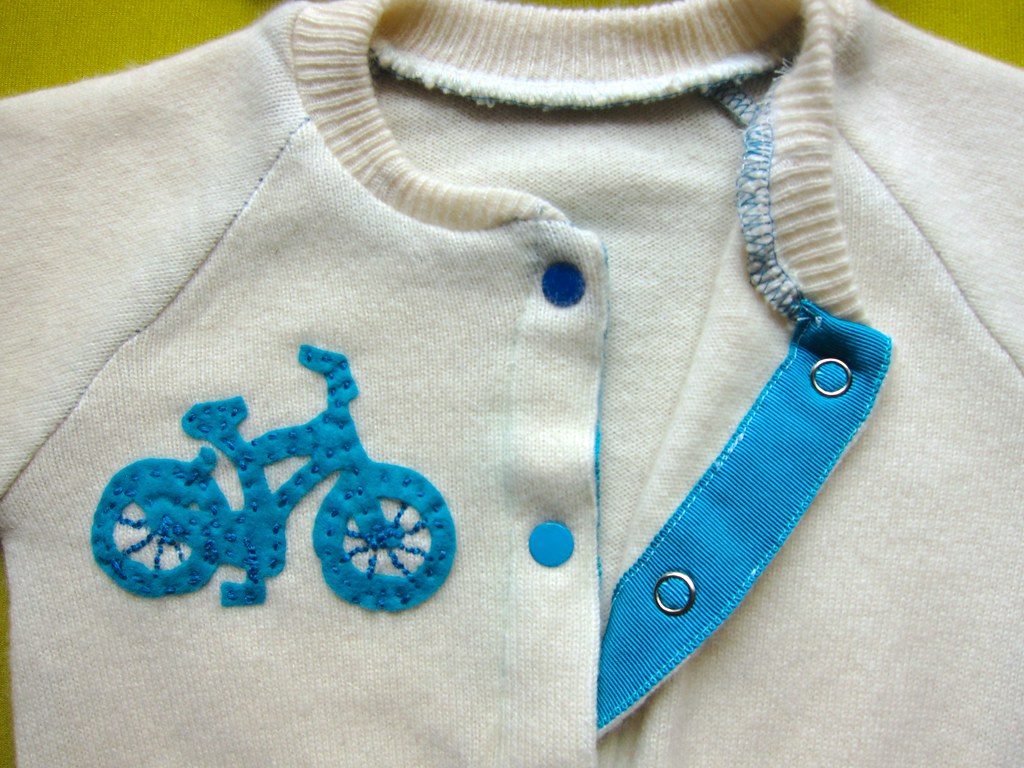
Notions: Embroidery floss, fusible webbing (part of my dwindling Lite Steam-a-Seam 2 packet), colorful snaps from Sew Baby, petersham ribbon from Pacific Trimming.
Size: Medium (3-6 months) for the sweater, and I just eyeballed the hat size to match.

Here's what the adult sweater looked like before I cut into it:

First #sewcation project: appliquéd cashmere baby jackets from repurposed adult-size sweaters. #sewingforbabies #sewing

Inspiration: I knew the gift had to be bicycle-themed, because my friend and her husband are the kind of people who manage to squeeze five bikes into their 1-bedroom Brooklyn apartment. (All of which they ride, frequently). I cut my appliqué design out freehand based on this cute little T-shirt from Mini Boden:

Modifications: No modifications, but I'm embarrassed at how much unpicking was involved in both of these items—somehow I managed to attach the collar wrong twice, and the ribbed hem too.
Construction notes: The cardigan is simple, if you actually pay close attention to the instructions, which I apparently did not. SO. MUCH. UNPICKING. OF. SERGER. THREADS. I did 90 percent of this project on the serger, reasoning that would keep the fine-knit cashmere from unraveling better than the machine.
The embroidery bit was super fun—I fused the little wool felt shapes to the cardigan with fusible webbing, then just played around with some back stitches and running stitches.

Cashmere Baby Cardigan with Bike Appliqué and Matching Hat

I initially put a bike wheel on the hat, but it looked odd and I replaced it with a heart:
Cashmere Baby Cardigan with Bike Appliqué and Matching Hat

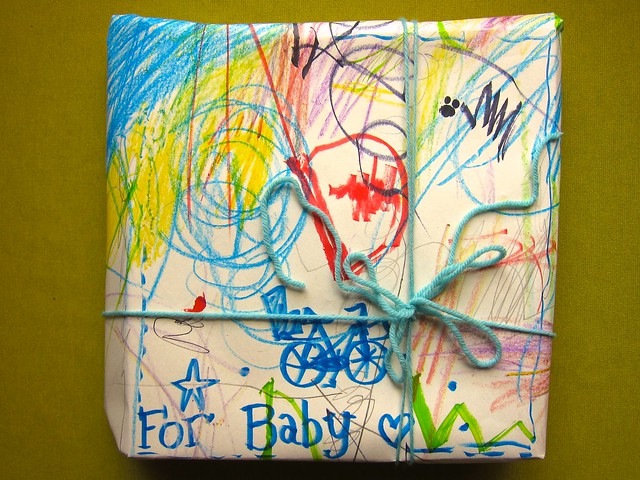
Finally, I wrapped the wee soft things in some of my daughter's extra artwork (with her permission), and tied them with a bit of leftover yarn—so much more fun than commercial wrapping paper and ribbon, am I right?

Cashmere Baby Cardigan with Bike Appliqué and Matching Hat

Hmmm... I kinda want to make a matching set for my baby-to-be now with the remaining cardigan, a nice red cabled knit — they could wear them when they play together.

P.S. I am happy to report that my daughter's scheme for a handmade mermaid fairy superhero doll with a big curly purple Afro is well underway—we designed the pattern together and she's mostly sewn and stuffed—all she needs now are a few finishing details. More to come soon!

Monday, May 13, 2013

Second Verse, Same as the First (Me Made Week 2)

Me Made May 10: Polka Dot Ombré Overload

The good me-made news is that although I pledged to wear at least one me-made four times per week, I've actually been rocking the me-made lifestyle EVERY SINGLE DAY and managing to squeeze in a photo to boot.

The bad news is my photo poses are all boring and almost all in front of the same backdrop, and I barely have anything new to show you, but, yeah, whatever. So here we go!

Day 5: Warm Wooly Accessories

Me Made May 5: Ready to Cheer my Husband at the 5 Boro Bike Tour

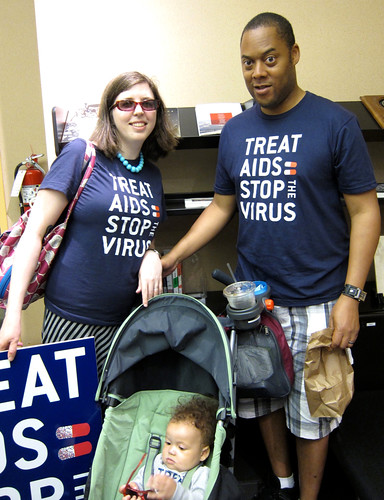
My husband was riding in the TD 5 Boro Bike Tour for Doctors Without Borders, so this outfit was all about this Doctors Without Borders T-shirt from an AIDS activism rally a few years ago. Since I was running out of me-made garments and it was super-chilly, I decided to stick to just accessories. Little Z had her Daddy's matching T-shirt and a me-made sweater.

    Me-Mades (FOUR of them!):
  1. Matching alpaca hat and cowl set: 18 Seconds Until Sunrise cabled earflap hat and Cherry Garcia cabled cowl.
  2. Waving lace socks again.
  3. Fetching mitts.
  4. My daughter's striped Toddler Tomten Jacket.
    Other:
  1. Doctors Without Borders "TREAT AIDS = STOP THE VIRUS" T-shirt.
  2. Not Your Daughter's Jeans Marilyn Straight Leg stretch jeans with natural waist (made in USA).
  3. Arcopedico Flower leather Mary Jane cut-out flats in black.
  4. Sprout eco-friendly purple watch made of Tyvek and corn plastic.

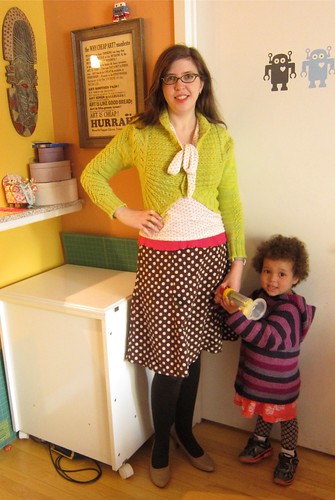
Day 6: Polka Dot Overload

Me Made May 6: Polka Dot Overload

I did mention I liked polka dots, right? And in case you're wondering what that odd yellow object is, it's the spacer for my daughter's daily steroid asthma inhaler.

One plus to Me-Made-May is that in order to look fancy for you all I'm wearing my heels much more often than usual... Otherwise I tend to fall into a rut and just wear the same comfy flats every day until they scuff away to nothingness.

    Me-Mades (FOUR again!):
  1. Jalie Scarf-Collar top the 2nd.
  2. Georgina cardigan in chartreuse.
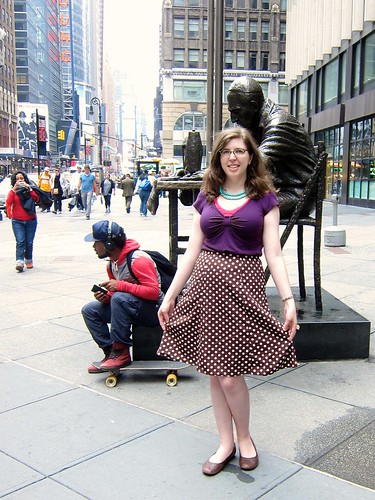
  3. Brown and cream polka dot A-line skirt in cheap $2/yard poly fabric with petersham waist facing, made in 2005 pre-blog days and rather on the small side.
  4. Striped Toddler Tomten Jacket made for my daughter.
    Other:
  1. Spanx reversible tights, the brown side. (Best opaque tights ever, seriously!)
  2. Tsubo taupe leather comfy pumps with sturdy heel (similar and similarish).
  3. Sprout eco-friendly purple watch made of Tyvek and corn plastic.
  4. Pink silk rib knit lace-edge cami

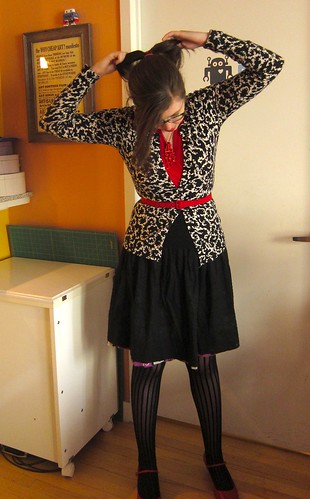
Day 7: Black, White and Red All Over

Me Made May 7: Black, White & Red All Over

The OTHER side of my reversible skirt from last week.

    Me-Mades (just one):
  1. Self-drafted reversible shirred skirt, the black swiss dot lawn side (originally a maternity skirt!)
    Other:
  1. Red coral necklace bought at Renegade Craft Fair, but can't remember the maker
  2. Red silk rib-knit surplice top, thrifted
  3. Black & white printed cardigan
  4. Red belt from Stop Staring dress not currently fitting me
  5. Fishnet-esque tights
  6. Camper Kim Mary Janes in sturdy red leather.

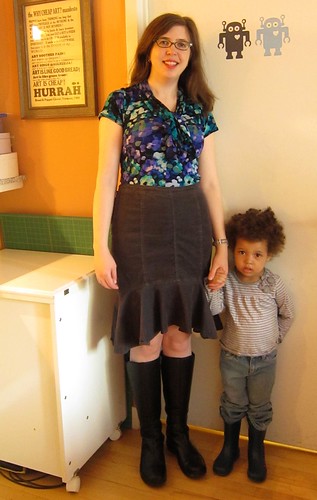
Day 8: Rainy Day Outfit

I swear little Z isn't actually grumpy here, she was saying "soy cheese!"

Me Made May 8: Rainy Day Outfit

I think this might be my favorite outfit of the week (with the possibly exception of the dress from Day 10).

    Me-Mades (just one again):
  1. Jalie 2921 scarf-collar floral poly knit top.
    Other:
  1. Merrell "Angelic Peak" black leather near-knee-high flat boots (waterproof). The only flat knee-highish boots I've owned since 2009 and still going strong!
  2. Gray corduroy gored skirt with mermaid flounce, gift from my mom. I SO want to make my own version in every possible fabric...

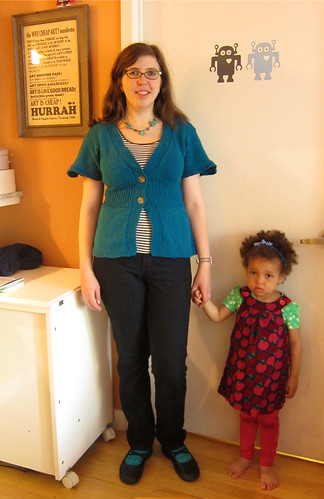
Day 9: Cardigan Refashion

Me Made May 9: Cardigan Refashion!

My first refashion for Me Made May!

    Me-Mades (three):
  1. Flutter-Sleeve Cardigan with a major refashion (tutorial and details here).
  2. Waving Lace socks.
  3. On my daughter: "A is for Apple" dress, now barely wearable and more of a little short tunic.
    Other:
  1. Turquoise necklace, made by my dear friend Márta as a birthday gift
  2. Striped knit T-shirt
  3. Not Your Daughter's Jeans Marilyn Straight Leg stretch jeans with natural waist (made in USA).
  4. Arcopedico Flower leather Mary Jane cut-out flats in black.

Day 10: The Ombré Dress

Me Made May 10: Polka Dot Ombré Overload

I know you're sick of this dress, but until my Tiramisu one is complete, it's all I've got.

    Me-Mades (one):
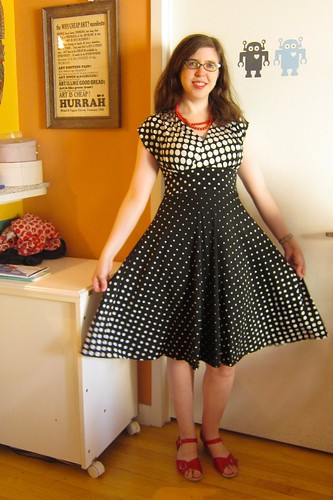
  1. Polka dot ombré surplice knit dress (McCall's 6070 top, self-drafted half circle skirt bottom).
    Other:
  1. Second Base Brittany demi lace cami (made in USA).
  2. Red beaded necklace, a gift from my mom
  3. Worishofer Women's 711 Ankle-Strap Red Sandals (aka "granny sandals")

Day 11: Driven to Fabric Shopping Desperation

Me Made May 11: Scraping the Bottom

Why yes, this is a poorly-made maternity top from back in 2010, tucked in so you can't see how long/low it hangs in front. BUT at least I managed to get outside for a photo for once—I had just finished with a little printed-knit-seeking shopping excursion to Mood Fabrics with Lee.

    Me-Mades (two):
  1. Burda Magazina 02-2010-122 knit top, maternity-hacked by me
  2. Brown and cream polka dot a-line skirt in cheap $2/yard poly fabric with a petersham waist facing... etc. Circa 2005. Never blogged.
    Other:
  1. Pink silk rib knit lace-edge cami
  2. Privo by Clarks brown leather flats with sneaker-esque bottom (similarish)

So, if you even made it to the bottom of this post, which outfit do you like best?

**Disclosure: Actions you take from the ready-to-wear hyperlinks within this blog post may yield commissions for polkadotoverload.com (and quite likely spent on yarn or fabric).

Thursday, May 9, 2013

Sweater Surgery Success (Or How To Tighten Up a Baggy Sweater... With Your Sewing Machine!)

Sewing Machine Sweater Surgery Tutorial: Before and After

I cut into my sweater with a big scary set of shears... and it lived to be worn again!

Few things are as terrifying for a knitter of delicate constitution as approaching a painstakingly handknit sweater with a sewing machine and a sharp pair of scissors. That delicate garment into which you've poured your knitting heart and soul—building it gently stitch by stitch over weeks, months, maybe years—could all unravel in a matter of moments if you muck it up.

Many knitters would rather frog the entire thing themselves and reknit it at a smaller size.

I am not one of those knitters.

Instead, I am here to tell you that Baggy Sweater Repair Surgery (BSRS) CAN be done—and to encourage you to make an attempt at refashioning before tossing your too-big knit (or using it for a car cozy).

DISCLAIMER: Polka Dot Overload is not in any way responsible for any sweater runs, tears, ravels or other yarn injuries, minor or major, that may result from the application of scissors or sewing machines to handknit garments.

Yes, I came. I saw. I altered a hand-knit sweater... by MACHINE (I'm serious, you can do that—Eunny Jang says so!). And here's how I did it:

Supplies & equipment used:

  • Unwearably baggy hand-knit sweater.
  • Sewing machine with zig-zag stitch function
  • Ballpoint needles for machine sewing
  • Thread to match sweater color
  • Thread in a contrast color for basting
  • Darning needle for hand basting
  • Sharp shears (I use these)
  • Pins

Step 1: Assess the Magnitude of the Problem. This is a somewhat risky surgical procedure, so I wouldn't necessarily advise performing it on a frequently worn sweater that is ALMOST perfect. It's probably best reserved for the most critical of unworn sweater cases.

Now I originally knit my Flutter Sleeve Cardigan to the correct gauge in a size 36" bust (that's 2.5" of negative ease). However, because the yarn was a cotton-silk blend, it bagged and stretched over time, so it was even a bit too big back when I was pregnant:

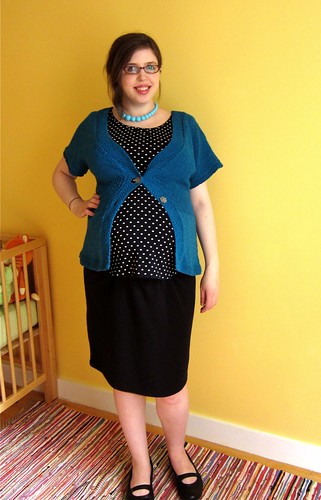
Teal Flutter-Sleeve Cardigan remix (37 weeks pregnant)

Which means I haven't worn it in THREE YEARS. An ideal candidate! (Plus I needed it for Me-Made-May.)

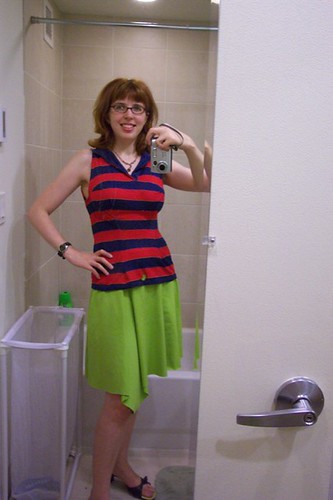
Step 2: Pin Out the Excess Ease. I tried my sweater on, and determined that the biggest issue was in the length over the bust—it had stretched out there by about five inches. I put the sweater on inside out, and carefully pinned out the excess ease over my shoulders while looking in the mirror:

IMG_2294

I determined that I needed to take out about 5" total of length (seriously!) vertically, about 3" from the front shoulder and 2" from the back. I tapered this out to 0" at the end of my sleeves.

Note that some baggy, stretched-out sweaters may also warrant taking in at the sides (at the side seams if they exist, or by creating side seams if they don't). And baggy sweaters with set-in sleeves might even require removing the sleeves and sewing them back on—but be sure to secure with a few careful rounds of zig-zagging near any areas you plan to cut (zig-zag set to 0.5 mm width, 1.5 - 2 mm length).

Step 3: Even Out Your Alterations. I laid my sweater down flat and carefully adjusted the pins on each side for symmetry:

IMG_2295

Step 4: Baste and Check Fit. There's really no going back once you sew into a handknit with a machine, so I wanted to make sure I was doing it right. Using white thread for contrast and a darning needle, I sewed a loose running stitch along the pin line, removed the pins and tried the sweater on again to be sure it fit (which it did!) At this point I also used my darning needle to close up the button holes quite a bit—they had stretched out so much the buttons were just falling out.

Step 5. Take a Deep Breath and Machine Sew it. VERY CAREFULLY. I sat down at my machine and very cautiously sewed a line of zig-zagging (0.5 mm zig-zag, with a 1.5 — 2 mm stitch length as recommended for sweater knits in my trusty copy of Sew Any Fabric) right next to my line of hand-basting stitches. Then I sewed a second line just for extra security. I made sure my stitches were well fixed at each edge, because even one unzig-zagged knit stitch could start a dropped stitch unraveling chain reaction of DOOM.

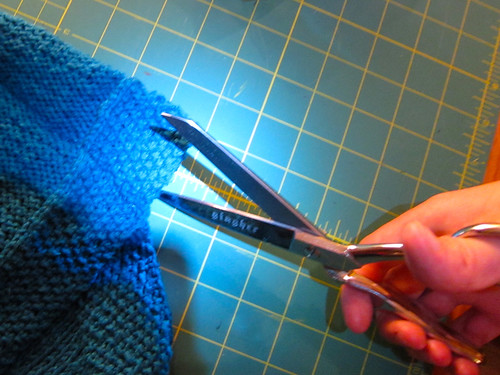
Step 6. Take an even DEEPER Breath and Cut Away the Excess. This part was hard. I kept checking and rechecking to make sure I wasn't cutting too close to the new seamline... EEEK:

IMG_2296

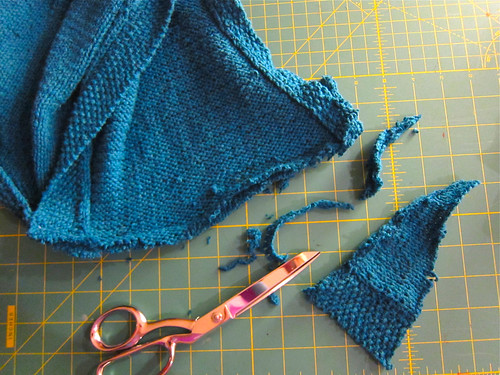
And then moments later, it was all over:

IMG_2298

I'm happy to report the sweater patient is recovering well and is quite wearable now, though still a bit less snug than I prefer. (And I'm still recovering quite well from my own actual surgery, as you can probably guess from the steep increase in activity on this blog).

Me Made May 9: Cardigan Refashion!

I told you I was a RECKLESS sewist!

So tell me: would you ever sew and cut up a handknit — or would you rather reknit it from scratch?

Wednesday, June 6, 2012

A Shirring Fail + a Draping Attempt (T-shirt wedding dress progress)

So I finally started Monday night on that T-shirt wedding dress costume project for work--the skit is this weekend, but I have to have it ready for a fitting on Thursday. The above is my attempt at "draping"--it's just a bunch of XL size shirts cut up and pinned together on my dress form (which has now been adjusted to approximate the woman who will be wearing it). I'm digging the wide straps and the plunging wrap / sweetheart / surplice neckline.

My original plan was to fit the bodice with shirring:

But as I should have remembered from the great elastic shirring debacle of 2010, my sewing machine REFUSES to shir with elastic thread in the bobbin. Unfortunately, this T-shirt fabric is so thick and rough, it wouldn't even shir via the zig-zag method (sewing with a zig-zag over the stretched elastic thread).

So I sewed the skirt together from two of the shirts with an elastic waistband instead. The bustle or flare or train or flounce thingie is just part of those two shirts left on. I was disappointed that the logos on the shirts are so small, so I may (if I find the time) apply larger ones with T-shirt transfers or just fabric paint.

It was such a relief to actually get back at the sewing machine. I'm a bit stressed out by the deadline, but my husband (who helpfully cut up all the T-shirts for me) keeps reminding me that this thing only has to look OK from 20 feet away from the stage, and that it is supposed to look rugged/thrown together.

It is pretty freeing to be going pattern free and just randomly cutting, draping and sewing. I am the sort of person who usually spends hours carefully aligning and smoothing and pinning and cutting my fabric perfectly on grain and making sure I cut the pattern out precisely without slicing off any tissue and... no wonder I barely sew one garment per month.

I do hope that somehow I will also find the time to sew something normal for myself to wear in time for the Brooklyn BurdaStyle Sewing Club meetup Sunday, but if not, I suppose I could bring this.

So: do you ever go pattern-free and just wing it? What have your results been like?

P.S. Tonight, June 6, at midnight EST is the deadline to enter my vintage sewing pattern illustration giveaway! Thanks to all of you for the awesome entries so far!

P.P.S. My daughter's comment looking at the dress in progress on the mannequin: "Oh a dress! Pretty! Boobies!" Toddler wisdom at its finest.

Monday, May 14, 2012

Adjustable Wedding Dress for a Mystery Bride (with a Mosquito Net Veil)!

The challenge:

  • Design and sew a wedding dress...
  • In less than three weeks.
  • For a bride you've never met and can't measure or get measurements from. So: ADJUSTABLE.
  • With little to less money (i.e. what you can scrounge up around the office). CHEAP CHEAP BEYOND CHEAP.
  • In your spare time between working, parenting, and having a life and trying to finish a bunch of freelance illustration projects.
  • Also: Make it funny to humanitarian aid workers.

I've mentioned before that I have an awesome job, working in marketing for the emergency medical relief organization Doctors Without Borders/Médecins Sans Frontières (MSF). It's generally very serious humanitarian business, but once a year at the afterparty for our annual general assembly, some of us put on a little skit with sketches, music, dancing and costumes.

And this year, part of our skit involves a wedding—and somehow, I found myself volunteering to make the dress. Even though we're not quite sure who will be playing the bride, so I somehow have to design it to fit ANYONE. (I'm also supposed to come up with some kind of over-the-top bridesmaid outfit for myself, which I'm still puzzling over).

Funnily enough, I just checked out a copy of Susan Khalje's Bridal Couture from the library (via inter-library loan, after a LONG wait--it was NOT easy to come by):

I actually used to own a copy back in the days before it went out-of-print... but after I realized I didn't actually have the chops to make my own wedding dress, I up and sold it. Which I am so kicking myself for now, since it seems to go for like, $300 used (even though you can buy as a CD book now).

But somehow I doubt I'll be using any of those fancy techniques. Instead I'm planning to make a T-shirt wedding dress out of some extra MSF T-shirts from around the office. I actually have a pattern for one, the Tying the Knot dress from Megan Nicolay's Generation T: 108 Ways to Transform a T-shirt...

...But I think I'll go even simpler here. The bodice will just be a tube with tons of elastic shirring and a gather to make the sweetheart neckline, and the skirt will be a separate tube of T-shirts, with a flounce in back and a red ribbon sash (and maybe an elastic?) to gather the waist. I won't bother with hemming. EASY, right?

The accessories are obvious: a "mosquito net" veil, elegant yellowish surgical gloves, a stethoscope "necklace." Haven't figured out the bouquet yet--I might just make it out of paper flowers, or maybe surgical masks?

Let's hope so, because I want to get on those Jalie jeans... and I have the Cambie dress coming in the mail... I am such a bad pattern-buying-past-capacity-for-pattern-sewing girl.

I used to be really into T-shirt refashioning, though it doesn't appeal so much these days--I'd take oversized old punk rock and thrift store Ts and turn them into darted, fitted tops... here I am in 2004 with one such:

Deconstructed polo shirt

I even once hosted a T-shirt refashioning party using the Nicolay book and it was a lot of fun, though my T-shirt transformation didn't turn out wearable (tip: use super-soft thin old T-shirts, not thick unyielding scratchy thick T-shirts).

So: do you fancy T-shirt refashioning? Have you ever made a T-shirt dress? Conversely, are you so super-fancy you actually made your own lovely wedding dress (NOT from T-shirts)?

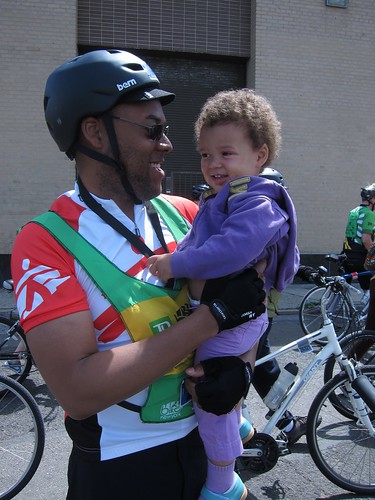
P.S. Bonus photos: Masheka rode in the 42-mile TD 5 Boro Bike Tour on May 6, raising $1,370 for MSF in the process. Here's little Ms. Z hugging her daddy halfway through the ride:

Z cheers her daddy on--Partway through the 5 Boro Bike Tour, Masheka stops for a goodluck hug from Z.

And here's a photo of us from last year heading out to an AIDS rally with the MSF office. We were protesting in support of scaling up access to AIDS medications for people living with HIV worldwide. I made Z a matching onesie with an iron-on T-shirt transfer.

Mikhaela, Masheka and Zora on our way to an AIDS rally with Doctors Without Borders in June 2011.

Wednesday, August 25, 2010

Polka Dot Pinafore

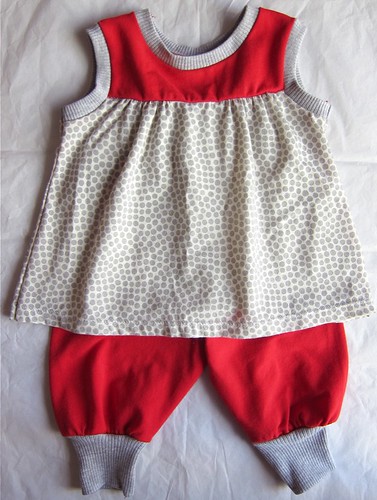
Red and gray polkadot baby ensemble

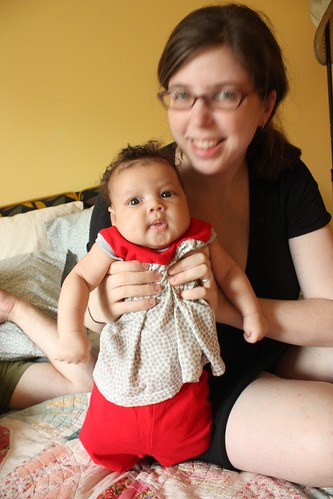
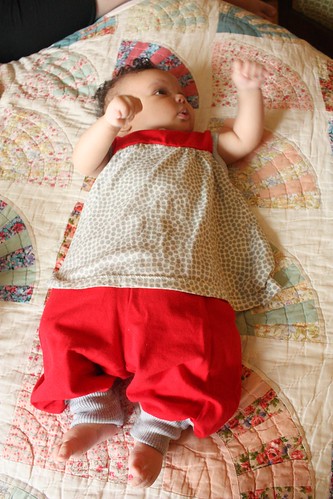
Another baby ensemble sewn during my pregnancy finally gets a model--the Ottobre magazine January 2010 pinafore and pants combo I refashioned from an old shirt of my mother's (see my original blog post and Pattern Review review for full pattern details). Here's the flat photo...

Red and gray polkadot baby ensemble

More shots, including one with her Zadie (aka grandfather, aka my dad):

Red and gray polkadot baby ensemble

Red and gray polkadot baby ensemble

Red and gray polkadot baby ensemble

I made the 62 cm size, and it's still a bit big, hence the Hammer pants effect Masheka pointed out to me. But still--super cute, right?

Sunday, August 8, 2010

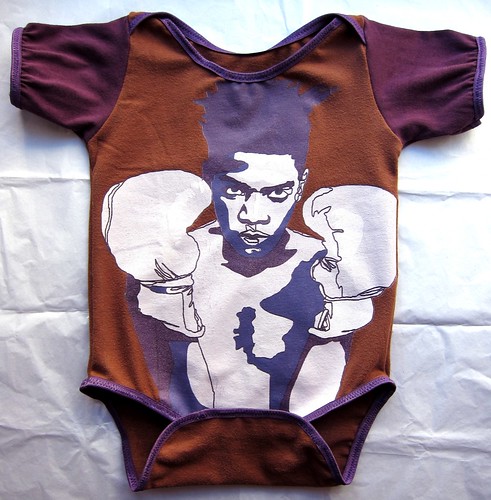
The Boxing Basquiat Onesie Gets a Model

Boxing Basquiat Baby Onesie

It's still a little big on her, but it's the first time she's worn something sewn by her mom... the boxing Basquiat onesie I blogged about previously, made with Kwik Sew 2433 out of one of Masheka's old T-shirts.

Boxing Basquiat Baby Onesie

Saturday, April 3, 2010

Happy 30th to Me! + The Boxing Basqiat Baby Onesie!

... 30th week of pregnancy that is! (My 30th birthday isn't till June 1!) Not so long ago Cartoonist Baby was the size of a blueberry, and Masheka and I can't believe our little girl weighs over 3 pounds and is 17 inches or more long now...

Or maybe we can, considering how strong her belly-shaking kicks are!

According to all my pregnancy books, Cartoonist Baby is even DREAMING now. Which naturally leads to the question--what do babies dream about?

Probably not patterns and fabric.

And since I abhor an image-free post, here's a picture of one of my favorite outfits I've made for Cartoonist Baby, the Boxing Basquiat baby onesie (review here, for you PR members):

Basquiat Onesie--front

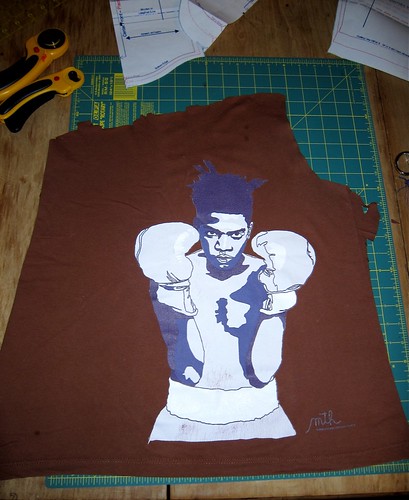
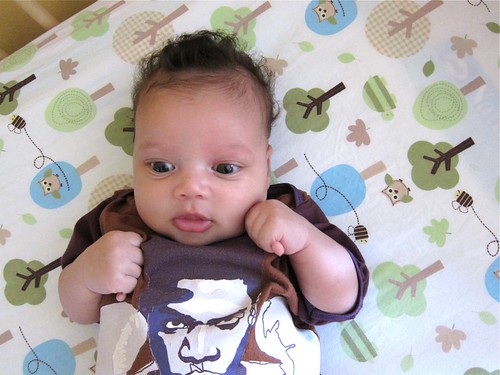
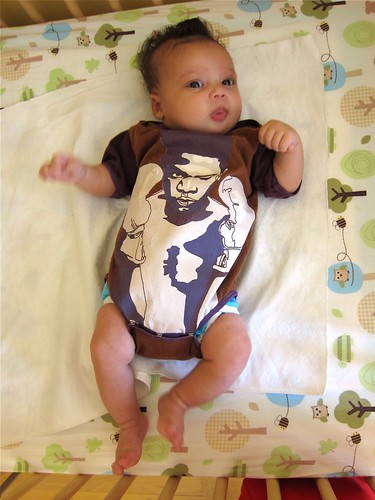
... which is just Kwik Sew 2433 sewn up from one of my husband's favorite (but now too-small) Brooklyn Industries T-shirts that I happened to spy in our massive Goodwill-bound donation pile. The edges are bound with satiny purple FOE (foldover elastic) for a SLIGHT girly touch.

Basquiat Onesie--cutting up T-shirt

I love this onesie for many reasons:

  • The subject. Masheka and I are both artistic and literary types, as you might have guessed. Cartoonist Baby's first name is shared with a famous black woman writer (not sure if I'll be revealing her name on this blog yet, you'll have to guess for now!) and I like that she also has one of our favorite artists, the late great Jean-Michel Basquiat, on her shirt, too!
  • The colors. I love wearing pink myself, but why does everything for girls have to be doused in Pepto-Bismol and covered in bows and flowers? I felt like the purple foldover elastic binding I did added just a touch of girly without being overwhelming.
  • It reminds me of this photo of my husband as a child... you can see why one of his nicknames was "Rocky"!:

LinkWithin

Related Posts Plugin for WordPress, Blogger...