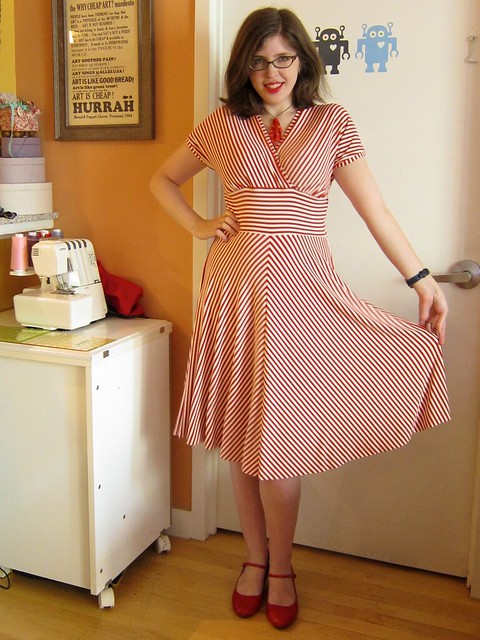
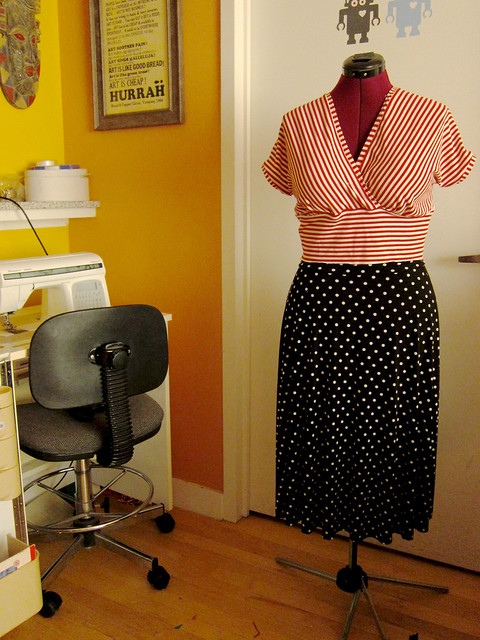
Seriously, I have been planning to make a candy-striped Tiramisu with this fabric since last August, when I was still illustrating the first Cake Patterns envelope cover! And I'm so glad I finally sat down and did it, because this dress in this soft, stretchy knit is pure happiness.
The pattern: Cake Patterns Tiramisu Dress 0144.

- My high bust is between 34" and 35", my full bust is 38.5" and my underbust is 30", so I initially chose to make a 35D (see muslin post here and wearable muslin top here). That turned out to be a bit large in the bust and back for me, especially since I was using a very stretchy knit and I prefer a really close fit with plenty of negative ease.
- For this dress version in my fancier fabric with plenty of horizontal AND vertical stretch, I went with a 30D wide bodice with a 1" FBA but cut just the 30A length (I based this length on measuring some well-fitting RTW surplice knit tops I had that hit me exactly at the underbust). And I used the size 30 back bodice.
- This worked GREAT but if I use a fabric with only horizontal stretch for the next one I will need to make it longer over the bust (maybe the 30C or 30D length).

Fabric: This fabric is out of control awesome. It's a light-weight, yet substantial red and white cotton-spandex knit with good recovery that I bought on a sewing club outing to NY Elegant Fabrics for $15/yard.
At the time I felt guilty paying $45 for a hypothetical me-made dress, but this fabric is amazing. It is softer than soft, has stretch in both directions and is drapey (but not TOO clingy). Also: candy stripes. So... worth it!
Did it look like the photo/drawing on the pattern envelope once you were done sewing with it? Most. Definitely. And I should know, I drew it myself...
Were the instructions easy to follow? Obviously I'm quite biased, but I followed them almost exactly and was quite pleased with the results!
However, the Tiramisu has one thing that almost NONE of my other surplice-style knit dresses have...

Pattern alterations: I did leave off the pockets on this version, but only to make sure I had enough fabric left over to recut the bodice if necessary (which it wasn't).
Construction notes:
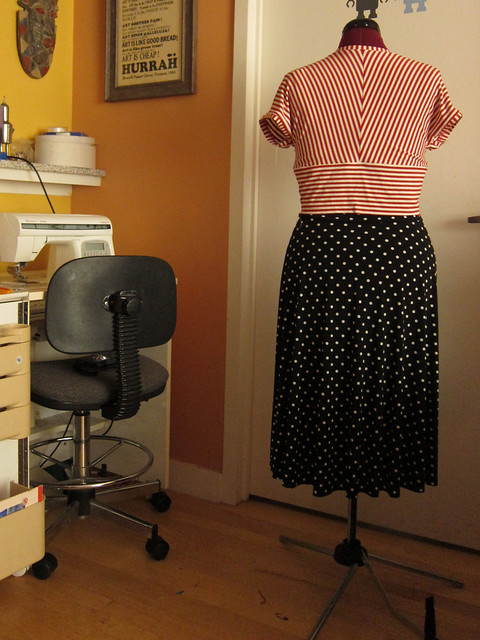
- I cut the fabric on a single layer to make sure the stripes were just so.
- I made this on a mix of sewing machine and serger as recommended in the pattern instructions.
- My walking (aka dual feed) foot helped a lot in keeping the jersey from rippling out of shape and in pattern matching at the seams.
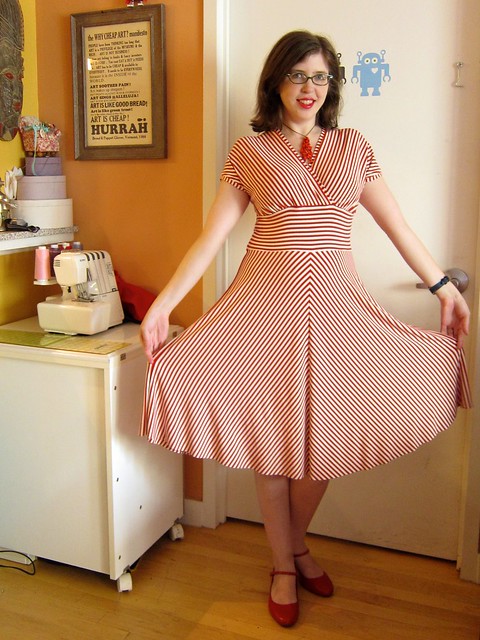
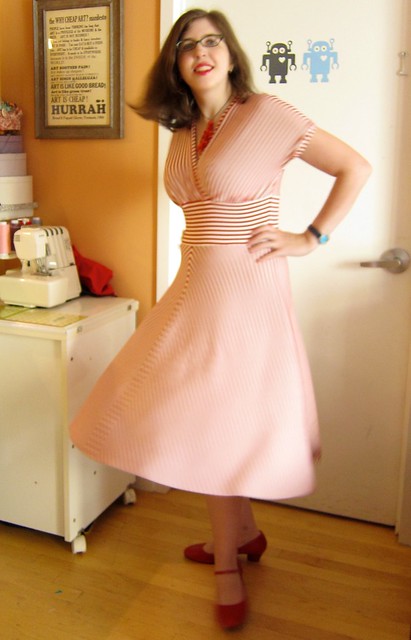
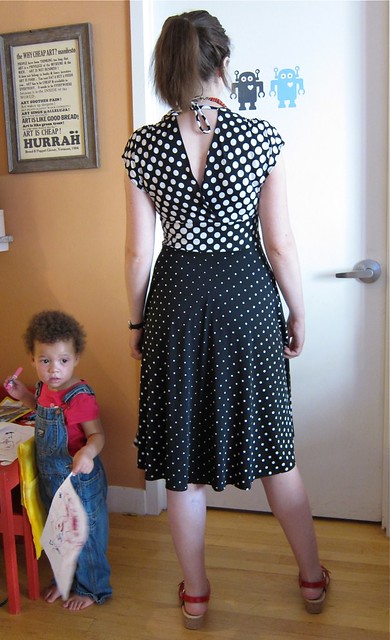
- Great fit! So flattering!
- Stripes! Stripes! Chevrons and stripes!
- Lovely binding that is NOT in any way stretched out of shape.
Obligatory half-circle skirt twirly photo:
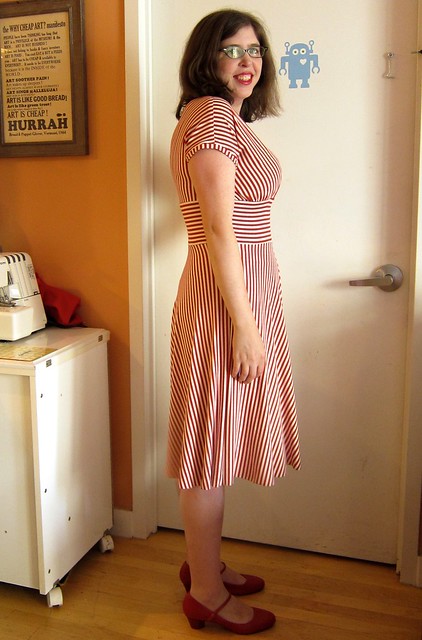
*So the asterisk in the post title is because this dress isn't actually hemmed yet. BUT one of the hemming options recommended is to leave it raw... either permanently or just for a few wears until it settles. So it is finished ENOUGH. For now. I do think I will do a twin-needle hem to even things out, as it seems a bit shorter in the front than the back (though that might be a bad posture thing).Outfit details:
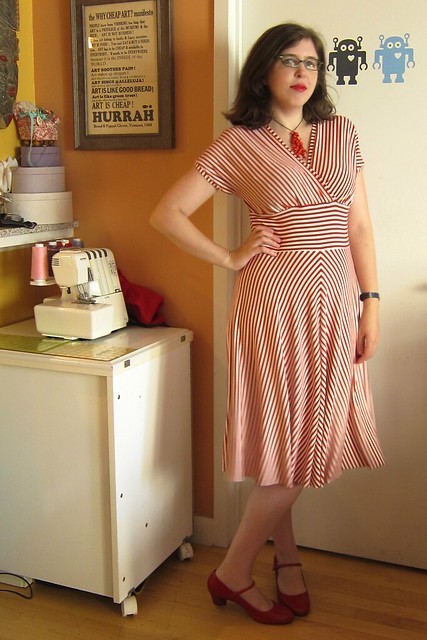
Cake Patterns Tiramisu knit dress, me-made
Coral necklace from craft fair
Vintage-inspired blue and aqua leather watch
Comfy red leather Mary Janes
")