Showing posts with label stripes. Show all posts

Friday, April 17, 2015

Done: A striped Jalie 2921 Scarf-Collar Top, hacked for nursing (SHB Sew-Along)

Baby only took catnaps today but somehow I finished my #jalie scarf top hacked for #SHBsewalong as a #nursingtop ...

"Rip!"

Is not the sound you want to hear when you have a project that is actually turning out awesome, and you are managing to sew in ten-minute baby catnap-sized chunks, and it is just SO close to done, and...

I had snagged this tissue-thin unstable rayon-lycra jersey on a broken plastic piece of my sewing table insert while hemming, opening up a hole right over the bust area. I was not about to scrap this thing, given how hard it had been to cut out (like slicing through water, argh!), so I repaired it with a little hand-stitching, and I hope no one is looking close enough to notice!

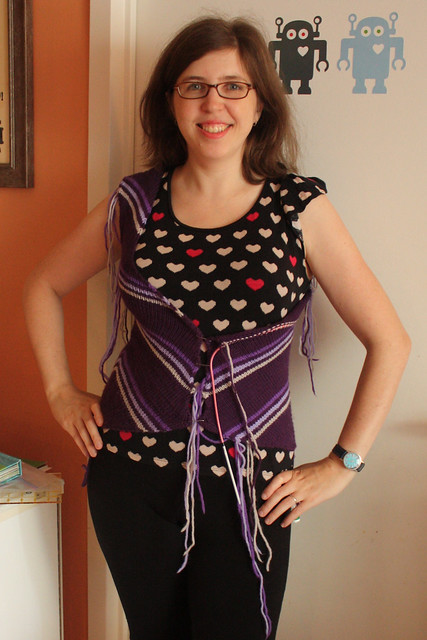
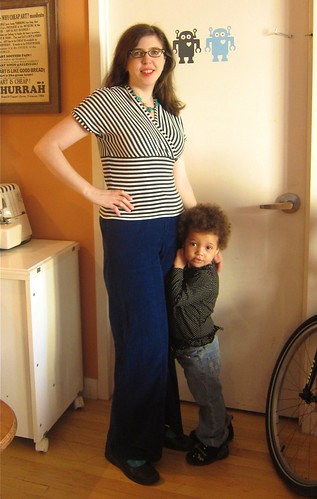
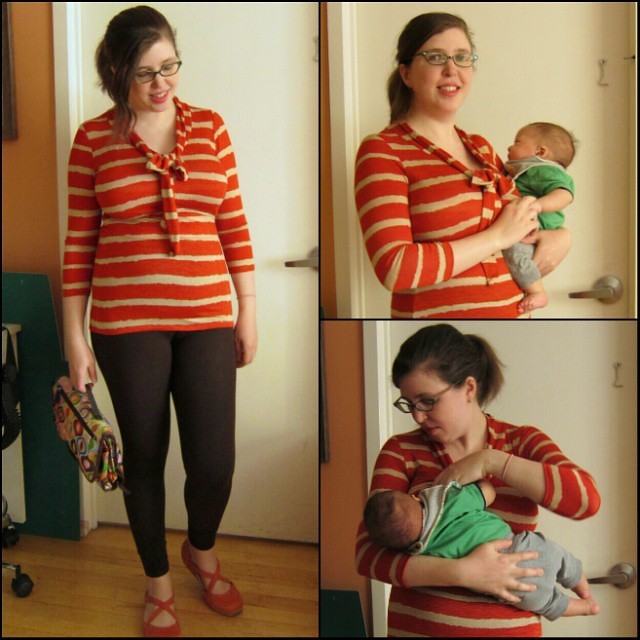
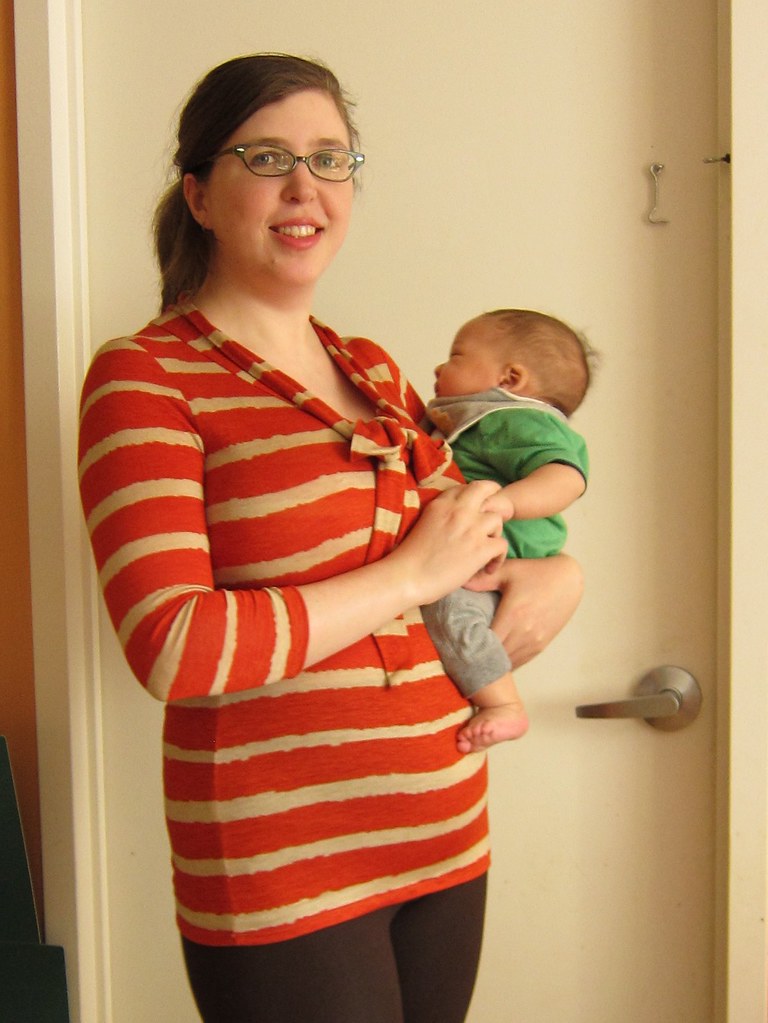
This breastfeeding hack of my beloved Jalie 2921 scarf-collar jersey top is my fourth piece for the Small Human Being Sew-Along this month with Cindy and Clio.

Jalie 2921 scarf-collar top--hacked for nursing

The inspiration: Specialty nursing tops aren't necessary for breastfeeding – but I love them anyway. Any top that can be pulled up or down or unbuttoned can work... but I like to be able to get baby his lunch quickly without a cover, and I don't want to show off my belly. So easy access is key, and tops that open right above or right under the bust fit the bill.

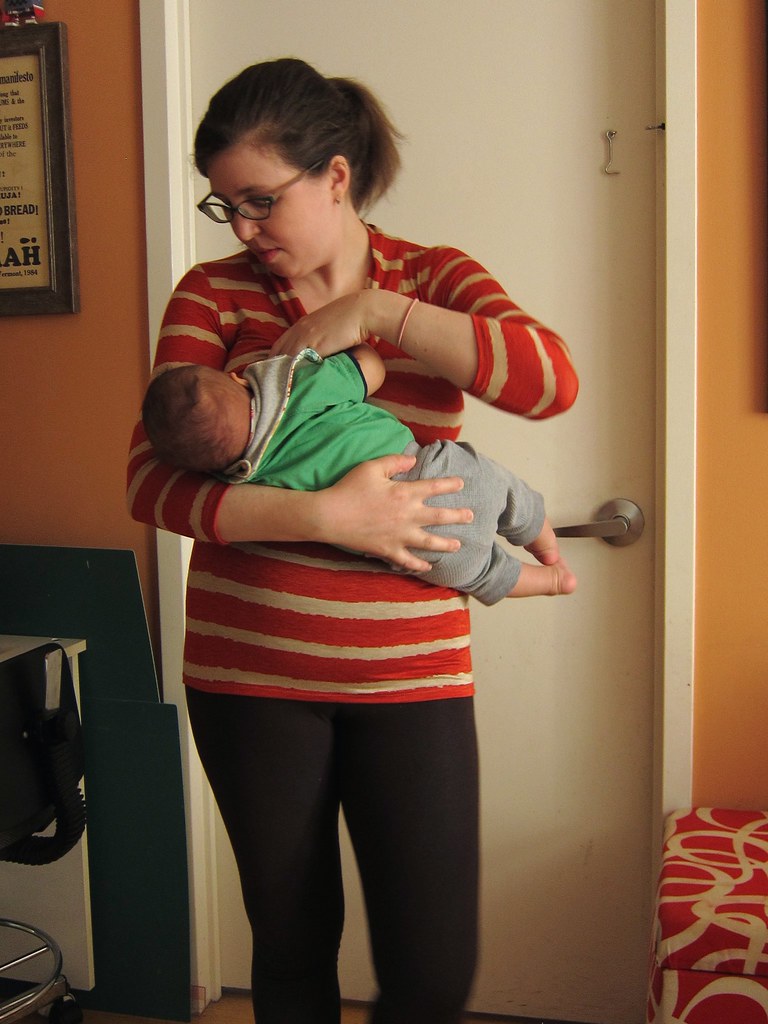
Recently, I acquired a few nursing tops in a great front overlap style by Boob Designs, and while I love the way they work, I foolishly bought light, solid-colored ones that developed breastmilk stains almost immediately. Here's how the Boob Nursingwear tops function (in a smarter colorway, too):

So I decided to make my own versions in distracting stain-hiding prints.

The basics:

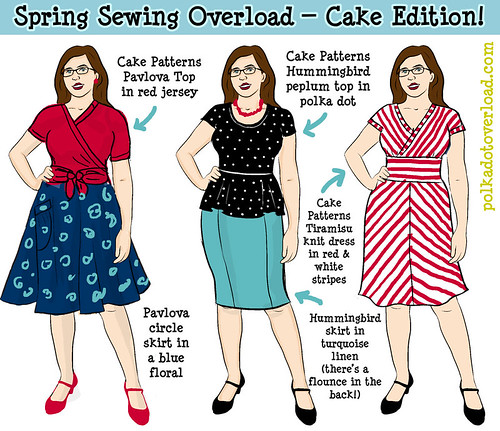
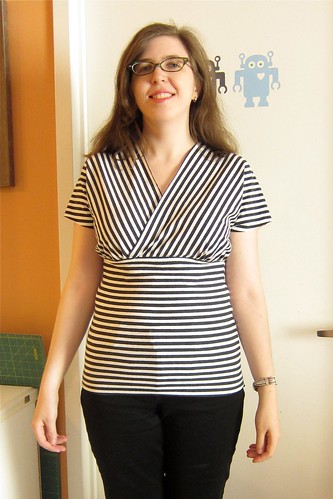
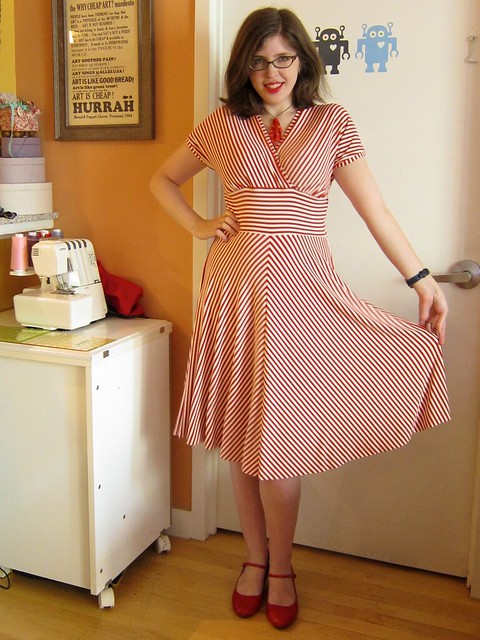
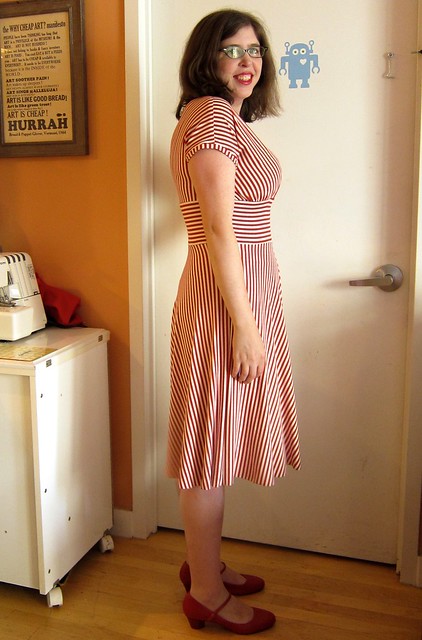
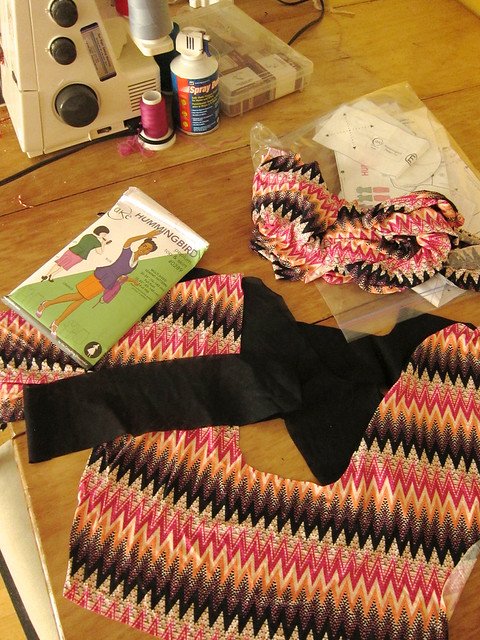
Pattern: Jalie 2921 scarf-collar top (basically a knit version of a bow-neck blouse!), hacked with the So Zo nursing top tutorial. I'd previously made this fantastic top pattern (not hacked for nursing) in a floral and polka-dot version, both of which I wear, and get complimented on, constantly, so it is a real TNT.

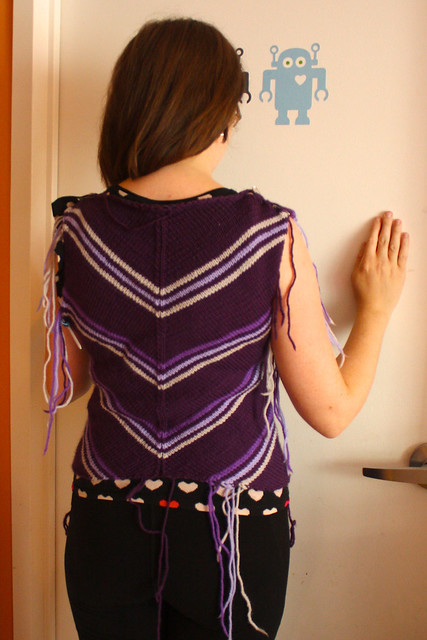
Fabric: Slippery thin striped (rayon lycra?) jersey knit with good recovery that I got for free in a fabric swap. Horribly thin and unstable while cutting and sewing (I was swearing a LOT while cutting) so I can see why its former owner ditched it.

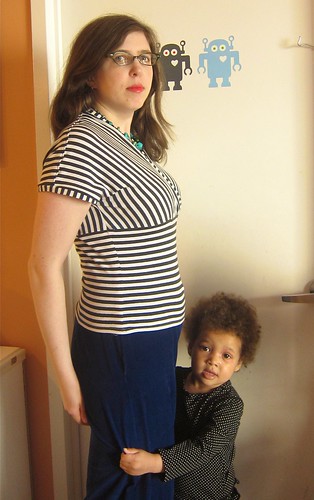
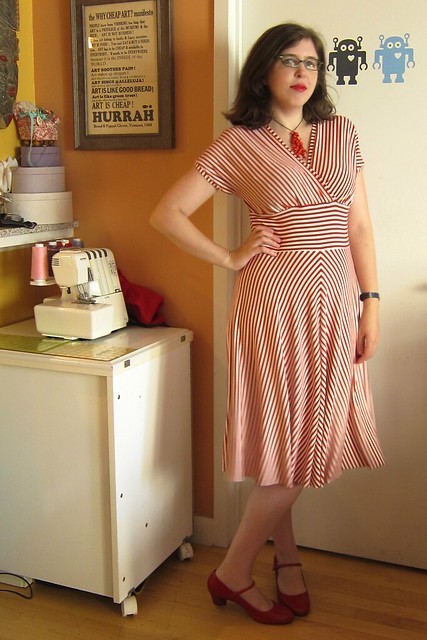
Size: Because I still seem to be shrinking slowly post-birth and this fabric is super stretchy, I decided to stick with my usual size even though my bust, waist and hips are all 3" bigger than last time I made this thing. Which is a size S (34" bust) overall, but a size V (37") for the bust and front sleeve armhole. My actual bust is 41.5" right now, so there's a lot of negative ease going on here.

Notions: 1/4" clear elastic for the bottom of the overlap and the top of the underlap. But I think next time I will use a heftier knit elastic, the clear stuff seems too flimsy to me for frequent nursing.

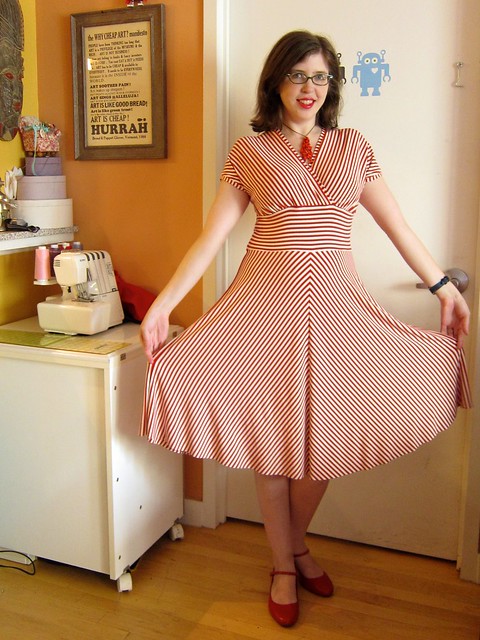
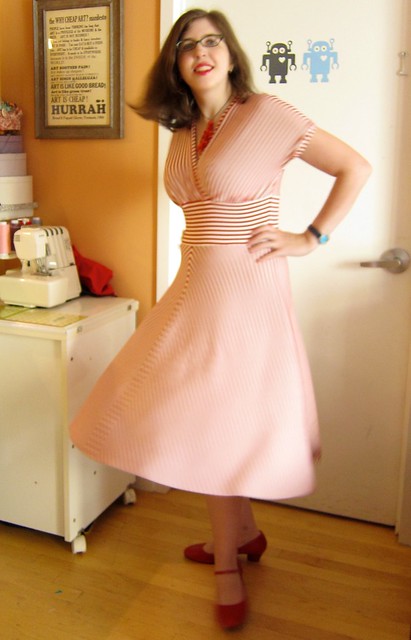
So it's maybe slightly TOO thin and clingy, but I think it will loosen up over time, and I personally rather a top be slightly too tight than too loose.

Jalie 2921 scarf-collar top--hacked for nursing

Instructions: Zoe's free tutorial was clear and thorough, and I found it easy to apply to this pattern I had already made several times. I did cheat a bit by just adding marks to my existing traced front pattern piece rather than creating new pattern pieces for the overlap and underlap, and it worked out fine.

Modifications: In her tutorial Zoe recommends the overlap ending 3/4 down the bust instead of under the bust, but I personally prefer the underbust line, so I moved it down. And the overlap front piece is split down the middle, but I made the underlap a single piece cut on the fold.

Construction notes: I made this all on the sewing machine with a zig-zag stitch, as I was visiting my mom and she doesn't have a serger. The fabric was so thin that it practically seemed to tear apart as I stitched, so I hope it holds up over time.

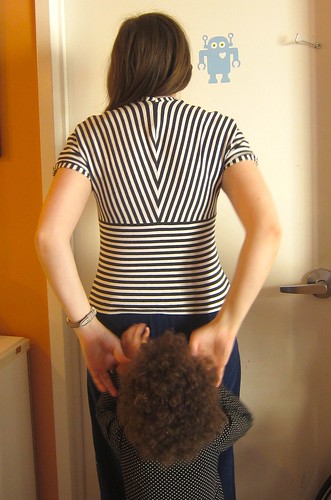
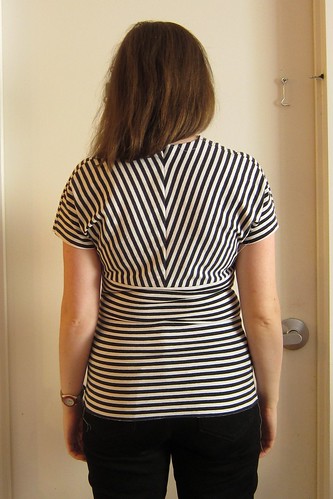
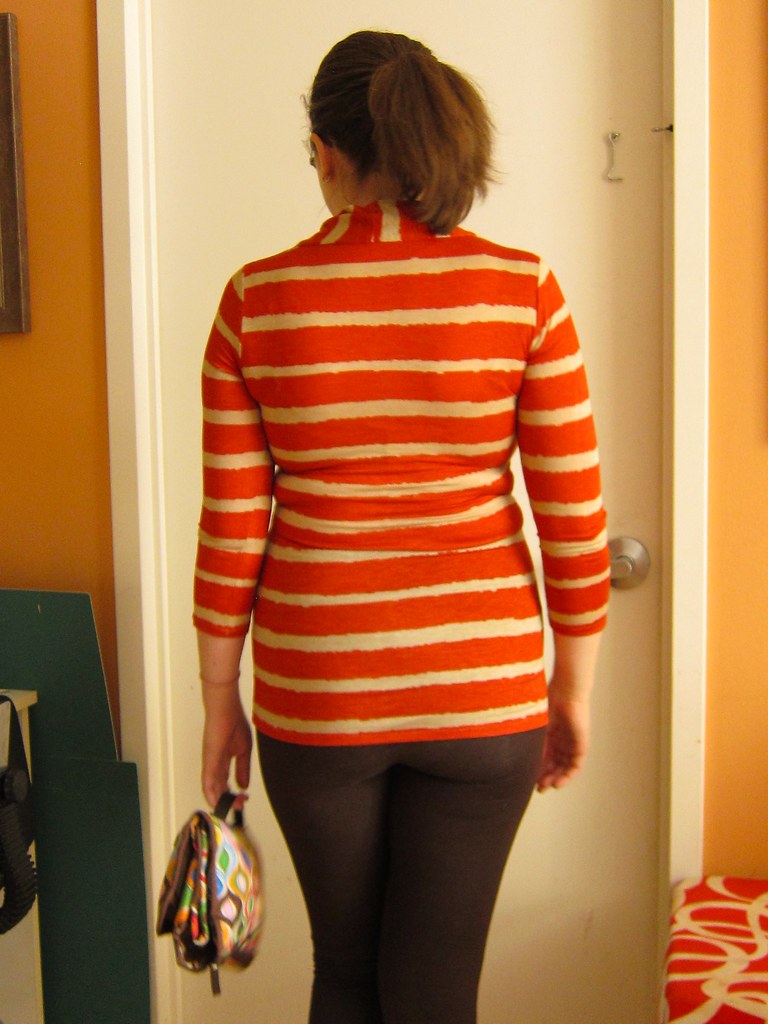
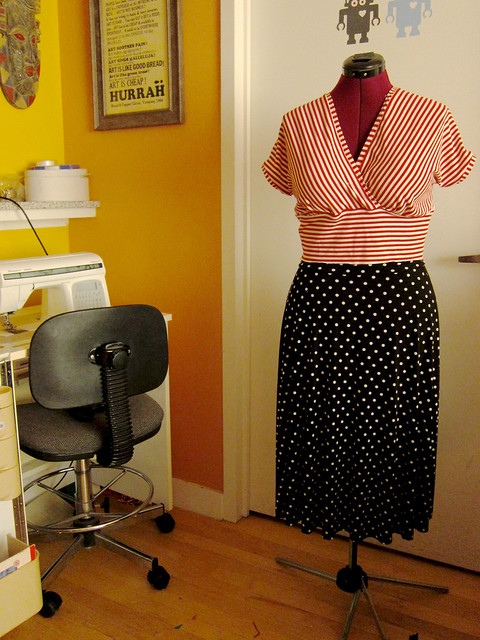
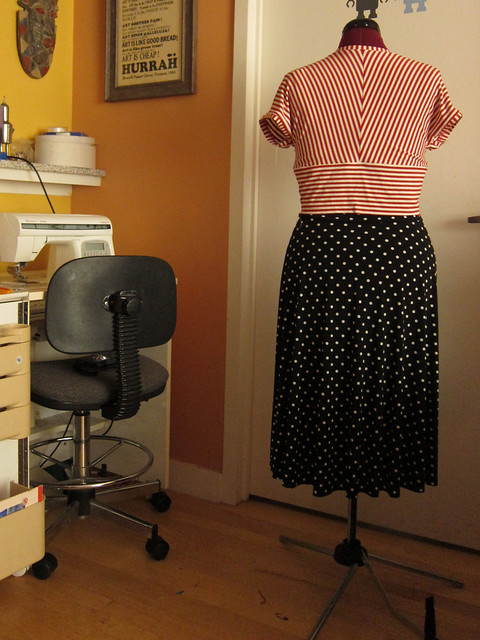
Side seam stripe matching win (nevermind the sleeves and shoulders):

Jalie 2921 scarf-collar top--hacked for nursing

How I found the time: I was visiting my parents when I cut and sewed most of this, and they held the little guy quite a bit while he was awake. I finished it when we returned to Brooklyn in very small chunks during baby's way-too-short naps.

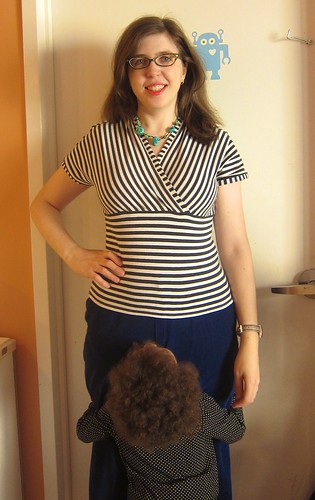
Pretend nursing shot (baby was actually full, but you get the idea):

Jalie 2921 scarf-collar top--hacked for nursing

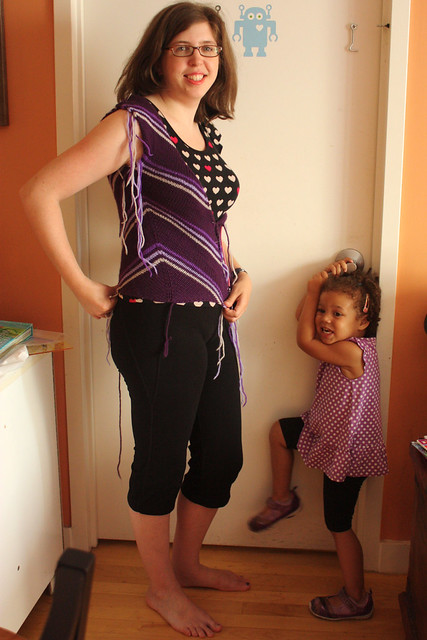
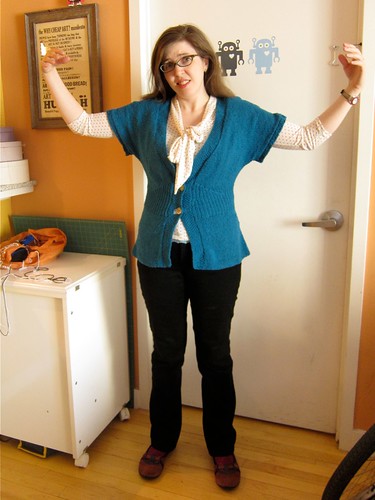
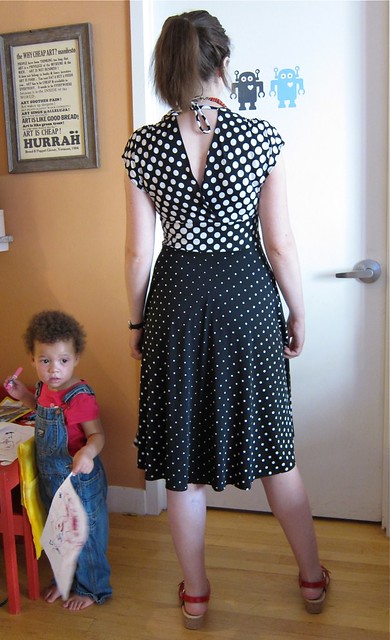
I've been trying to be more minimalist when going out with baby — no large bag, stroller, nursing cover, etc. So here I am about to pick up my daughter from Pre-K and take both kids to the playground... just wearing baby in a ring sling and carrying a diaper clutch with diapers, wipes, a change of clothes and my keys, ID and debit card. (My daughter wears her own small backpack with her Epi-Pens, water bottle and an allergy-friendly snack.):
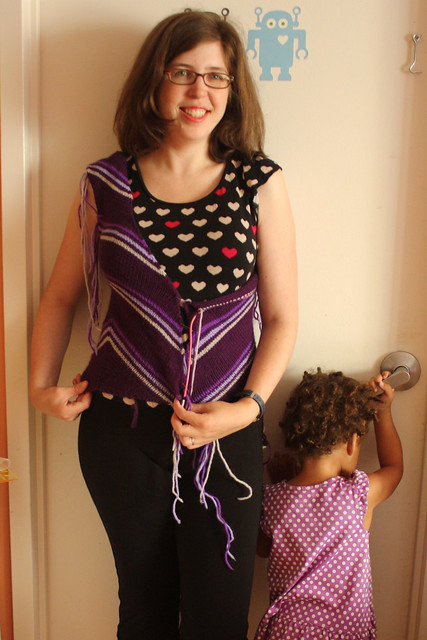
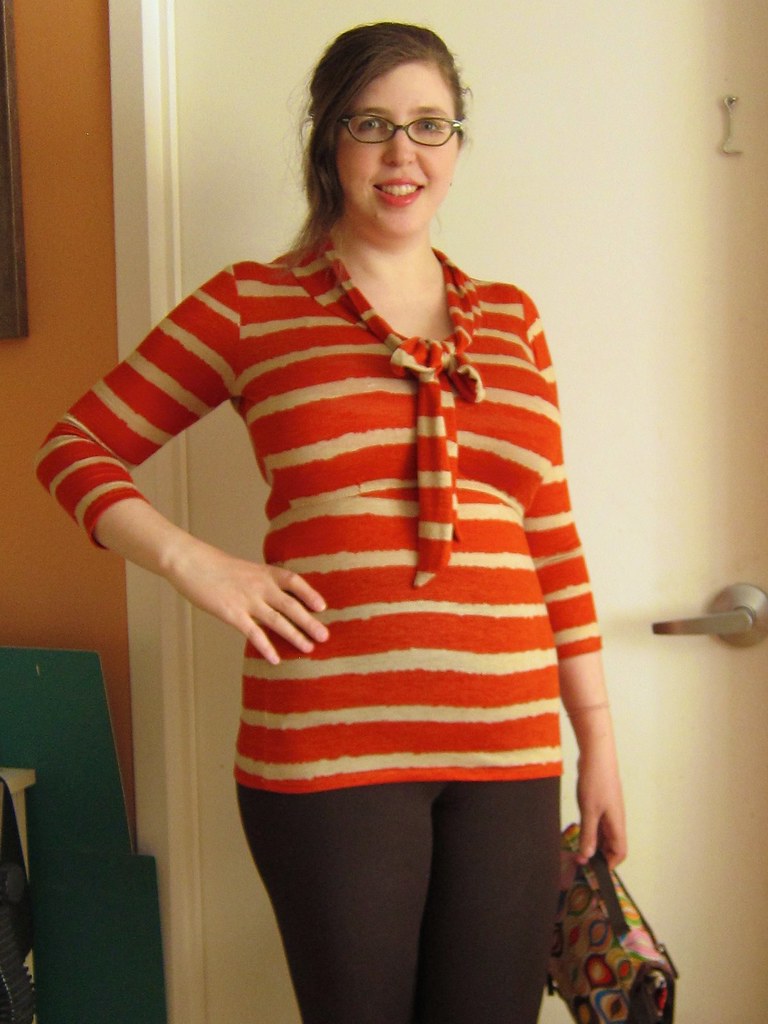
Jalie 2921 scarf-collar top--hacked for nursing

Outfit details

Top: Made by Me
Leggings: Yummie Tummie by Heather Thomson compact shapewear leggings (scored on eBay for $3.50 due to a tiny flaw).
Diaper clutch: Skip Hop Pronto diaper changing clutch/station in a Jonathan Adler print, also scored on eBay.
Orange flats: Ahnu Karma ballet flats in Red Clay, bought on deep sale at Amazon. Ring sling: Sakura Bloom essential double-layered dupioni silk ring sling, can't remember the colorway as I bought it in 2010.

By the way, I do realize leggings are not actually trousers/pants/jeans. But since I don't have a single pair of non-maternity jeans that fit at the moment, I hope you'll forgive me. And these Yummie Tummie high-waisted tummy-control leggings are pretty amazing — thick and supportive and comfortable, and I immediately had people telling me "wow, you look great, getting in shape!" etc, even though my actual size and weight have not changed in over six weeks.

Oh, and I'll definitely make this top again, as this striped version was intended to be a wearable muslin. Next time in this chaotic Mood rayon lycra jersey, maybe in a sleeveless version: Amazing chaotic rayon/lycra print knit ...

**Disclosure: Actions you take from hyperlinks within this blog post may yield commissions for polkadotoverload.com (quite likely to be spent on yarn or fabric).

Tuesday, January 6, 2015

Done: Striped Gift Wrap Sweater, Bonnet and Mitts

Gift Wrap Baby Sweater, Gift Wrap Bonnet and Wee Mitts

Yeah, so, partial bedrest is apparently really good for knitting productivity, because I have knit more finished objects in the last month alone than maybe the entire last year, mostly while lounging sideways on the couch watching Marvel: Agents of S.H.I.E.L.D., Black Mirror and Parks & Recreation with the husband.

Above is the latest finished knit set for Baby Torchwood, and I think it's my favorite so far. Because, well: stripes! Plus I love the kimono-style closure and contrast bands.

The basics:

Patterns: The Gift Wrap Sweater and Gift Wrap Bonnet by Carina Spencer (purchased as the Gift Wrap Collection ebook set as I originally intended to make the Gift Wrap Romper but didn't have enough yarn)... plus the free Wee Baby Newborn Mitts pattern by Christine Vogel.

Yarn: 3 colors (4 balls total) of Debbie Bliss Cashmerino Aran yarn, a lovely, squishy, soft and washable merino wool/microfiber/cashmere blend. I bought these on impulse while shopping for buttons at one of my favorite local Brooklyn yarn stores, La Casita Yarn Shop Café. They didn't have enough of the blue for an entire sweater (just two balls), but these three colors seemed harmonious, and rather TARDISy/Whovian to me. I had a few little bits left over when the sweater and hat were done, so decided to squeeze out a pair of matching thumbless mittens as well.

Needles: The Gift Wrap patterns recommends size 8 and 6 needles, but I got gauge with sizes 4 and 3 for the sweater, and 4 and 2 for the hat. (I knit super loosely, though.) I used size 4 and 2 on the mitts.

Size: I made the 6-month size in the sweater, toddler size in the hat, and although the mitts are supposed to be newborn size, I used aran weight instead of DK weight, so they're more 6-month or toddler-size. I do think baby will be able to wear all the coordinating pieces at once.

Notions: The 3/4" buttons (sewed on INCREDIBLY tightly and securely, please don't worry!) were an Etsy find, just $2.55 for a pack of 50 in various iridescent shades from SkeeterBitz.

Raveled: Sweater, bonnet and mitts.

I am embarrassed to say I spent hours agonizing over my online button search, as I'm used to being able to stroll over to Pacific or M&J in the Garment District, dig through some nicely color-coded displays and drawers and actually pair them with the sweater... online button shopping is way less intuitive. (Plus I didn't feel comfortable buying vintage plastic buttons, cute and cheap as they might be, for fear they might contain formaldehyde.)

The sweater took about two weeks of sporadic knitting, and the hat and mitts were both done in less than a day each.

The sweater pattern has striped and non-striped options, as well as a contrast band. It's super simple to make, knit all in one piece from the top down, and the sleeves picked up later. I didn't have quite enough gray to stripe the sleeves, but I think the solid sleeves are a nice "design feature."

Similarly, I didn't have quite enough yarn to make the mitts match, so decided to go for, er, deliberate asymmetry:

Gift Wrap Sweater & Bonnet and Wee Mitts

There is nothing easier than thumbless mitts, really. Babies don't need thumbs on their mittens, and I had made these before for Z when she was a baby:

Green Baby Hat &  Cream Baby Mittens

I do hope you're not all getting super sick of baby stuff around here... I really do plan to sew grown-up lady clothes again once my waist returns, but I don't really know yet what size I'm going to end up, and there is no point in making maternity clothes at 38 weeks along, now is there?

Thursday, August 29, 2013

Finished: A Tulip for My Niece

Tulip baby sweater

Here's the little sweater I finished just in time for the baby shower for my niece-to-be, a lucky little girl who will be living on my brother's farm in Maine*, picking lots of blueberries, going camping and kayaking and wearing lots of soft snuggly woolen things.

The pattern: Tulips, a Colorful Cardigan for Baby, 9 month size. (Available as a PDF, or as part of a kit).

The yarn: Dream in Color Classy, bought as a kit with eight colors from Eat. Sleep. Knit.

Time taken: A bit over a month (but I was knitting and making lots of other things at the same time).

The exhaustive Ravelry details: Here.

IMAG0032

This sweater was so fun and pretty to knit I almost felt guilty — going from stripe to stripe with the little seed stitch, fondling the pretty soft colors, making the little I-cord edge and ties. It was very well received by my brother and sister-in-law and all the baby shower guests. Here's a closeup:

Tulip baby sweater

My amazing mom of course made some really gorgeous decorations and tasty treats for the baby shower. My favorite were these allergy-free (for my daughter) chocolate cake pops, with no dairy, eggs, or nuts:

The completed allergy free chocolate cake pops at the baby shower for my niece to be. No dairy, eggs or nuts!

Little Z wore her Oliver + S wax-print dress, and I wore my Cake Patterns Tiramisu. Luckily neither fell victim to the chocolate frosting:

IMG_3301

I can't wait to meet my niece!

*My brother is actually a civil rights lawyer, not a farmer, but he lives on a 40-acre farm in rural Maine in a house he and his wife designed themselves with a big garden and lots of ducks, chickens and cats. It's super awesome.

Monday, July 22, 2013

Finished*: Candy Striped Tiramisu! (And why I am knit dress obsessed!)


Cake Patterns Tiramisu Knit Dress in Candy Stripes

Sweeter than candy: I finally made my striped Tiramisu knit dress!


Seriously, I have been planning to make a candy-striped Tiramisu with this fabric since last August, when I was still illustrating the first Cake Patterns envelope cover! And I'm so glad I finally sat down and did it, because this dress in this soft, stretchy knit is pure happiness.
The pattern: Cake Patterns Tiramisu Dress 0144.

Pattern Description: Knit knee-length dress with front mock wrap neckline, cut-on sleeves, customizable midriff and flattering half-circle skirt. Pattern Sizing: The pattern is sized for a 30-54 inch high bust, 25-50 inch waist and has bust proportion sizing A-D.
  • My high bust is between 34" and 35", my full bust is 38.5" and my underbust is 30", so I initially chose to make a 35D (see muslin post here and wearable muslin top here). That turned out to be a bit large in the bust and back for me, especially since I was using a very stretchy knit and I prefer a really close fit with plenty of negative ease.
  • For this dress version in my fancier fabric with plenty of horizontal AND vertical stretch, I went with a 30D wide bodice with a 1" FBA but cut just the 30A length (I based this length on measuring some well-fitting RTW surplice knit tops I had that hit me exactly at the underbust). And I used the size 30 back bodice.
  • This worked GREAT but if I use a fabric with only horizontal stretch for the next one I will need to make it longer over the bust (maybe the 30C or 30D length).
Tiramisu back view
Sweet sweet candy-colored peppermint back chevrons!


Fabric: This fabric is out of control awesome. It's a light-weight, yet substantial red and white cotton-spandex knit with good recovery that I bought on a sewing club outing to NY Elegant Fabrics for $15/yard.
At the time I felt guilty paying $45 for a hypothetical me-made dress, but this fabric is amazing. It is softer than soft, has stretch in both directions and is drapey (but not TOO clingy). Also: candy stripes. So... worth it!
Did it look like the photo/drawing on the pattern envelope once you were done sewing with it? Most. Definitely. And I should know, I drew it myself...
Were the instructions easy to follow? Obviously I'm quite biased, but I followed them almost exactly and was quite pleased with the results!

Cake Patterns Tiramisu Knit Dress in Candy Stripes
Pattern thoughts: So. Knit dresses. Lately I have been wearing knit dresses three days out of five. Because they are the perfect garment — no mixing and matching, just throw it on, pick some shoes and a necklace (and maybe a cardi) and I am DONE and I even look FANCY when I am chasing my toddler around the farmer's market or playground.

Cake Patterns Tiramisu Knit Dress in Candy Stripes
Most importantly, knit dresses ALWAYS fit. My weight fluctuated a lot when I was ill and on oral steroids for months, and has fluctuated even more since I stopped nursing four months ago, so my jeans and non-elastic woven dresses all hate me... but my knit dresses always love me and never complain. (Heck, I wore some of my non-maternity knit dresses 6 and 7 months into my pregnancy a few years ago! So there you go.)
However, the Tiramisu has one thing that almost NONE of my other surplice-style knit dresses have...

Look! No gape!
... a no-gape neckline! NO cardigan needed for bra-hiding modesty! Thanks striped neck binding!
Pattern alterations: I did leave off the pockets on this version, but only to make sure I had enough fabric left over to recut the bodice if necessary (which it wasn't).
Construction notes:
  • I cut the fabric on a single layer to make sure the stripes were just so.
  • I made this on a mix of sewing machine and serger as recommended in the pattern instructions.
  • My walking (aka dual feed) foot helped a lot in keeping the jersey from rippling out of shape and in pattern matching at the seams.

Tiramisu side view
Successes:
  • Great fit! So flattering!
  • Stripes! Stripes! Chevrons and stripes!
  • Lovely binding that is NOT in any way stretched out of shape.
Recommended Reading: Wear for: Work or a date. I love it so much and the fabric is so nice I am a bit afraid to get it grubby at the playground. So I might make a second version in a less fancy knit for weekend wear.
Obligatory half-circle skirt twirly photo:

Tiramisu twirly view
Outfit details:
Cake Patterns Tiramisu knit dress, me-made
Coral necklace from craft fair
Vintage-inspired blue and aqua leather watch
Comfy red leather Mary Janes
*So the asterisk in the post title is because this dress isn't actually hemmed yet. BUT one of the hemming options recommended is to leave it raw... either permanently or just for a few wears until it settles. So it is finished ENOUGH. For now. I do think I will do a twin-needle hem to even things out, as it seems a bit shorter in the front than the back (though that might be a bad posture thing).


Thursday, July 18, 2013

Bits and Pieces from a Mini Sewcation

TIra dress bodice and Insta Skirt in progress

My daughter is off visiting her grandparents in Massachusetts for a few days, and I'm managing my severe toddler cuddles and kisses deprivation by taking a little sewcation for myself each night when I get home from work. It is kind of amazing how much sewing you can get done when you don't have to start at 11:30 p.m. and stop at midnight each night... and when you can actually leave out the ironing board, sewing table and cutting mats!

Above you see two separate items in progress: the bodice of my Tiramisu dress so far (finally! I made the muslin back in May!) and a self-drafted "Insta Skirt".

The Tira is the one I sketched for my Spring Sewing Plans, it's got a red and white bodice and skirt just like my envelope illustration:

Spring Sewing Sketch 2013 — Cake Patterns Edition

I picked a smaller bodice size this time (30D with a 1" FBA, instead of a straight 35D) and she is fitting great so far! I should have the skirt attached tonight. (And I know she doesn't fit my crappy sewing form at all, so just trust me on this).

Tira dress bodice and Insta Skirt in progress

The "Insta Skirt" is the one-piece half-circle skirt and midriff I drafted for this McCall's knit dress I made a while back:

IMG_0585

I've always wished I could wear the bottom bit as a separate skirt, and it took me only about 15 minutes to sew (just two sides seams and an elastic-free knit waistband—magic!). FIFTEEN MINUTES FOR A SKIRT, PEOPLE.

...But it's not REALLY an Insta Skirt, because my serger temporarily crapped out on me for three hours of swearing and rethreading and crying... and now that the skirt has hung for a day it has grown by four inches and needs a severe hemming. Having no clue how to evenly hem a half-circle skirt, I suspect there is some online tutorial hunting in my future.

Finally, I have my Hummingbird Blue top pieces sitting around since the sew-along, since I was too busy moderating to actually make anything!

Hummingbird "Blue" in progress

I think this little sewcation may almost be as fun as splashing around on the beach, and I'm getting 100% less sunburned as a result! (But I am also counting the seconds til I get to cover little Z in kisses ... on Friday!).

So readers: When was the last time you really got to sew (and leave all your sewing mess all over the place) with no interruption?

Saturday, July 13, 2013

Delancey Try-On: Too Snug or Just Right?

Delancey Cardigan Try-On

Chevrons and stripes both rank high on my crafterly happiness list and this cleverly-constructed sweater has been a joy to knit so far. The big question, though—does it actually fit me?

Pattern: Delancey Cardigan. You may recall that the Delancey cardigan by Alexis Winslow was the winner of my indecisive "Sweater Girl Showdown 2013." Here was my original concept sketch:

Sweater Girl Showdown 2013: Which Cardigan to Knit Next? (Polka Dot Overload)

Ravelry link with all details: Here.

Yarn: Knit Picks Merino Style (discontinued) in various colors from the stash. A lovely DK-weight merino that I had lying around. Sadly I lost one of the colors I was using midway through (left it on a subway or airplane during a business trip) so you can see that the stripe pattern on the top back is gray/periwinkle/gray instead of gray/periwinkle/purple. Oops!

Size: 33" bust. The biggest challenge was deciding what size to knit—the 33" finished bust or the 36" finished bust. I have a 38.5" bust and 29.5" waist but I like my cardigans snug, with at least 2-3" of negative ease at bust and waist (see my old post on sweater fitting for more on this).

BUT because of the clever chevron pattern, there is no waist shaping here—the bust and waist are the same size. So if I went with the 36" bust, the waist might have been quite baggy. I wrote to the designer and she gave me some fantastic advice—based on my preferences and yarn she suggested I try the 33", as the bias fabric makes the cardigan quite stretchy.

So readers, what do you think so far? The back looks perfect to me (see top) but the bust area seems to be pulling away to the side (note that I've only knitted one of the side fronts, the other isn't done yet):

Delancey Cardigan Try-On

And the side "seams" aren't really straight when I pin the cardigan shut in front:

Delancey Cardigan Try-On

That said, there is going to be a button band and shawl collar in front which will add a little extra front width.

My verdict: Keep going and hope for the best. I think with a little blocking and the bands/collar, it'll be just perfect, and it may loosen up a little with a handwash and wear, too.

Delancey Cardigan Try-On

Speed notes: I swear I haven't been knitting MORE often than I did last year but I must be knitting FASTER. Not only is my Delancey more than half done, I just finished a baby cardigan for a friend two days ago. AND I just started on a Tulip for my niece-to-be yesterday and I'm already down to the chest:

Tulips Cardigan Progress

Hello, my name is Mikhaela and I am a cardigan knitting (and wearing) addict.

I think my new speed is from switching away from plastic to metal needles. I had some serious repetitive stress injury issues with my hands back in 2008 and had switched to using plastic and sometimes wooden needles... and they are just MUCH SLOWER. This year I decided to switch back to metal but just be careful—to knit in small chunks and stop if my hands start bothering me even the slightest.

So, what do you think—too tight or just right?

P.S. By the way, if you're interested in making the Delancey yourself, there was a Ravelry knit-along last year with accompanying blog posts on the Sweatshop of Love. It also comes in a plus-sized version (up to a 58" bust).

P.P.S. In case you're wondering why both Z and I are prancing around in black bike-short-esque things, we were about to go for a family bike ride. We went down to Brooklyn Bridge Park and rode the carousel four times until I got motion sick and had to let my husband take her around for the fifth ride. Phew!

Tuesday, May 14, 2013

Finished: Tiramisu Striped Top (Cake Patterns 0144)

MMMay 14: Cake Tiramisu Top & Vogue Trousers

Striped Tiramisu top love! Don't you adore the directional striped neck and sleeve bands?

Oh, you know how it is... You wake up in the morning snuggled up in your handknit socks and striped me-made sleep bra and panty set. Then you pull on your Tiramisu top and your me-made corduroy wide-legs... just another day, right?

The pattern: Cake Patterns Tiramisu Dress 0144. (Full disclosure: I'm the envelope illustrator for Cake Patterns and I designed the envelope and instructions along with my husband ... but I began working with Cake BECAUSE I already thought what Steph was doing was so awesome.)

Pattern Description: Knit knee-length dress with front mock wrap neckline, cut-on sleeves, customizable midriff and half-circle skirt. (I left off the skirt for this test garment top version).

Pattern Sizing: The pattern is sized for a 30-50 inch high bust, 25-50 inch waist and has bust cup sizing A-D. My high bust is between 34 and 35" and my full bust is 38.5", so I initially chose to make a 35D.

After basting to check fit (as recommended in the pattern), I realized I should probably have chosen a size up instead of a size down ... so I tightened up the width and length of the front bodice pieces by quite a bit. Probably slightly too much (and I overdid the overlap, so it's somewhat more modest than intended), but this is a test garment, so I'm not about to unpick it now. (See Steph's underbust tune-up tutorial and video from the Tiramisu sew-along for more on how to do this).

Cake Patterns Tiramisu Dress as Top: Front View

Never mind my photo-bombing toddler... ("I love stripes Mommy!")

Did it look like the photo/drawing on the pattern envelope once you were done sewing with it? Why yes, though as a top.

Were the instructions easy to follow? It was a rather surreal experience following along with my own illustrations (and Steph's instructions), but I find them quite clear and thorough if I do say so myself!

What did you particularly like or dislike about the pattern? It's such a flattering style on so many figure types, mine included. But my absolute FAVORITE thing is the stripe matching options... don't you love those striped sleeve bands and neck bands? AND the back chevron effect is some kind of awesome:

Cake Patterns Tiramisu Dress as Top: Back View

Fabric: Soft, medium-weight gray & white striped cotton-lycra blend jersey at $6/yard from Spandex House, leftover from making fun panties (which I'm actually wearing here, in case you're curious). It's very similar in weight/recovery to the much more expensive $15/yard fabric I'm going to use for the dress version.

Because of the stripes, I cut the pattern pieces out on a single layer to make extra-sure I aligned them with the stripe matching guide printed on the pattern. Cutting stripes on the fold can lead to stripey tears (ask me how I know).

Pattern alterations or any design changes you made: I left off the skirt, and extended the midriff band down and out to the hips a bit.

Construction notes: I made this on a mix of sewing machine and serger (now both repaired and working great) as recommended in the pattern instructions. I used a ballpoint twin needle for the hem.

My walking (aka dual feed) foot helped a lot in keeping the jersey from rippling out of shape and in pattern matching at the side seams—almost invisible, am I right?

Cake Patterns Tiramisu Dress as Top: Side View

There is a side seam there... but I can barely see it! Thanks walking foot.

Successes:

Recommended Reading: Room for improvement?:
  • When I make the dress I'll try cutting a different size for the front bodice—probably the 30D—and play with it a bit before sewing real seams. It's really a matter of personal ease preference.

Would you sew it again? Would you recommend it to others? Heck yeah and triple heck yeah.

Wear for: Work, weekend, pretty much anywhere.

Readers, it feels good to be sewing again after my long illness! And I can't wait to make the dress version... in red and white stripes, of course:

Spring Sewing Sketch 2013 — Cake Patterns Edition

Then it's on to Hummingbird... and Bonny... and Pavlova... and... Cabarita... I think I need to clone myself! I have many other patterns in my queue but I've grown so attached to these after drawing them that I just need to bring them to life NOW.

Saturday, May 4, 2013

In Progress: Tiramisu Top Muslin, Or the Over-Enthusiastic Bust Assessment

Tiramisu Muslin basted together: Too big in front bodice!

My basted-together Tiramisu muslin: So I think I chose the wrong cup size, huh?

So I'm making the Cake Patterns Tiramisu dress (reprinting now and temporarily on presale for $12) in red and white stripes as part of my Spring Sewing Plan, but before I cut into my super-nice fabric, I figured I'd test it with some other leftover stripes from the stash.

For variety, I decided to make it as a top, since I wasn't worried about fitting the skirt. I just extended the midriff down (too far down, I think). and shaped it out for the hips.

In sewing, it is always a perilous thing to ignore your actual measurements in favor of half-remembered or wishful thinking or denial measurements. Numbers and letters are just that. Now, back when I was pregnant, and then nursing, I got REALLY good at making extreme bust adjustments (for F, G, H and even at one point, I). But I recently weaned my daughter and I think I need to wake up to the new reality of more subtle E-cup bust roomage needs.

Anyway, my high bust is 35" and my full bust is 38.5. So I chose the size 35 by high bust, which I'm pretty sure was correct since it fits well in the back (and how cool is that chevron effect?!):

Tiramisu Muslin basted together: Back seems OK?

But for the cup size I chose the D, which I now think was a mistake, since according to the cup size chart it creates a finished measurement of 39.5"... a whole inch of positive ease when I prefer at least an inch or two of negative ease.

Plans & Observations:

  • I think I'll recut the two front bodice pieces as the 35B, which should be a finished full bust measurement of 37" (1.5" negative ease) and should remove some of the front length, too.
  • I was so careful with pattern matching when I cut the midriff pieces and the back bodice pieces but totally forgot about the shoulders. Oh well! I'll be more careful with the dress version.
  • The length is bad—way too long. I'll chop at least a few inches off the bottom before I hem it.
  • It is SO weird to be sewing from instructions that I designed (along with my husband). WEIRD. I remember drawing some of those diagrams and now I am following them!

How would you fix this?

P.S. Update! Somehow despite being part of the Cake team, I missed Day 5 of the Tiramisu Sewalong series, which is completely dedicated to the issue of fitting the bodice of the Tiramisu and tuning up the underbust seam, with videos and step-by-step photos. So here it is!

P.S. Speaking of over-enthusiastic bust roomage, I tried to put on my silk Flutter-Sleeve Cardigan for Me Made May today and boy does it need a refashion... when I was knitting it I became convinced it needed bust shaping and did all these improvised short rows... and then it stretched out after wear... and NOW:

Me Made May 4: Cardigan Refashion Needed

Monday, March 5, 2012

Stripes & Wales Outfit #2 Progress: Piping! Appliqué! Cats!

Ottobre "Pupu" Corduroy Overalls in Progress: Kitty Appliqué!

Fun fact: sewing overalls with cat appliqués on them is 53% more fun than sewing any other types of clothes. Meow! Never you mind the embroidery hoop marks.

It's a sad equation, but the more precious evening minutes and weekend naptimes I spend blogging, the less time I have for actual sewing. So this weekend I deliberately resisted computer temptation and threw myself back into finishing my UFOs, most especially the Tomten sweater hoodie and Ottobre "Pupu" overalls from the Stripes and Wales outfit for my sweet toddler:

Stripes & Wales Sweater & Overalls toddler outfit sketch

The overalls are almost done--I had cut them out ages ago and then put them aside while I waffled over the design and construction for the front appliqué and back patch pockets. Little Z could care less about bunnies, so I knew I'd need to put a cat on the front for Maximum Toddler Overall Satisfaction. And my husband nixed the original heart-shaped back pockets, as he said they reminded him of those tight adult women's sweatpants with silly words on the butt.

I ended up cutting out bits of the cat's face freehand from scraps of my Triumphant Trousers (which, thankfully, shrank a bit in the wash and now fit PERFECTLY again... I even had someone stop me in a store this weekend to tell me how much she admired them, "they look tailor-made for you!" YES! I WIN!) ... I then used Light Steam a Seam 2 to stick all the bits down before stitching.

Considering how many new techniques I've been trying lately, I should probably join the Curves, Patterns & Pins technique-checking sewalong... For these little overalls alone, I've tackled:

  1. Making bias binding (using the cool infinite loop-style technique from the Colette Sewing Handbook)
  2. Flat piping (yes, the fear is gone!)
  3. Double topstitching (it's a bit wobbly, but serviceable--I'm using the triple-stretch-stitch since I couldn't find a topstitching thread in the exact color I wanted, and my edge-stitching and top-stitching presser feet.
  4. Appliqué, which I am super loving--it satisfies the artist in me. I must now resist the urge to cute-i-fy all items of clothing with little sewn-on bits.
  5. Hand embroidery (for the whiskers). My mom and aunt taught me some techniques back in the day but I had forgotten all the stitches and had to reteach myself from a book. BUT I do not advise trying to hoop a fabric with a pile--it leaves marks.
  6. Patch pockets with pretty piping. I drew them freehand because I was too lazy to use a template or the computer, and I wanted to go for a more "funky" look. With mixed results.

As for the sweater, even though I mostly knit on the subway or at lunchtime, I FINALLY finished the hood and got to the sleeves. I'm doing the sleeves in two colors instead of four because I didn't want to pay for eight balls of yarn when six would do--we'll call it a design feature!

Luckily it's gigantically huge on her--she'll be able to wear this thing for a while yet!

Striped Toddler Tomten Jacket in progress

Isn't she the cutest little elf?

Striped Toddler Tomten Jacket in progress

And here's the flat view:

Striped Toddler Tomten Jacket in progress

If all goes well, these will be done very soon and I'll move on to Joan blue bow dress overload!

So, how about you, Polka Dot readers: tackled any UFOs lately?

P.S. Bonus cat-related project photo--here's "Vincent", a stuffed blue wool tweed cat I made for my mother-in-law Gail for Christmas back in 2008 (pattern from the Denyse Schmidt Quilts book), shown here with Gail and her sweet cat Flo.

Vincent the Blue Tweedy Cat

LinkWithin

Related Posts Plugin for WordPress, Blogger...