Saturday, July 13, 2013

Delancey Try-On: Too Snug or Just Right?

Delancey Cardigan Try-On

Chevrons and stripes both rank high on my crafterly happiness list and this cleverly-constructed sweater has been a joy to knit so far. The big question, though—does it actually fit me?

Pattern: Delancey Cardigan. You may recall that the Delancey cardigan by Alexis Winslow was the winner of my indecisive "Sweater Girl Showdown 2013." Here was my original concept sketch:

Sweater Girl Showdown 2013: Which Cardigan to Knit Next? (Polka Dot Overload)

Ravelry link with all details: Here.

Yarn: Knit Picks Merino Style (discontinued) in various colors from the stash. A lovely DK-weight merino that I had lying around. Sadly I lost one of the colors I was using midway through (left it on a subway or airplane during a business trip) so you can see that the stripe pattern on the top back is gray/periwinkle/gray instead of gray/periwinkle/purple. Oops!

Size: 33" bust. The biggest challenge was deciding what size to knit—the 33" finished bust or the 36" finished bust. I have a 38.5" bust and 29.5" waist but I like my cardigans snug, with at least 2-3" of negative ease at bust and waist (see my old post on sweater fitting for more on this).

BUT because of the clever chevron pattern, there is no waist shaping here—the bust and waist are the same size. So if I went with the 36" bust, the waist might have been quite baggy. I wrote to the designer and she gave me some fantastic advice—based on my preferences and yarn she suggested I try the 33", as the bias fabric makes the cardigan quite stretchy.

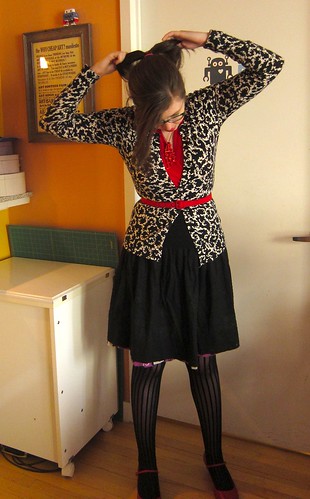
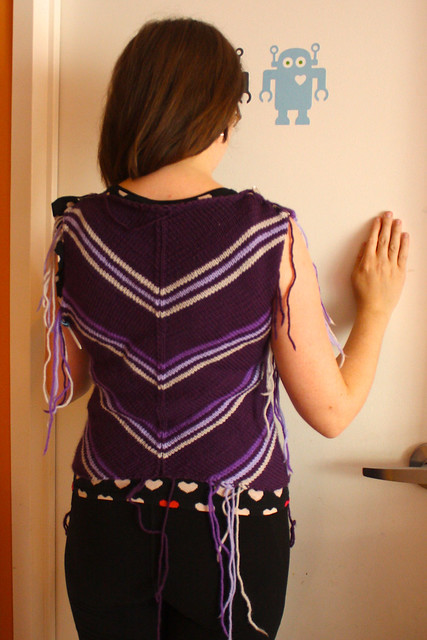
So readers, what do you think so far? The back looks perfect to me (see top) but the bust area seems to be pulling away to the side (note that I've only knitted one of the side fronts, the other isn't done yet):
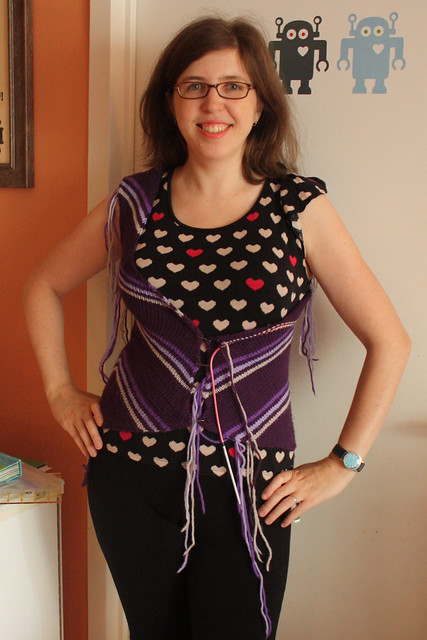
Delancey Cardigan Try-On

And the side "seams" aren't really straight when I pin the cardigan shut in front:
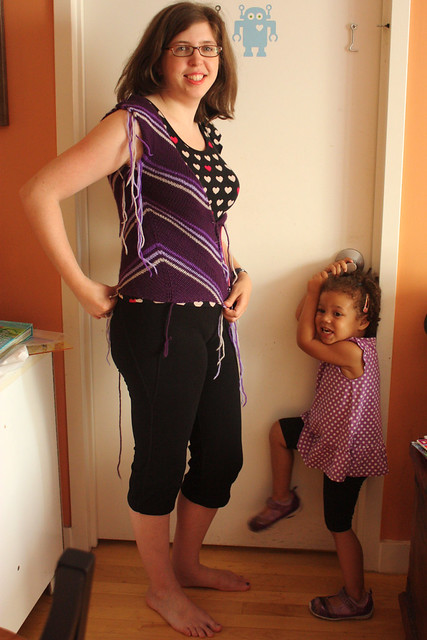
Delancey Cardigan Try-On

That said, there is going to be a button band and shawl collar in front which will add a little extra front width.

My verdict: Keep going and hope for the best. I think with a little blocking and the bands/collar, it'll be just perfect, and it may loosen up a little with a handwash and wear, too.
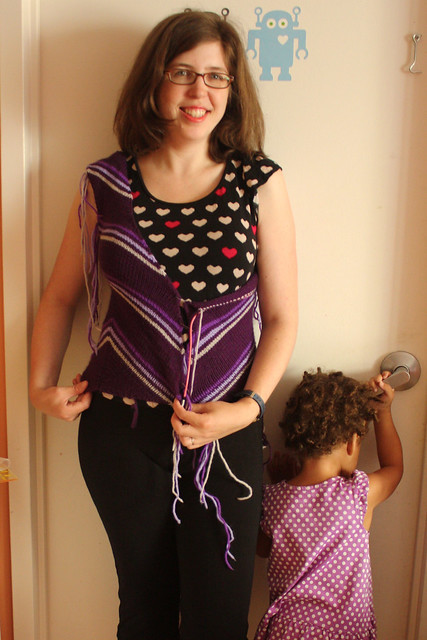
Delancey Cardigan Try-On

Speed notes: I swear I haven't been knitting MORE often than I did last year but I must be knitting FASTER. Not only is my Delancey more than half done, I just finished a baby cardigan for a friend two days ago. AND I just started on a Tulip for my niece-to-be yesterday and I'm already down to the chest:
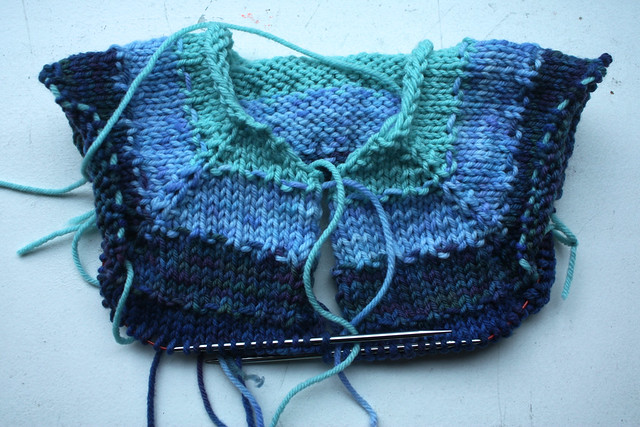
Tulips Cardigan Progress

Hello, my name is Mikhaela and I am a cardigan knitting (and wearing) addict.

I think my new speed is from switching away from plastic to metal needles. I had some serious repetitive stress injury issues with my hands back in 2008 and had switched to using plastic and sometimes wooden needles... and they are just MUCH SLOWER. This year I decided to switch back to metal but just be careful—to knit in small chunks and stop if my hands start bothering me even the slightest.

So, what do you think—too tight or just right?

P.S. By the way, if you're interested in making the Delancey yourself, there was a Ravelry knit-along last year with accompanying blog posts on the Sweatshop of Love. It also comes in a plus-sized version (up to a 58" bust).

P.P.S. In case you're wondering why both Z and I are prancing around in black bike-short-esque things, we were about to go for a family bike ride. We went down to Brooklyn Bridge Park and rode the carousel four times until I got motion sick and had to let my husband take her around for the fifth ride. Phew!

Friday, July 12, 2013

Unusually Unselfish Knitting: Baby Surprise Jacket II

Baby Surprise Jacket II

There's nothing like a hot summer day to snuggle your baby in a ... really warm wool jacket. Er.

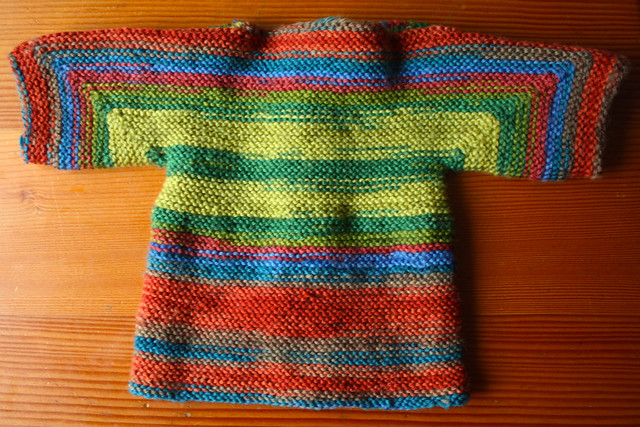
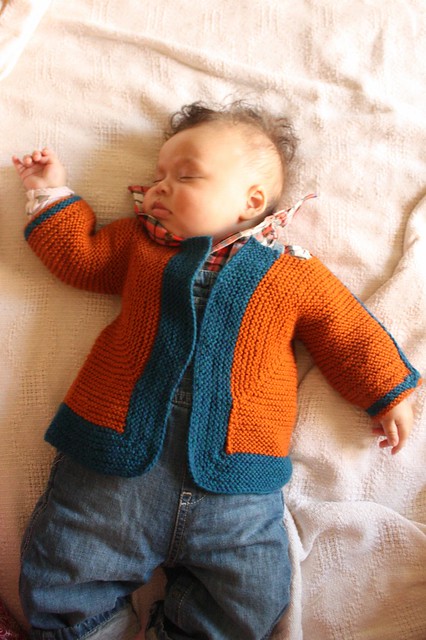
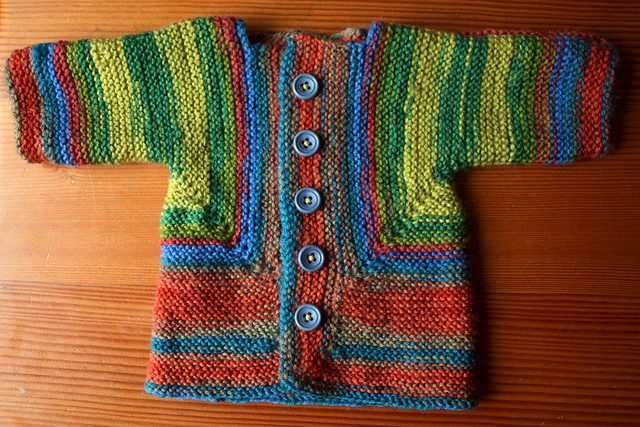
Anyway, I knit this little garter-stitch cardigan for a friend who had a baby boy last week — she's bringing him over this evening and I can't wait to meet him! I'm hoping it's big enough that he can wear it in the fall.

This is the first time I have EVER made anything more serious than a hat for someone ELSE's baby, but said baby's mom is a knitter herself, so I know she'll appreciate it in the way only a fellow maker-of-garments-that-take-forever-and-ever-to-make can.

The pattern: Elizabeth Zimmerman's famous Baby Surprise Jacket from Knitting Workshop. I knit with a worsted yarn in hopes of achieving a 3-6 month size for this fall/winter.

The yarn: Classic Elite Liberty Wool, a fabulous soft squishy self-striping washable wool, purchased on my birthday trip to the Hub Mills yarn store.

The buttons: High-quality blue buttons from Pacific Trimming (at least, they LOOK really nice and for 75 cents each, they must be high quality, right?)

Time taken: A month (but I was knitting and making lots of other things at the same time).

The exhaustive Ravelry details: Here.

Baby Surprise Jacket II

This jacket is known as the surprise jacket because while you are knitting it, it looks like an amorphous blob of yarn nonsense...

Baby Surprise Jacket II in Classic Elite Liberty Wool: almost done!

And then you do some origami magic and seam up the shoulders, and surprise! It's a jacket. I actually made one for Z three years ago when I wasn't nearly as confident a knitter... and totally left off the buttons and buttonholes. Oops!

Baby Surprise Jacket

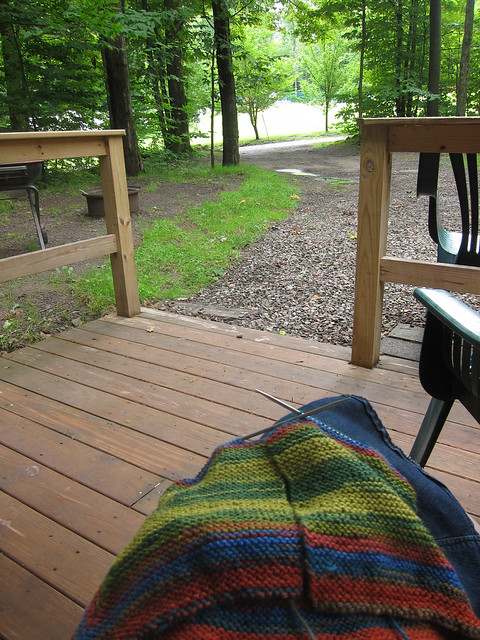
Back then I kept getting confused by the cryptic pattern and looking up reviews and notes... this time it was a breeze and a great way to relax on the family camping cabin vacation we took in the Poconos last week:

Relaxing and knitting

In sum: pure baby sweater happiness!

In other cardigan current issues, I'm still knitting the fantastic chevroned Delancey cardigan for myself (try-on photos soon)... but I have another urgent unselfish baby sweater to make first, as I'm attending a baby shower in just a month to celebrate the impending arrival of my niece-to-be!

I bought the unisex #4 color kit for the Dream in Color Classy Tulip Sweater in blues and greens from Eat.Sleep.Knit:

Luckily my niece-to-be will reside in Maine, so she'll have an endless need for warm wooly things!

So—what was the last thing YOU made for someone else (and not you or your immediate household?)

Tuesday, July 9, 2013

Teaching the Girls to Sew! (Fun Dolls Eyelash Bunny)

Polka Dot Overload: Teaching the girls to sew

Don't worry readers, I didn't give my just-turned-three-year-old a needle and a pair of sharp shears. But I did let her use toddler-appropriate kiddie scissors, and I was really impressed with how carefully she cut out her pattern pieces!

Let me step back for a moment.

Twenty-three years ago my brother (then seven) and I (10 at the time) got a really fantastic Christmas present from our sewaholic mom -— doll-making kits. We spent a couple of days sitting around the kitchen table carefully dying our doll fabric with tea, cutting out our pattern pieces, embroidering the faces, sewing on hair, and stitching the seams by hand (see photo at top). It was awesome, and I loved every minute!

My mom still has "Annie," one of the finished dolls at her house.

Anyway, when my niece T came to stay with us for a week recently, she asked if I could help her fix a split seam on her travel pillow. Instead of sewing it for her, I handed her a needle and thread and showed her how to use them... and was impressed at how quickly she figured it out and sewed a sturdy little seam on her pillow.

T was so excited by her success, I decided to give her a more fun project. I gave her a little Japanese doll sewing book and she picked a moderately challenging doll pattern. Little Z couldn't be left out, so I promised to let her make the same pattern.

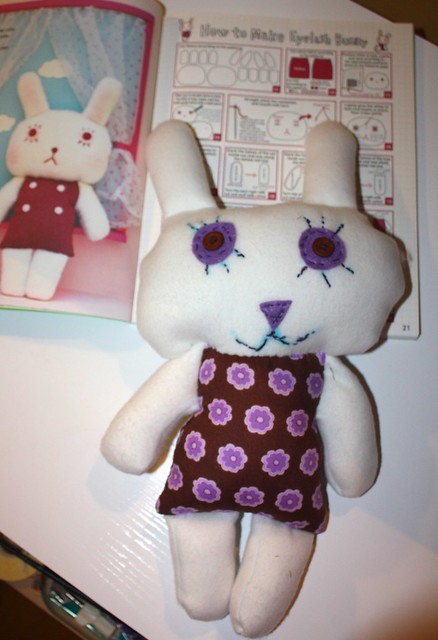
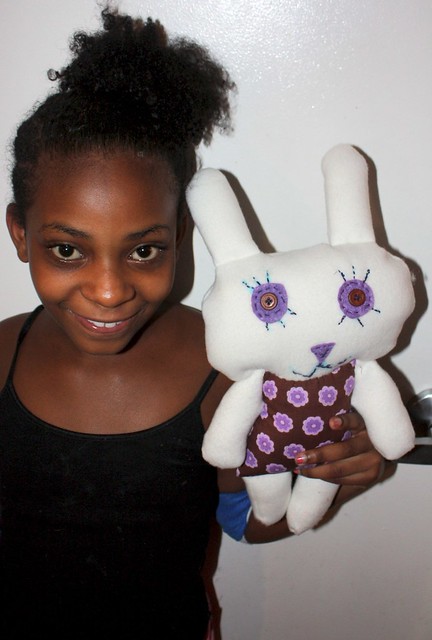
The pattern: "Eyelash Bunny" from the book Aranzi Aronzo Fun Dolls (Let's Make Cute Stuff). It's a fantastic book full of cute, modern-looking little dolls with excellent comic-book-style instructions. The eyelash bunny in the book is sad, but T decided to make her happy and add button eyes:

T's bunny is happier than the pattern called for.

Fabric & notions: I let the girls choose fabrics from the stash.

  • T made her bunny body out of a stretchy white fleece from an old blanket, and the dress from a lovely floral cotton I had picked up a few years ago in Portland at the Bolt modern fabric shop.
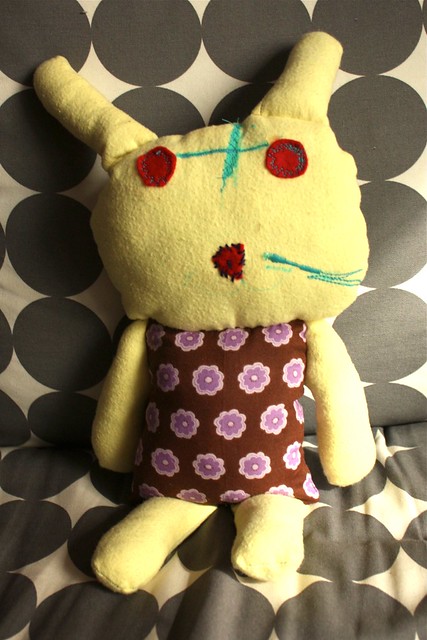
  • Z chose some yellow cotton flannel left over from diapers my mom made her a few years ago, the same floral for the body, and some red felt for eyes.

    Z's finished bunny, face 1

The process:

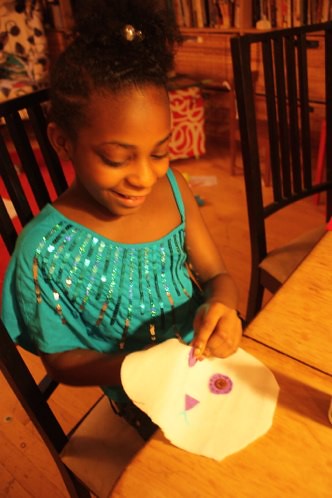
  • T's bunny (aka "Mini-Me"): T had never sewn before, but took to it very quickly. She cut out all her own pattern pieces and fabric, did all of the stuffing and most of the sewing. She had a few moments of impatience with the hand-embroidery parts...

    Sewing on the bunny's face...

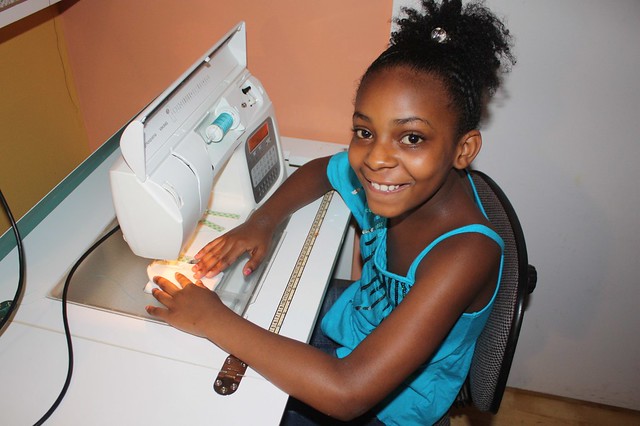
    ...but absolutely LOVED "driving" the sewing machine and very quickly learned to back-stitch, pivot and the like: Project Runway, here she comes...

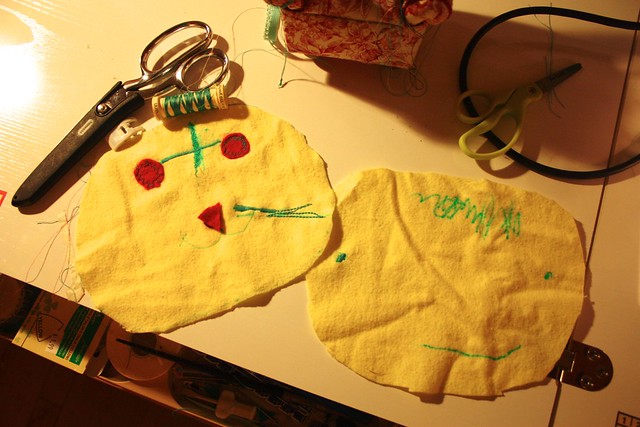
  • Z's bunny (aka "Foo-Foo"): Z obviously couldn't do as much as her big cousin, but she made quite a try. She cut out a few of the paper pattern pieces, cut out the felt eyes and nose and glued them on, and drew a second face (that I embroidered for her):

    Little Z's doll in progress

    Her Nana Gail helped her cut out most of the fabric pieces, T stuffed the doll and I sewed it together.

I've taught some adults to knit before but this was so much more fun—the girls were so very excited and enthusiastic and proud of their creations! (And I found it so much easier to be really really patient and helpful with them... I think sometimes when I've taught adults I get frustrated if they don't pick things up quickly.)

Bunny love.

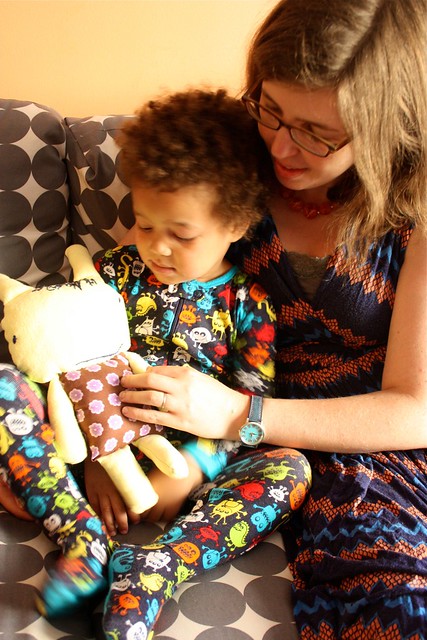
Z and me with her finished bunny doll

I promised T that next time she visited she could sew a ruffly (and sparkly) skirt! I think she's really caught the sewing bug...

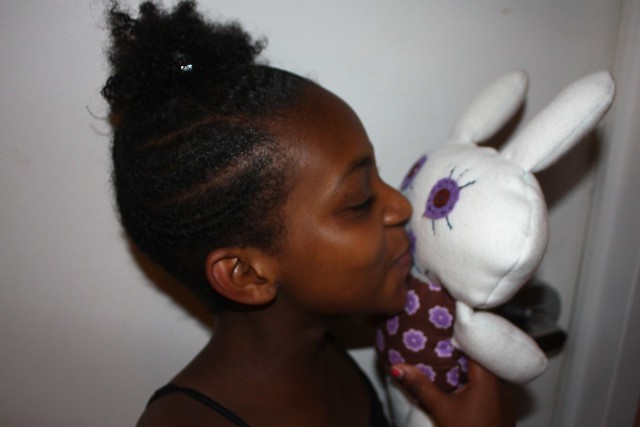
T and her finished bunny doll

Have you ever taught anyone to sew? What was your experience?

P.S. I finally got around to setting up a Facebook page for Polka Dot Overload... will try and cross-post everything there if you prefer to follow me that way!

Friday, June 28, 2013

Shoe Showdown Survivors: The Colorful Comfy Flats Verdict!

Softwaves Wave Mary Jane comfort flats in Citron: Beautifully made and on sale for $85, but too small for my giant feet!

So one of my most commented on recent posts was the "Colorful Comfort Shoe Showdown" where I was trying to find some bright flats to buy with a Mother's Day gift certificate from my mom. You all seem REALLY opinionated about footwear — which makes sense since shoes are one of the few things most of us CAN'T make for ourselves. So I thought I'd report back on the results of my mission of comfort shoe desperation.

In the end I bought three pairs of colorful flats (and returned one), winding up with two comfort shoe winners. Here's the scoop:

#1: Softwaves Wave Mary Jane leather comfort flats in Citron. (pictured at top of post).

  • Pros: Beautifully made, a really unique vintage-inspired style (one of many! I drool!), serious comfort construction and arch support, fabulous color.
  • Cons: The largest size available — a European 41 — was at least an inch too small for my big feet. I wear a 41 in some other European-sized shoes (and a 10 or 11 in most American-sized shoes), but I think I'd need a 42 for these.
  • Do they pass the subway stairs/playground/long NYC walks test? They would if they fit.
  • Result: Wistful shoe sadness. So I exchanged them for a little dose of polka dot happiness...

Polka dot comfort shoe win!

#2: Ahnu Karma flats in "Mood Indigo"

  • Pros: Well-designed cross-strap flats perfect for summer and on sale. Great arch support and a really comfortable breathable insole for your bare feet. Also: internal polka dots and a bright orange sole and spiral stitch detail.
  • Cons: These "yoga-inspired" shoes mostly come in the kind of subdued/earthy/natural colors I generally avoid. Even this colorway is not as bright as I was going for (except for the topstitching and sole).
  • Do they pass the subway stairs/playground/long NYC walks test? Oh yes yes yes!
  • Result: They are so comfortable and seem to go with MANY things. I have been wearing them almost every day since they arrived and there was no break-in period — just instant foot happiness. I REALLY wish they came in bright colors!

#3: Tsubo Aftenia fashion sneakers in "claret" and "silver"

  • Pros: Bright red, cushy insole, cute pointed-ish toe but not uncomfortably pointy, cheap because they were discontinued. And I had a pair of them in brown already so knew they'd be a win.
  • Cons: The insole is well cushioned, but not really shaped for firm arch support. The insoles don't really wick moisture, so they are fine with tights or socks but get a bit slippery/blistery inside after long walks and need to be broken in at the heel.
  • Do they pass the subway stairs/playground/long NYC walks test? Only with socks.
  • Result: Moderate shoe happiness. Z calls them my "ruby slippers." Here they are in action back during Me-Made May (sorry for bad lighting, they truly are BRIGHT red):

Me Made May 29: Bright Hummingbird with Jeans

That's it for my shoe-buying budget for a good long while, but next time I have room in the closet/budget for an accessory hunt, I'm going to check into some of the other new-to-me brands suggested in the comments.

What are your favorite "walk for miles" comfort shoes?

P.S. Forgot to mention... I stupidly broke my toe two nights ago while sweeping up fabric scraps (stumbled and stubbed it on a chair leg). There's not much to be done for a broken toe except "buddy taping" it to the neighboring toe, but the doctor said to make sure to wear roomy, comfortable flat shoes with good support, and the Ahnu Karmas seem to be the only shoes I can walk in without crying at the moment!

**Disclosure: Actions you take from the hyperlinks within this blog post may yield commissions for polkadotoverload.com (and quite likely spent on yarn or fabric to be blogged here!).

Tuesday, June 25, 2013

Done: "Swim Away!" Wax Print Dress (Oliver + S Ice Cream Dress)

"Swim Away!" African wax fish print dress (Oliver & S ice cream dress)

This little dress has been swimming around my head since back when I was pregnant and bought this "Super Deluxe Veritable Wax Print" fish fabric for $1.99/yard at Sew-Fisticated Discount Fabrics.

So I'm feeling quite pleased with myself for finally completing it before my daughter outgrew the largest size in the pattern envelope (or, say, went off to college!). I was nearly derailed by a few disasters—crappy yoke fabric that shredded like spiderwebs, a loop turner that refused to turn loops...

"Swim Away!" African wax fish print dress (Oliver & S ice cream dress)

But I triumphed in the end and Ms. Z squealed in excitement this morning when I showed her her brand-new "Swim Away!" dress.

It'd been a long time since I made her anything, and I had forgotten how soothing sewing simple relaxed-fit children's cotton clothes can be. Even when the construction techniques are complex, there's no fitting or alterations to make me cry and swear. I just make everything a bit too big, and know she'll eventually grow into it. Only it's not really all that big. Oops!

"Swim Away!" African wax fish print dress (Oliver & S ice cream dress)

The pattern: Oliver + S Ice Cream dress, View A. (Though around here we're calling it the "Coconut Cream" dress — my daughter has life-threatening dairy allergies, so she was very alarmed when she saw the little girl on the envelope holding a cone of "mean allergies" in her hand):

Oliver + S Ice Cream Dress and Family Reunion Dress
Pattern Description: Child's color-blocked dress with notched yoke, cut-on sleeves, color-blocked patch pockets and double hem panel.

Pattern Sizing: I bought the 6M-4T envelope, and made up a size 4T (tracing the pieces with my beloved Bosal paper in case I need the smaller sizes again).

My daughter is a big girl—just turned three but already 37.5" tall and 37 pounds in weight... so the 4T fits just right with not very much room to grow, alas! So I'll just have to make her wear it every day this summer. Right?

"Swim Away!" African wax fish print dress (Oliver & S ice cream dress)

Fabric & notions Another stash win!

  • Super Deluxe Veritable Wax Print" fish-patterned cotton, $1.99/yard at Sew-Fisticated Discount Fabrics. Really soft and gauzy, not stiff at all. Used a bit less than a yard's worth.
  • Scraps of turquoise Kona cotton leftover from a quilting project. The pattern calls for a whole yard but with very careful single-layer cutting I was able to squeeze it out of just half a yard with miniscule scraps remaining.
  • Extra button from a sweater I donated to charity long ago.
  • So, a free dress, right?

"Swim Away!" African wax fish print dress (Oliver & S ice cream dress)

Pattern alterations or any design changes you made: None. This was a pure, relaxing "sew exactly as directed" project.

Instructions and Construction: Are great. Oliver + S patterns always make me feel so smart, like I'm taking a mini sewing class. I don't find them easy or quick to sew, but they have such fun details and atypical construction, they are a joy to put together. And I do feel like I've learned skills here that could easily apply to a fitted dress for myself!

What I love about the pattern: Um, everything. It's such a great style for a little girl on the go.

  • The colorblocking.
  • The adorable notched patch pockets (perfect for rocks or toy fish, which is what she put in them this morning).
  • The little bias button loop closure.
  • The cut-on sleeves.

"Swim Away!" African wax fish print dress (Oliver & S ice cream dress)

Successes:

  • First bias button loop.
  • Lots of nice even edge-stitching (thanks, edge-stitching foot!)

Near disasters:

  • Bias button loop agony. So I have a loop turner and have made spaghetti straps and such with it before, but this thick Kona cotton did NOT want to turn inside out. I literally spent 40 minutes struggling with the loop turner before I finally got it to cooperate. Which is crappy when I generally only have 30 minutes a day to actually sew.
  • Fabric of spiderwebs fail: I originally intended to use a bright red cotton poplin remnant I bought at Mood for the solid color contrast. Except when I went to even out the ends, my FINGERS WENT RIGHT THROUGH IT. Like it was made of butter. Or spiderwebs. Or spiderweb butter. WTF?!:

    Fabric Fail - weird red poplin fell apart when I gave it the slightest pressure, my fingers went through like butter.
  • Toddler non-cooperation: She wanted to run around in the dress and jump and lie on couches, but I could not get her to just look straight at me and smile. Could NOT. Oh well!

Wear for: Running around all summer and looking freaking adorable. Also for relaxing on polka-dot couches:

"Swim Away!" African wax fish print dress (Oliver & S ice cream dress)

P.S. "Swim Away" is of course a Finding Nemo reference... I never really liked or appreciated that movie until I had a kid with severe chronic health issues, but now I am kind of obsessed with it!

P.P.S. I would like to take credit for the polka-dot couch, but I just bought the fabric. My amazing mom actually covered my old couch for me. In like, an hour. Thanks Mom!

Tuesday, June 18, 2013

Inspiration: Pretty, Pretty Peplums!

Pretty Pretty Peplums collage

"Pretty Pretty Peplums" inspiration featuring a Modcloth striped dress and top and a Stop Staring dress

With the Cake Patterns Hummingbird Sew-Along humming along on day 2, it's time to cut my third Hummingbird top, and I was on the hunt for a little inspiration on what I might do differently this round. Man do I love a peplum...

You might guess I was leaning towards a dress version... maybe with stripes...

And I was. Until I remembered that my daughter's third birthday party is this weekend and I only have two actual sewing evenings before both my parents and my husband's mother and young cousin come to stay in our little apartment for several days...

So I think another top it is—probably View Blue, which has a deep wide neck, with a woven dickey and cuffs. (A little step towards making my first button-down shirt, but way less commitment!). Here's Steph's version for an example.

I'm doing mine in a nice chevron jersey from my recent trip to Mood:

Pinka and purple chevron rayon/lycra knit large print

And the dickey and cuffs in some scraps of sheerish black Swiss dot lawn from the Stash that Must Be Busted, left over from my self-drafted reversible shirred skirt:

Me Made May 7: Black, White & Red All Over

I hope sheerness won't be an issue here... we shall see!

P.S. On another note, this just made my day. I have a bad case of laryngitis and have been very cranky about not being able to talk properly. I got home today and my husband had washed a recent fabric purchase (sorry, can't tell you what it's for! sssssssh!) and put it on my sewing cabinet with this little note:

Pontes and poplin from Mood

So are you pro or anti-peplum?

Sunday, June 16, 2013

Sketchbook: Knit Franken-dress Ideas

Polka Dot Sketchbook: FrankenDress Ideas

Not going to discuss the state of my sewing queue right now or all the things I WISH I had time to sew (Bonny and a Bombshell swimsuit and a Hummingbird flounce skirt and peplum dress and some Oliver + S for the little one and a top-secret project and my vintage patterns and... !).

But here are some ideas that have been bumping around my head and sketchbook for colorful Franken-patterned dresses I don't even have patterns for.

I love them both but am kinda leaning towards the second one (blue and green version) because color-blocking and flutter sleeves both rock my little sewing world.

Which one would you sew if you were me?

Thursday, June 13, 2013

BlogLove Me Before It's Too Late!

Follow on Bloglovin

Just a quick note encouraging you all to follow my blog with Bloglovin' before Google Reader goes dark on July 1. (You needn't re-follow all your blogs individually, either—you can import subscriptions from other readers).

I know Bloglovin' has some bugs and is missing a few features—the ability to save posts to read later, for example--but I prefer it to the other options for one huge reason: it lets you read actual blog pages in their own design, the way they're meant to look... and it gives bloggers pageviews.

Why do pageviews matter? Many bloggers rely on people actually viewing their sites (instead of just the text and photos from a single post) to earn money from ads, sponsors, Etsy shops and links. When you read a post through something like Google Reader, that didn't count as a pageview. So every time you view an actual blog, or read it through Bloglovin', you are helping to support your favorite bloggers!

I don't make MUCH money from ads on this blog, but I have noticed since folks started switching over to Bloglovin' my pageviews have doubled (30,000/month average now). And instead of $10/month from Google Adsense, I'm seeing $30 or more. (That may not sound like much, but I live on a REALLY tight budget, and that's guilt-free money to spend on sewing and knitting supplies to blog about!)

So again—please follow me on Bloglovin'!

Have you all made the switch? Or are you going with a more Reader-esque option?

P.S. I believe this also marks the death of Google Friend Connect, which was linked to Google Reader and is being superseded by Google Plus? RIP, Friend Connect! I guess I'll remove it from my sidebar at some point...

P.P.S. If you are a blogger, even if you don't make the switch to reading blogs on Bloglovin', you should still claim your blog over there to have more control when people subscribe to you that way!

Wednesday, June 12, 2013

My 3 favorite sewing tools (that aren't actually sewing tools at all)


The non-sewing tool I couldn't sew without: an LED headlamp

Good thing you all can't watch me while I'm actually sewing. Because when I'm attacking a pattern I generally look less like this:

Vintage postcard image of woman sewing

And slightly more like this:

WPA poster: Pennsylvania miner
WPA poster from 1930s, click for more info

What can I say? I live in a poorly-lit NYC-sized apartment and I cut and sew on my dining table. A long time ago I did buy a lovely color-correcting Ottlite sewing lamp (similar to this desk one currently on 50% off sale), but I have no idea what happened to it.

And I don't need a light that sits in one spot—I need good sharp light EVERYWHERE when I'm, pressing, cutting, hand-sewing, embroidering and more.

So one day I got frustrated while trying to thread my serger (remember—always UNPLUG while threading and watch that KNIFE!), grabbed the LED headlight I use for camping...

And suddenly I, well, saw the light.

Now I always keep a headlamp in my little sewing cabinet and I'm fairly certain I swear at least 40% less while hemming, changing the presser foot or even unpicking dark stitches on dark fabric. Which brings me to:

My 3 favorite sewing tools that aren't sewing tools at all:

  1. A good LED headlamp with long battery life for shining light on tricky sewing tasks. I use this bright red one but sometimes borrow my husband's boring gray one (I think it has stronger light power).
  2. A roll of 1/2" double-sided mounting tape to use as a removable seam guide for even-width seams. (I can't use magnetic seam guides on my computerized machine).
  3. Ceramic cups and bowls for pattern weights. I learned this from my grandmother Melba who once laughed when she saw me slowly pinning my pattern and fabric together before cutting. (As my mom put it "She scorned the use of pins... a few upside coffee cups on the pattern were enough.")

    Of course you can buy nice colorful pattern weights or use big flat metal washers, but... I like my cups.

So: What's your favorite non-sewing sewing implement?

**Disclosure: Actions you take from some hyperlinks within this blog post may yield commissions for polkadotoverload.com (quite likely to be spent on more patterns, yarn or fabric for me to blog about!).

Tuesday, June 11, 2013

DONE: Short striped & piped Hummingbird skirt (Cake Patterns #0289)

Cake Patterns Hummingbird Orange Skirt Collage

Until I made this skirt, I hadn't inserted an invisible zipper in EIGHT years. It's probably been just as long since I wore short skirts regularly, too—I got into a rut in 2005 when I decided all skirts MUST BE KNEE LENGTH.

But that is old news now because I LOVE my new Hummingbird Orange denim skirt AND I inserted the invisible zipper with no issues on the first try with help from a little video tutorial linked in the pattern.

But screw zippers. What I really love about this skirt is the fit. Which is, well, PERFECT.

Hummingbird Orange short piped denim pencil skirt:  Pockets & piping

And now that I have a perfect fitting woven skirt, it just emphasizes how ill-fitting most of my RTW woven skirts are—gaping at the back waist, droopy in the rear.

In fact, while wearing my Hummingbird peplum tops (and now the skirt) I've had a number of people spontaneously ask me "Did you lose weight?"

While the body image warrior in me wants to be cranky and ask why that should be a compliment, I do think it points to the perks of wearing well-fitting, flattering clothing. (And no, I haven't lost weight—in fact I've gained quite a bit thanks to oral steroids I had to take while I was ill. But thank you anyway.)

I also love:

  • The smartphone-sized panel pockets, just right for my so-old-it-can't-run-any-apps first generation Apple iPod Touch. Of course I lined my Hummingbird Orange pockets in, well orange:

    My Hummingbird Orange has orange pockets!
  • My striped piped seams (try saying that five times fast)—they look like a dotted line! Yes I should have made them more even and no, I don't care. I cut 1 1/2" wide strips, pressed them in half, and basted them to one edge of the fabric (raw edges to raw edge) before stitching the seams:

    Applying flat piping to my Hummingbird Orange Skirt

Anyway, on to the juicy details:

The pattern: Cake Patterns Hummingbird Peplum Top and Straight Skirt 0289. (Disclosure: I draw illustrations and flats for Cake, but I don't get paid to sew, blog or otherwise promote Cake!)

Pattern Description: Hummingbird view "Orange" woven skirt with no gape panel pockets sized for smartphones, back zipper and simple straight waistband. Optional back flounce, aka Hummingbird "Pink". (There's also a knit top with sleeve and neckline variations and optional dickey and cuffs which I have made twice already.)

Pattern Sizing: Full hip sizes ranging from 35"-57", with waist size cut by actual size. I cut the size 40" with a 30" waist. (My full hips are 38.5" and my waist is 29").

There is a "fit check" step in the instructions where you baste the side seams to check and adjust fit, and I ended up taking in the waist by about 3/4" on each side (or 3" total), the hips about 1" (4" total) and the waistband about 3". This is mainly because I was working with a stretch woven—I think in a plain woven I would have taken out half that. After that, it fit PERFECTLY and I made no adjustments to the darts or anything else.

Hummingbird Orange short piped denim pencil skirt:  Back view

The skirt is designed for this side-seam adjustment, and can be taken in up to 1" on each piece (4" total) without distorting the pocket design. Here's a photo of me pinning the waist and hips in to fit—can you see the chalk and pins?

Hummingbird Orange: Pinning the side seams to customize fit

Fabric: All from the stash, aren't I a good girl?

  • Dark pinstriped black stretch denim I've had since high school—less than a yard.
  • Scraps of orange stretch cotton sateen for the pockets from a $1/yard FabricMart sale three years ago.
  • Bits of gray and white cotton/lycra blend knit, $6/yard from Spandex House a long time ago (also used for panties and my Tiramisu test top).

Pattern alterations or any design changes you made: I added flat knit piping to the front and waist seams to create a dotted line effect. If the piping hadn't been so uncooperative and shifty I would have gone all out and done the pockets and side seams too, as in this lovely Milly skirt.

Wear for: Work (with flats or boots) or weekend (though maybe not going down a slide on the playground or riding a bike?) and definitely for a date with the husband.

Cake Patterns Hummingbird top and skirt

Successes:

  • My first invisible zipper in EIGHT years. Smooth and perfect!:

    Hummingbird Orange closeup back flat view
  • First time attempting flat piping—it totally works, even though it's not perfectly even.
  • Second waistband EVER. (I used a hook and eye closure).
  • First time sewing with stretch wovens. I used a small zigzag stitch (1 mm wide, 2 mm long) for most seams to prevent popping.

Cake Patterns Hummingbird top and skirt

References used (in addition to instructions of course):

I can't wait to make my next pencil-style Hummingbird "Pink" with fancy back tailfeather flounce during the sewalong (join us! orange envelopes are in my House!), in a nubbly turquoise linen blend from ancient stash.

Hummingbird Orange short piped denim pencil skirt:  Pockets & piping

So, do you wear short skirts? How short is too short for work (or equivalent social settings?)

P.P.S. Notice the new red flats, after my agonized blog post on my search for bright and comfortable shoes? Little Z calls them my "Dorothy shoes!"

LinkWithin

Related Posts Plugin for WordPress, Blogger...