Tuesday, March 13, 2012

$1 a yard, pt. 2: Things I have made with cheap fabric!

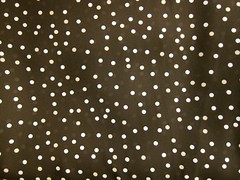
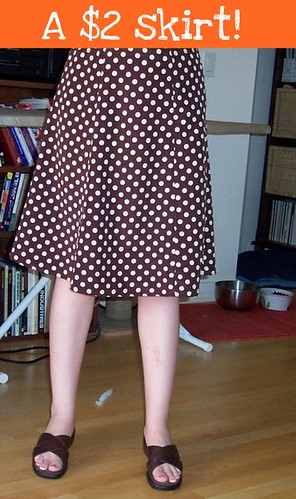
Brown polkadot skirt

Polyester polka dot overload, circa 2005.

Since cheap fabric was such a popular topic with y'all, I thought I'd follow up with a few things I've made with cheap fabric...

But first, I can't believe I forgot:

Another cheap fabric PRO: Bragging rights.

Because when someone says "oh, I LOVE your skirt/dress/trousers/culottes/sequined jumpsuit", what could be more fun than saying:

  1. "Oh this? I got it at the thrift store for $2."
  2. Except maybe "Oh this? I made it."
  3. Or better yet: "Oh this? I made it with some $2 fabric from the thrift store."

Anyway:

Some things I have made with cheap fabric:

  • A $2/yard polka dot poly skirt (Simplicity 5914), from Fulton Fabrics in Brooklyn. Made it in 2005, still wear often. Super fast, super fun (photo at top of post).
  • A superfast and satisfying $3/yard spiral knit print from Sew-Fisticated Discount Fabrics in Boston poly maternity skirt from a non-maternity pattern (Kwik Sew 3513). Wore it to oblivion while pregnant and postpartum, but it's way too big now (and rather pilly):
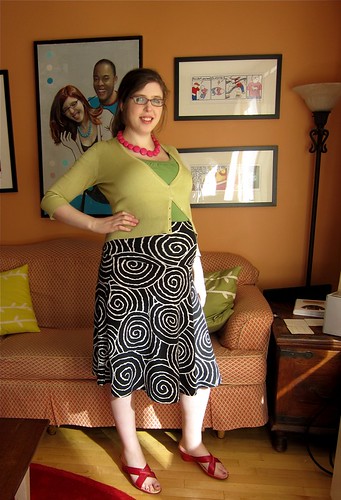
    Spiral Skirt: Front View (showing waistband)
  • A $1.50/yard full gingham self-drafted maternity skirt. Obviously unwearable at the present time. (And yes, I am pale as a corpse, but I'm cool with that.)
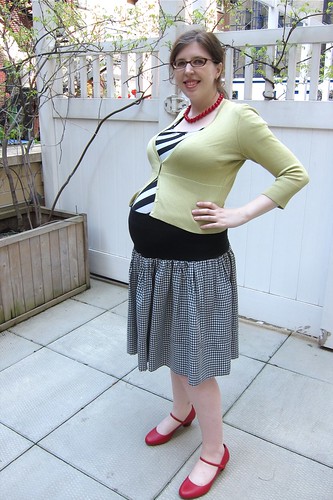
    My No-Pattern Rib-Yoked Full Gingham Skirt!

I was not struck down by any sewing deities as a result. They weren't the nicest things I've ever made... but they weren't the un-nicest, either. And I think full-ish skirts are generally a better bet with cheap un-breathable fabrics since they don't cling to your skin as much as tops.

More lovely cheap fabrics in my stash (not featured in the previous post)

  • Soft 100% cotton purple 70s-style floral apparel fabric, $2.99/yard. (Sew-Fisticated Discount Fabrics)
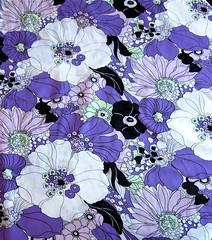
    Bold Cotton Lawn Floral (Purple, Black, White, Green)
  • African-style cotton wax prints, $1.99/yard (Sew-Fisticated again). No idea if these were made in the Netherlands or West Africa or China, but they're really soft and seem to be of good quality--I think the fishies will make a lovely simple sundress for my daughter, and the leaves/floral could be a Bombshell dress for me. (See also post and discussion at Miss Celie's Pants, "The curious history of 'tribal' prints.")

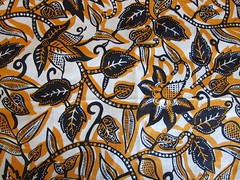
    African print cotton: red and blue fishesAfrican print cotton: Orange and blue leaves and vines.
  • $1/yard stretch cotton sateen from ridiculous Fabric Mart Fabrics online sale in 2010 (shown in hand, see also "In Defense of Orange"):
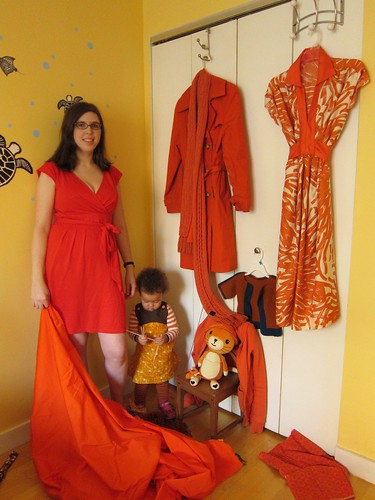
    IMG_8487
  • $2/yard iridescent purple poly/cotton shirting from "It's a Material World" (257 W. 39th St.).
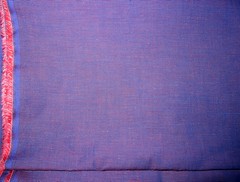
    Iridescent purple poly/cotton shirting
  • $3/yard super-soft lightweight turquoise cotton/lycra blend from Modeani (was across the street from "It's a Material World", but gone now, I think).
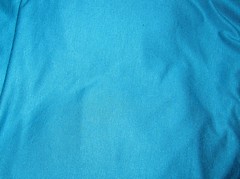
    Super soft lightweight turquoise cotton lycra
  • $3/yard B&W polka dot ombre-effect poly matte jersey (Sew-fisticated. Again!):
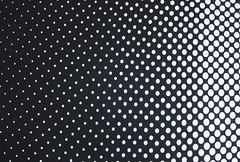
    B&W polka dot ombre matte jersey

And finally... a few cautionary words of sad warning on...

The perils of sewing with cheap fabric

:

So, remember how I said the discount Denver Fabrics wool-blend navy jersey in my color-blocked Sew Grateful Skirt was tissue-thin?
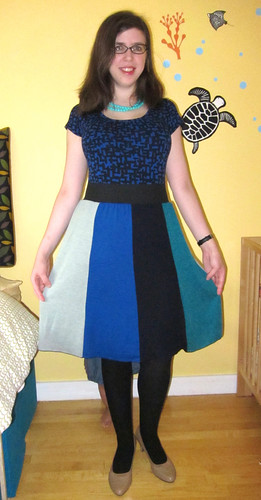
Sew Grateful Crazy for Colorblocking Skirt

Yeah, well, the second time I wore my skirt--even with a slip--the thinnest spots began turning into runs, like the kind you get in cheap nylon stockings.

This makes me incredibly sad, but I'm not sure whether darning is even worth it, the fabric is so thin in places. I don't know how I could really reinforce it without taking the whole thing apart, either. SUCH a bummer, because I love the look of it!

Sometimes, you get what you pay for.

So, let's hear your bragging--what's the cheapest thing you've made--and still gotten compliments on?

Monday, March 12, 2012

Mad Men: Joan Hair How To (+ How Done Up Do You Get for Garment Photos?)

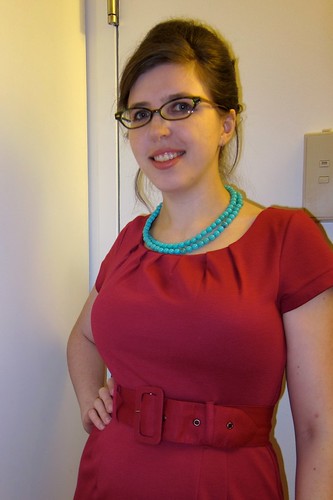
Joanie hair test for Mad Men Challenge

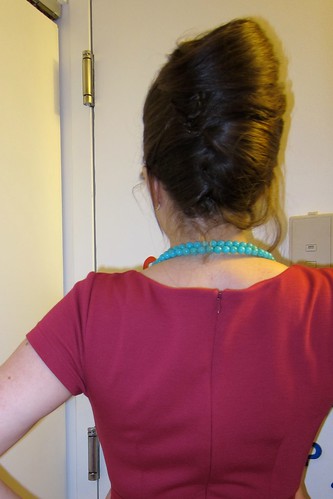
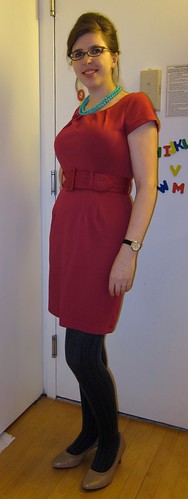
Teased-up 1960s hair: Yay or nay? (P.S. Yes, no amount of bobby pins could keep my hair from escaping this French twist)(P.P.S. No, I didn't sew this--it's just a vaguely 60s-ish contemporary doubleknit dress I thrifted recently)

Fellow sewists, some questions for you:

  • Does vintage sewing require vintage hairstyling? Do 60s hair and 60s dresses pair like a fine wine and cheese--or a Halloween costume?
  • How done up do you get for finished garment photos? Do you fancy yourself up with coordinating hair, makeup and accessories before staging an elaborate photo shoot on a weather-beaten bridge? Or do you throw your garment on fresh from the sewing table and snap a few quick pix with your camera phone, styling and scenery be damned?
  • Can you explain to me why what I thought was quite a chic and sophisticated vintage-style updo caused my husband to burst out laughing and use words like "outdated," "older" and "like my elementary school principal"? [Edited to add: Also, "Marge Simpson."]

Last time I attempted to learn to vintage up my hair, the underwhelming results (see "Wet Set Woes") so traumatized me that it took me two years to get up the courage to try again.

But I have finally regained my hair experimentation bravery, with the help of some of the Youtube video tutorials by Lisa Fremont-Street, Strawberry Koi Vintage and more that my readers so kindly recommended at the time.

I finally achieved curling success with a combo of LottaBody, water and overnight pillow curlers--I styled the results into a 1940s pageboy (which my husband LOVED, fyi) that lasted several days.

But I digress!

Joanie hair test for Mad Men Challenge

OK all you wiggly-dressed Mad Men Challenge-ers, here's...

How to Get a Joan Holloway-ish Updo Look:

The tools

  1. Rat-tail comb.
  2. Bobby pins in mind-boggling quantities.
  3. Hair pins—a lifetime's supply.
  4. Hair spray with a death grip hold.

Joanie hair test for Mad Men Challenge

The steps

  1. Use rat-tail comb to tease all hair from ends to roots, starting at the crown of the head, and working in small sections--result should resemble demented hair haystack.
  2. Smooth outside layer and begin shaping, pulling over to side back of head and securing with---
  3. Oh who am I kidding?
  4. Cry in frustration because you have no idea what you're doing, give up and ask an expert hairstylist for help.

Anyway, yeah. This was way beyond my rudimentary skill level. So I went to see Ricky at Avalon Salon on 112 Christopher St. He's awesome, and has been doing my hair (when I remember to drag myself into the salon every 3-4 months) since 2004.

Joanie hair test for Mad Men Challenge

He did show me how to do it step by step, but I'm not sure if I'll be able to get it right when I complete my dress.

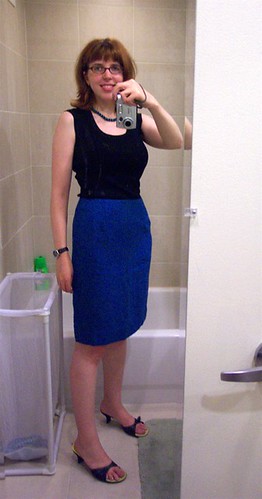
As for me, re: getting done up or fancy.. I started out photographing my sewing projects for Pattern Review bathroom-mirror style, as you can see with this lovely wool skirt circa 2005...

Blue Wool Tweed Pencil Skirt (sewn from Sew Fast, Sew East computer fit pattern)

And now I have a tripod and self-timer, and try to at least brush my hair and put on makeup and cute shoes and cheap costume jewelry. I'll admit that the exciting photographic antics of the Sew Weekly crowd (I'm looking at you, Oona and Kazzthespazz) sometimes make me feel ashamed of my boring apartment wall backgrounds.

Joanie hair test for Mad Men Challenge

But in my defense--I've got a toddler who can't be trusted not to run amuck while I'm messing with a tripod in a park.

So--what's your take? 60s hair yay or nay? Basic garment pix or fancy photo shoots?

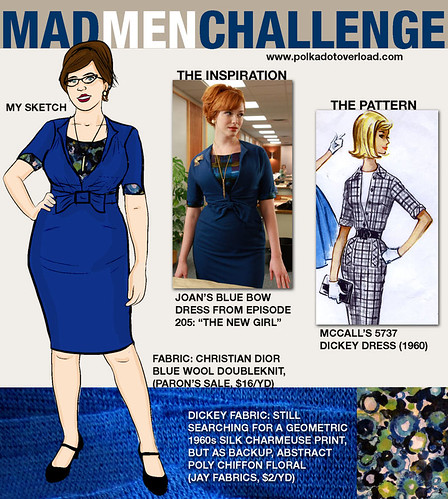
P.S. To recap--here's the sketch:

Mad Men Sewing Challenge Sketch: Joan Dress

Wednesday, March 7, 2012

$1 a yard! (Cheap fabric: awesome or icky?)


It's organza! It's pretty! It's colorful! It's $1/yard! It's.... polyester. Oh. But STILL! (Fulton Fabric in the Fulton Mall, Downtown Brooklyn, NY)
 
Got your attention with that post title, didn't I? But fabric addicts, I do apologize--I don't have any special insider news of a ridiculous new online fabric sale. (Though I do recommend an occasional browse of Fabric.com's Under $2.95 clearance section, where you can find nice apparel fabrics for $1.95/yard and sometimes just $1/yard.).

Mainly, I have some questions for you, like:
  • Do you often--or primarily even?--sew with cheap fabric? (And I mean CHEAP--$1-$3/yard, and quite likely of the polyester persuasion or even cut from old bedsheets).
  • And if so--why? Are you just trying to save money? Make laundry easier? Acquire fabric stash at speeds exceeding the boundaries of quantum physics? Avoid working with expensive, tricky-to-sew-or-treat fabrics like silk and wool?
Now, polyester has no place in my sewing/fashion fantasies. In said fantasies, I prance around in warm soft wool crepe dresses, slippery silk charmeuse blouses, rayon lycra polka dot tops and light and breathable cotton lawn skirts, all fabric acquired via diligent online or Garment District sale-hunting.
But put a nice polka dot or geometric print fabric in front of me with a big handwritten "$1/yard!" (or, let's face it, even "$3/yard!") sign and I LOSE ALL REASON and sense of fiber content.


Cheap/super-discount fabric PROS:

  • IT'S SO CHEAP. I mean, come on... we're talking $4 dresses... $1 skirts... $3 pants... my eyes glaze over.
  • CHEAP FABRIC MEANS NO FEAR.
    • No gorgeous fabrics languishing in the stash because they are just too precious and special to ever actually cut.
    • No obsessive terror as I sew/pin/fit. Who cares if I accidentally mess up my $2/yard polka dot polyester skirt?
    • No fear of breastmilk stains or toddler handprints all over my fancy new silk dress, or beautiful wool items eaten by clothes moths or accidentally shrunk down to doll-size in the laundry.
  • Cheaper (wearable?) muslins that are perhaps a better match with the actual weight/hand of your fashion fabrics.
  • We can't all find apparel-appropriate tablecloths and curtains or drive out to amazing estate sales. (I'm looking at you with jealous sewing stink-eye, you Sew Weekly sewists you!)
  • Have you noticed that even some pricey ready-to-wear designer duds aren't made from natural fibers either? (I once examined an entire row of tags in a rack of adorable $300+ Betsey Johnson dresses, only to find they were all 100% polyester).

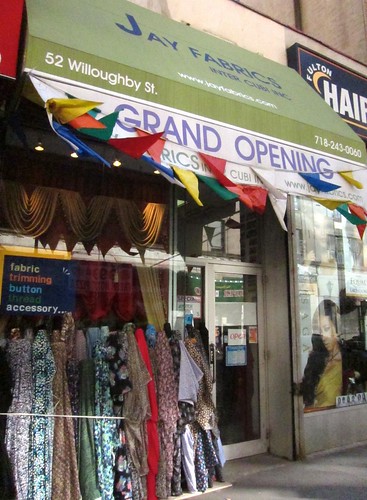
Newly opened Jay Fabrics on 52 Willoughby St.  
Newly opened Jay Fabrics, on 52 Willoughby St. in Brooklyn. Fabrics out front were $2/yard; those inside weren't much pricier.

Cheap/super-discount fabric CONS:

  • The distinct possibility that you will spend precious days, hours or even months lovingly fitting, constructing and sewing something... only to have it turn out crappier than a mass-produced discount store sweatshop special (though possibly better fitting).
  • Why is it so cheap? Is it possibly of even more suspicious/unethical/bad-labor/unenvironmentally sustainable origins than more expensive fabric? (Of course if it's remnants, second-hand or thrift store fabric, than it's likely MORE sustainable/responsible than some fancy new shiny freshly-manufactured pricy fabric).
  • Do you really want to live a fast disposable consumeristic life, or do you want to savor your fancy special sewn garments made of buttery-soft awesome magic fabric? Yummy!
  • It's easy to overcrowd your stash with random impulse-buy crap, like the 4 yards of hideous pink cotton suiting I bought in a Fabric.com $1/yard sale, now waiting for a trip to Goodwill. (To be fair, I also got 4 yards of AWESOME $1/yard orange stretch cotton sateen).

Fancy vs. cheap fabric: A super-short story:

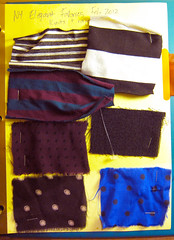
Why this topic? A few weeks ago, the Brooklyn Burdastyle Sewing Club (join us! you know you want to!) went on a little Garment District outing. Little Z and I met up with everyone at NY Elegant Fabrics, my first time in that giant, well-stocked—and overpriced—fabric shopping palace (detailed review on Shop the Garment District).

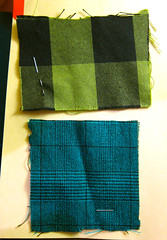
It was a disheartening experience. Z rushed around yelling some of her favorite words ("Green! Green! Green! Fabric! Fabric! Fabric! Dot! Dot! Dot!") and I ended up swatching some rayon-blend knits and wovens in dots, stripes or checks:

Swatching at NY Elegant Fabrics Swatching at NY Elegant Fabrics
BUT the types of fabrics shown above were pretty much all I saw for under $15/yard. Becasue there is no room in my sewing budget for $39/yard Liberty Tana lawn, $50/yard wool doubleknit, and most definitely not for $150/yard bright orange zebra fake fur.

It was depressing, and I felt acutely broke, not to mention limited in my sewing visions. In the end, I just got 3 yards of $15/yard super-soft cotton/lycra striped knit with excellent weight and recovery.

Red and white striped cotton spandex knit

With the idea of making a Sweet on Stripes dress knockoff (inspired by the Sew Convert).
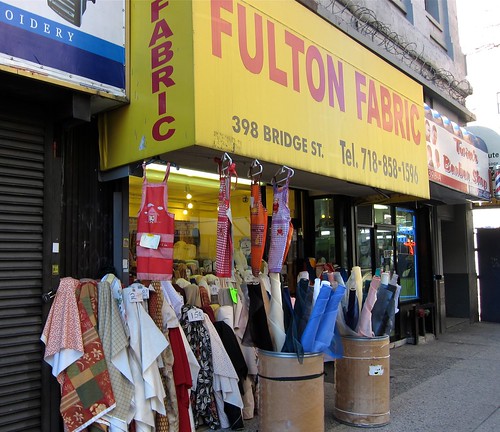
The next day, I was at home in Brooklyn, and had a sudden need for a large quantity of black stretch polar fleece (seriously) to make a costume for a friend. NY Elegant sells such things--for $10/yard and up. But so does Fulton Fabric on 398 Bridge St. (my detailed Yelp review here), a discount fabric store a mere short stroller ride away from my apartment:

Fulton Fabric on Bridge Street in Brooklyn (Fulton Mall)

And Fulton Fabric sells said fleece for $5/yard, but they gave it to me for $4, because they always do that and they are nice.

And because I of course couldn't resist taking home some of their $2, $3 and $1/yard fabrics in the process. Four dresses, a Ruby Slip muslin and one weird costume worth of fabric, all for less than the cost of the one stripey NY Elegant dress. Some highlights:

Lightweight vintage-looking floralBrown and cream polka dot poly georgettePurple poly stretch crepeLarge-scale purple and gray floral print poly chiffon  
Clockwise from top left: Vintage-looking floral poly woven ($1/yard), polka dot brown and cream poly georgette ($2.50/yard), super-soft and drapy floral poly chiffon ($3/yard), purple stretch poly crepe for muslins ($2.50/yard)

I told the store clerk and some fellow customers at Fulton Fabric about my NY Elegant experience, and they laughed in incredulity. "$20 a yard?" said a woman perusing a row of colorful embroidered polyester satins. "That's just crazy!"

So: is it? Or is that just the price you pay for quality?

And that's enough on this endless blog post. I'll save my detailed photo-heavy reviews of Fulton Fabric and newcomer Jay Fabric (and my roundup of things I have made with cheapo fabric) for another day.

Let me hear your cheap (or fancy) fabric confessions! Awesome or icky?

P.S. By the way, if flummoxed by how to sew either fancy or cheap fabrics, I really recommend having a detailed fabric sewing reference book handy. I love both Claire Shaeffer's Fabric Sewing Guide and Sandra Betzina's More Fabric Savvy: A Quick Resource Guide to Selecting and Sewing Fabric, though the latter is sadly out of print. They both include tips on pre-treating, pressing, washing, etc and recommend types of needles and presser feet for a huge range of fabric types.

Monday, March 5, 2012

Stripes & Wales Outfit #2 Progress: Piping! Appliqué! Cats!

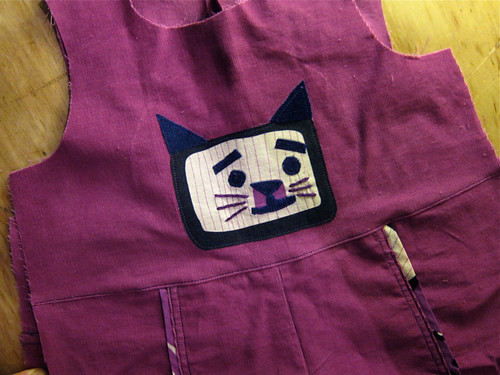
Ottobre "Pupu" Corduroy Overalls in Progress: Kitty Appliqué!

Fun fact: sewing overalls with cat appliqués on them is 53% more fun than sewing any other types of clothes. Meow! Never you mind the embroidery hoop marks.

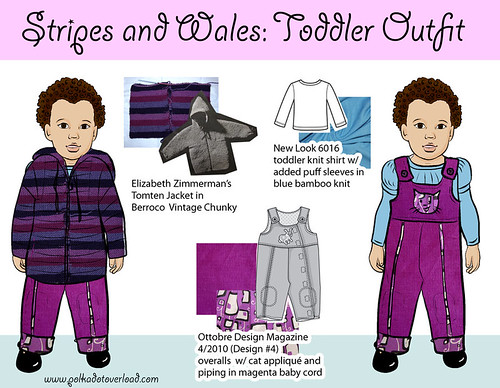
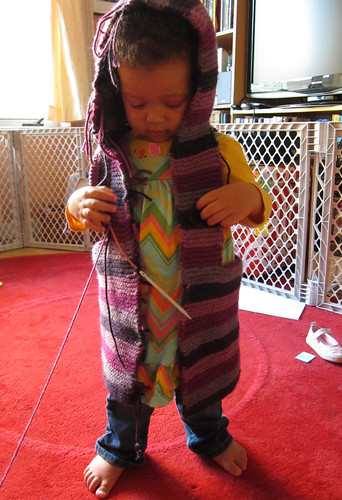
It's a sad equation, but the more precious evening minutes and weekend naptimes I spend blogging, the less time I have for actual sewing. So this weekend I deliberately resisted computer temptation and threw myself back into finishing my UFOs, most especially the Tomten sweater hoodie and Ottobre "Pupu" overalls from the Stripes and Wales outfit for my sweet toddler:

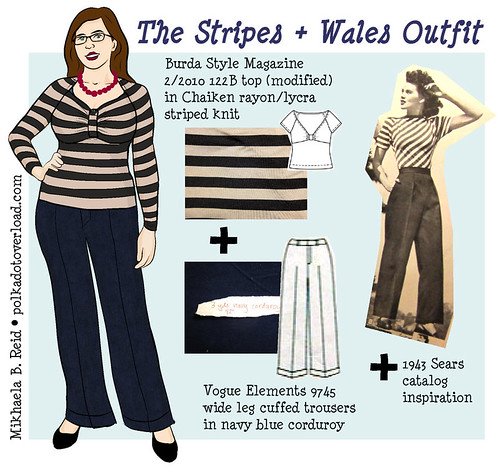
Stripes & Wales Sweater & Overalls toddler outfit sketch

The overalls are almost done--I had cut them out ages ago and then put them aside while I waffled over the design and construction for the front appliqué and back patch pockets. Little Z could care less about bunnies, so I knew I'd need to put a cat on the front for Maximum Toddler Overall Satisfaction. And my husband nixed the original heart-shaped back pockets, as he said they reminded him of those tight adult women's sweatpants with silly words on the butt.

I ended up cutting out bits of the cat's face freehand from scraps of my Triumphant Trousers (which, thankfully, shrank a bit in the wash and now fit PERFECTLY again... I even had someone stop me in a store this weekend to tell me how much she admired them, "they look tailor-made for you!" YES! I WIN!) ... I then used Light Steam a Seam 2 to stick all the bits down before stitching.

Considering how many new techniques I've been trying lately, I should probably join the Curves, Patterns & Pins technique-checking sewalong... For these little overalls alone, I've tackled:

  1. Making bias binding (using the cool infinite loop-style technique from the Colette Sewing Handbook)
  2. Flat piping (yes, the fear is gone!)
  3. Double topstitching (it's a bit wobbly, but serviceable--I'm using the triple-stretch-stitch since I couldn't find a topstitching thread in the exact color I wanted, and my edge-stitching and top-stitching presser feet.
  4. Appliqué, which I am super loving--it satisfies the artist in me. I must now resist the urge to cute-i-fy all items of clothing with little sewn-on bits.
  5. Hand embroidery (for the whiskers). My mom and aunt taught me some techniques back in the day but I had forgotten all the stitches and had to reteach myself from a book. BUT I do not advise trying to hoop a fabric with a pile--it leaves marks.
  6. Patch pockets with pretty piping. I drew them freehand because I was too lazy to use a template or the computer, and I wanted to go for a more "funky" look. With mixed results.

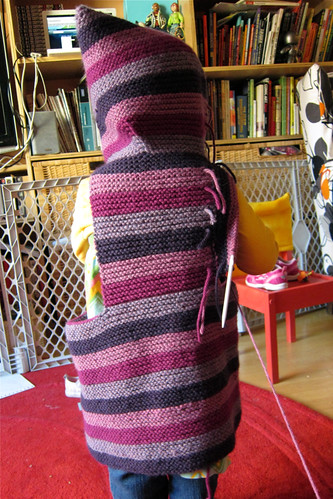
As for the sweater, even though I mostly knit on the subway or at lunchtime, I FINALLY finished the hood and got to the sleeves. I'm doing the sleeves in two colors instead of four because I didn't want to pay for eight balls of yarn when six would do--we'll call it a design feature!

Luckily it's gigantically huge on her--she'll be able to wear this thing for a while yet!

Striped Toddler Tomten Jacket in progress

Isn't she the cutest little elf?

Striped Toddler Tomten Jacket in progress

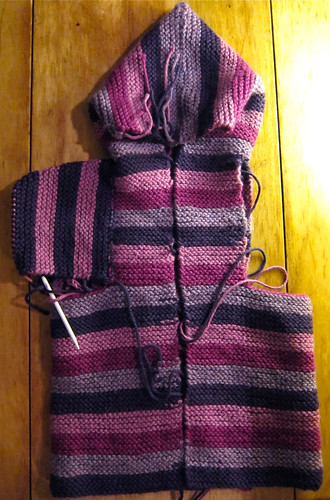
And here's the flat view:

Striped Toddler Tomten Jacket in progress

If all goes well, these will be done very soon and I'll move on to Joan blue bow dress overload!

So, how about you, Polka Dot readers: tackled any UFOs lately?

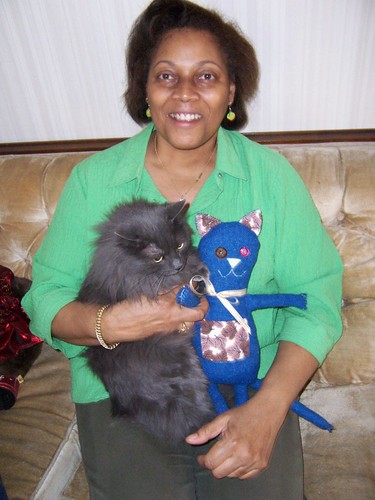
P.S. Bonus cat-related project photo--here's "Vincent", a stuffed blue wool tweed cat I made for my mother-in-law Gail for Christmas back in 2008 (pattern from the Denyse Schmidt Quilts book), shown here with Gail and her sweet cat Flo.

Vincent the Blue Tweedy Cat

Monday, February 27, 2012

Inspiration: Sweet on Sweater Dresses

Sweet on Sweater Dresses

I need another sewing project in my queue like I need more fabric in my underwear drawer (which is where the stash has started to creep). But I can't stop thinking about simple comfy sweater dresses lately, and I have this lovely plum sweater knit (which I got for $12/yard from Fashion Fabrics Club but SUPPOSEDLY was originally $40/yard) just lying around taunting me...

After collecting these images, I started seeing sweater dresses everywhere--I was especially taken with this lovely 1930s sweater dress refashion from This Old Life and her collection of inspiration images like this one:

I also loved this Anthropologie-knockoff sweater dress tutorial by un petit design...

And there are tons of gorgeous vintage sweater dresses on Etsy. I've been pinning them like mad, but as I write this Pinterest is down and I can't embed any of the images here. Boo!

Unlikely I'll get to this project before the weather makes it impractical, but wanted to share my obsession anyway. I keep debating whether I'd like a version with a big cuddly cowl-neck, or a split neckline, or deep V/scarf neckline...

So: have you ever sewed with sweater knit? As a knitter it just boggles my mind that a sweater that could take me MONTHS to knit could be magically whipped up in an evening or three...

P.S. Is it gauche/rude/stealikng or totally OK to put Pinterest pins of items sewn by other bloggers in inspiration posts, if they link back to the original posts? I wasn't sure, so just linked to them here.

Sunday, February 26, 2012

Mad Men Sketch + Bias Slip Woes

Mad Men Sewing Challenge Sketch: Joan Dress

Is it just me, or do I look a bit goofy in 60s hair? I think I'll skip that when I photograph my completed challenge.

So here's the sketch. I'm not sure what I think--I'm not as in love with the drawing as I expected to be, but I think it's the hair and the fact that I couldn't figure out how the dress would work on my narrow shoulders--which is why I didn't draw in the brooch. Maybe I need to convert it from the set-in sleeve of the pattern to the kimono sleeve of the real Joan dress?

And I'm still frustrated in my dickey fabric search. As you can see above, I got some random cheap poly chiffon that sorta works--but Joan just strikes me as a genuine silk charmeuse kind of woman.

On another note... Thank you all again for the kind comments on my corduroy trousers! I'm sad to say that although they started out perfectly fitted they've continued to grow with wear and are now at least an inch or more too loose even in the elastic waistband. I'll see if they shrink up decently in the wash--if not, I'll take them in. Either way, they still fit better than all my other pants. So there, pants!

But that's what sewing's all about, right? Always something new to learn.

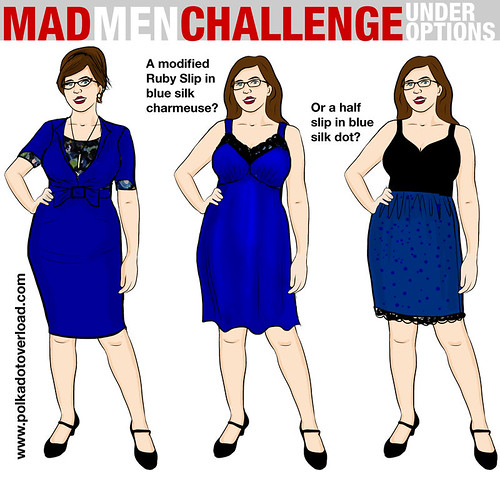
For example, tonight I learned I hate sewing on the bias. Or cutting silk on the bias anyway. I wanted to make some silk half and full slips to wear under unlined skirts or dresses:

Mad Men Sewing Challenge Sketch 2: Under Options

I attempted cutting out the simple rectangular pieces of my bias half-slip pattern (from Karen Morris's Sewing Lingerie That Fits) tonight while half-watching a sci-fi movie with my husband, and as the pieces slipped and slid all over the place, I was led to several deep questions:

  • How is it that so many of you watch television/movies while sewing? I pretty much missed the whole thing since I wanted to focus on not slicing off my fingers.
  • I know full slips are usually on the bias, but why would a half-slip need to be on the bias? Will all my suffering be worth it?
  • Do you think anyone will notice that the two rectangles I attempted to cut out look like parallelograms that have been chewed on by Cookie Monster? I swear those things would NOT square up, even with the help of the helpful woven-in dots on the fabric and a veritable army of rulers and T-squares.
  • I've never worn a half slip, but since they're all bunchy and gathered around the waist--is that going to show under my super-tight Joan dress? But conversely, would the full Ruby Slip--which has something of an A-line skirt--look weird/visible under a pencil-skirted dress? I'm curious--I've only ever owned slips of the unbreathable nylon variety.

And yes, a few of you pointed out that my croquis is now a bit larger than I am, since I drew her before an unintentional random weight loss (my food/movement habits haven't changed, so I believe it's due to my toddler nursing a lot during a recent growth spurt)... but I was too much in a rush to redraw her just for this.

Thursday, February 23, 2012

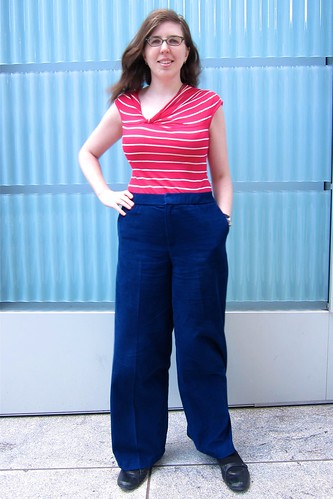
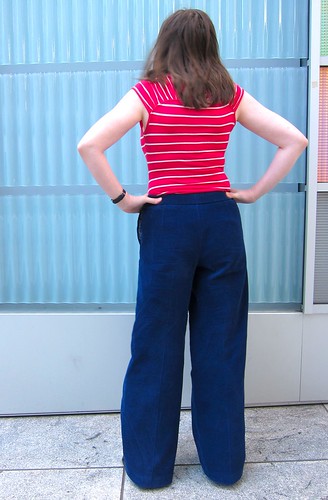
Trouser Triumph!

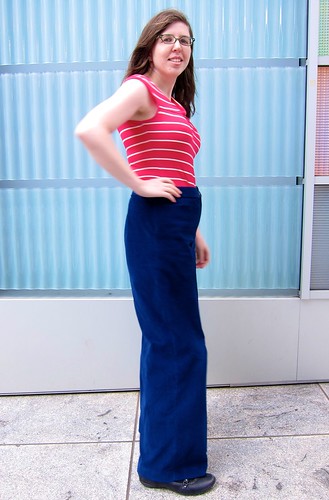
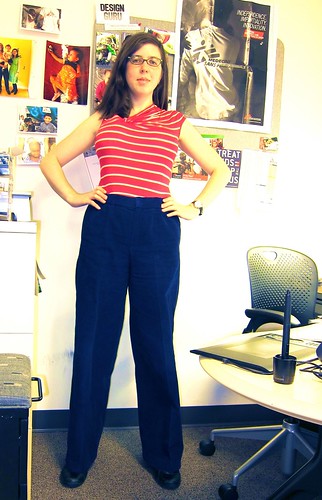
Trouser Triumph

I wanted trousers, I made trousers, I wore trousers. TROUSERS!

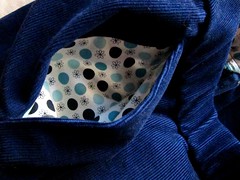
These might look like ordinary trousers, but they contain a veritable universe of pain, suffering, hard-won sewing experience--and eventual triumph! Also: polka-dot pockets:

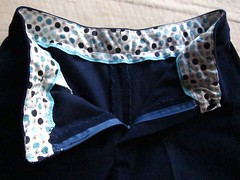
Pocket interior

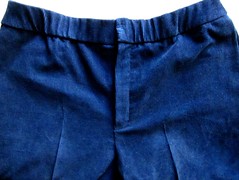
And a hidden elastic waistband:

Hidden elastic waistband shows when at rest

They're the first proper pants I've made (not counting pajama pants, pull-on pants and baby pants) and I'm not embarrassed to say that I started these over a month ago, because they are now the most comfortable, best-fitting pair of pants I own, and I will wear them INTO THE GROUND.

I took my time, made a muslin, read lots of reference materials, did lots of basting, and ripped out and redid anything that wasn't quite right. And as I wore them today at work I had this nagging sensation that they were too good to be true, and that my magic pants would somehow turn into a pumpkin (or rip up the rear)... but no. They're real, and they're mine! Phew!

Inspiration: I had three main inspirations:

  1. 1940s-style natural-waisted wide-legged trousers with creased legs...
  2. Maternity pants and toddler pants with hidden elastic. So comfortable!
  3. Burning hatred of all RTW pants. If they fit in my hips, they sag at my waist and rear. If they fit in the morning, somehow by the evening they are huge and sagging or super-tight. And they are always the first thing to stop fitting with even the slightest weight change. GRRRRR.

The sketch:

Stripes + Wales trouser outfit sketch

Photos:

Why is photographing clothes so HARD? I tried this morning, back when they were perfectly snug and pressed, but even super-lightened these pictures are a bust:

Trouser Triumph

Trouser Triumph

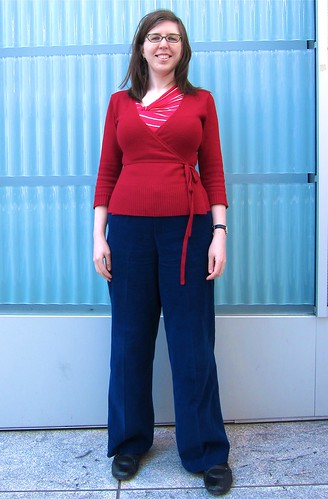
So I ended up snapping some cold and windy self-timer portraits in a park at lunchtime to get proper color, but by then they were a bit wrinkly:

Trouser Triumph

Trouser Triumph

Trouser Triumph

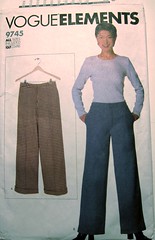
The pattern: Out-of-print Vogue Elements 9745 from the stash, a slightly below-the waist wide-legged trouser with contour waistband, fly front (no shield) and center back seam, with optional cuffs and carriers (which I skipped--I don't do belts on below-waist pants).

Vogue 9745 Pants

Pattern Sizing: The original envelope included sizes 6-22. I cut a 14, which should have been SLIGHTLY too small in the waist (I have a 28.5" waist, 38" hips)... but I ended up taking in 2 inches on the hips and 1 inch on the waist, plus adding elastic to the whole waistband to pull it in another inch or more.

This was partly due to my fashion fabric, partly to me randomly losing a few pounds (my toddler has been nursing a LOT lately--growth spurt and all that). And although my pants fit perfectly in the a.m., they did start to sag and bag a little by the end of the workday.

Were the instructions easy to follow? There was just one sheet of simple-looking illustrated instructions, but since I had never made real trousers before, they might as well have been in alien cryptoglyphs. So I relied heavily on step-by-step photo instructions from the Easy Guide to Sewing Pants and Sandra Betzina's Power Sewing.

What did you particularly like or dislike about the pattern? Overall I love it, but I realized after assembling the fly front that it's backwards--it faces the same way as the fly fronts on traditional men's pants, but most women's pants have it the other way.
Fabric:

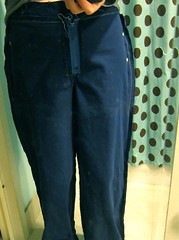
  • Trousers: Soft navy corduroy from the stash. I found it really tricky to cut in layers--it kept sticking to itself, so one leg came out longer than the other and I had to recut in single layers.
  • Pockets and inner waistband: polka dot quilting scraps by Denyse Schmidt from the stash.
Notions: A 7" Coats & Clark zipper from Jo-Ann's (probably should have gone for something classier in retrospect), rayon seam binding, 1 1/2" wide elastic.

Pattern alterations or any design changes you made:

  • I lengthened the legs by an inch or so, to a 32" inseam.
  • Took the hips in by 2 inches, and the waist by 1 inch. I did this after basting the fashion fabric pants together, standing in front of a mirror and pinning out the excess at the side seams:

    Pinning out excess fabric at the hips
  • Replaced the standard interfaced waistband with a hidden elastic waistband, following instructions from Power Sewing. The elastic is zig-zagged to the seam allowance of the waistband so it doesn't turn inside the casing. I didn't want them to LOOK like elastic-waist pants, so I kept the back darts. The elastic only pulls in the waistband slightly--maybe an inch or two all around--much as a belt would.
  • Used rayon seam binding for the lower edge of the inner waistband, creating a little "curtain" as I've seen in most of my RTW pants/skirts:

    Trouser interior

Every part of the process was painful--I swear 90 percent of my time on these was spent poring over instructional photos, second-guessing myself, trying on the muslin and fashion fabric version repeatedly, squinting at the mirror, pinching the fabric here in there, sobbing, what have you... as opposed to actually sewing. It reminded me of the time I took a road trip around Southwest France, got lost every five minutes due to all the roundabouts, had to ask for directions in my rusty French--and eventually got there.

Because it all worked out and I have a feeling that my next pair of these will be smooth(er) sailing! Please don't tell me otherwise.

References Used:

  • Sandra Betzina's Power Sewing
  • The Easy Guide to Sewing Pants
  • Pants for Real People
  • David Page Coffin's Making Trousers for Men and Women

Successes:I MADE TROUSERS AND THEY ARE THE BEST MOST COMFORTABLE TROUSERS I OWN.

Room for improvement:

  • Next time I may try a version in a lighter color with elastic only in the back (and petersham in the front), and some fun top-stitching.
  • They should probably be a little snugger around the belly in the front.
  • Maybe I'll try a wider contour waistband that goes all the way up to my natural waist.
  • I'll use a better zipper, this one is a bit flimsy.
  • But the main area I need to improve in is SPEED.

Would you sew it again? Would you recommend it to others?
Yes and yes. After all this work, I'm hoping these will become a TNT pattern!

Wear to:Work. Weekend. Playground with my daughter. EVERYWHERE!

Conclusion: I made trousers and I am happy. And here they are at the end of the workday, a bit looser and saggier and wrinklier, but still AWESOME:

Trousers at Work...

Good night all! May all your sewing projects go smoother than this one, but with just as happy results!

LinkWithin

Related Posts Plugin for WordPress, Blogger...