Showing posts with label kids. Show all posts

Thursday, May 7, 2015

A Polka-Dot Lego Dress, Onesie and Necklaces (Also: Fun with Block Printing!)

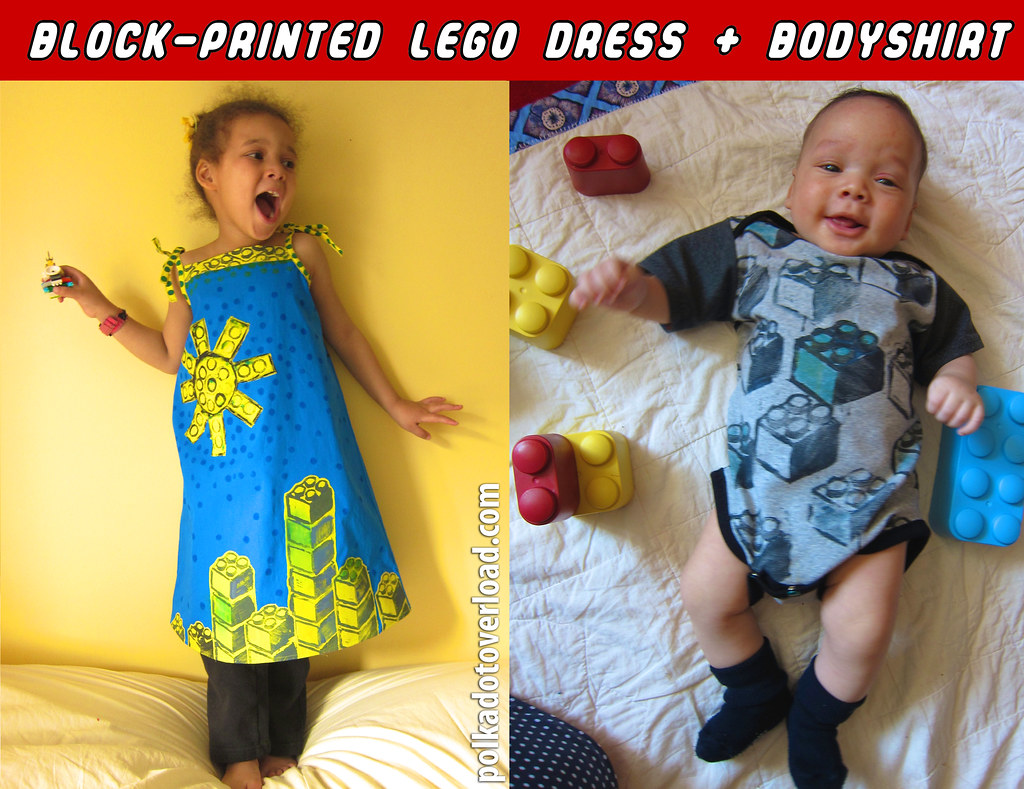
Block-printed Lego Dress + Bodyshirt

What with all the Small Human Being-focused sewing going on, I think my daughter was feeling a little left out. So I pulled out one of the unfinished (unstarted?) objects I felt most guilty about: her Lego Cityscape sundress. I sort of meant to make it for Kids Clothes Week, but baby wasn't really napping, and I fell down the crafty rabbit hole of experimenting with block printing and... well, here it is.

She loves it, if it isn't obvious. I really struggled to edit down the photos on this one!
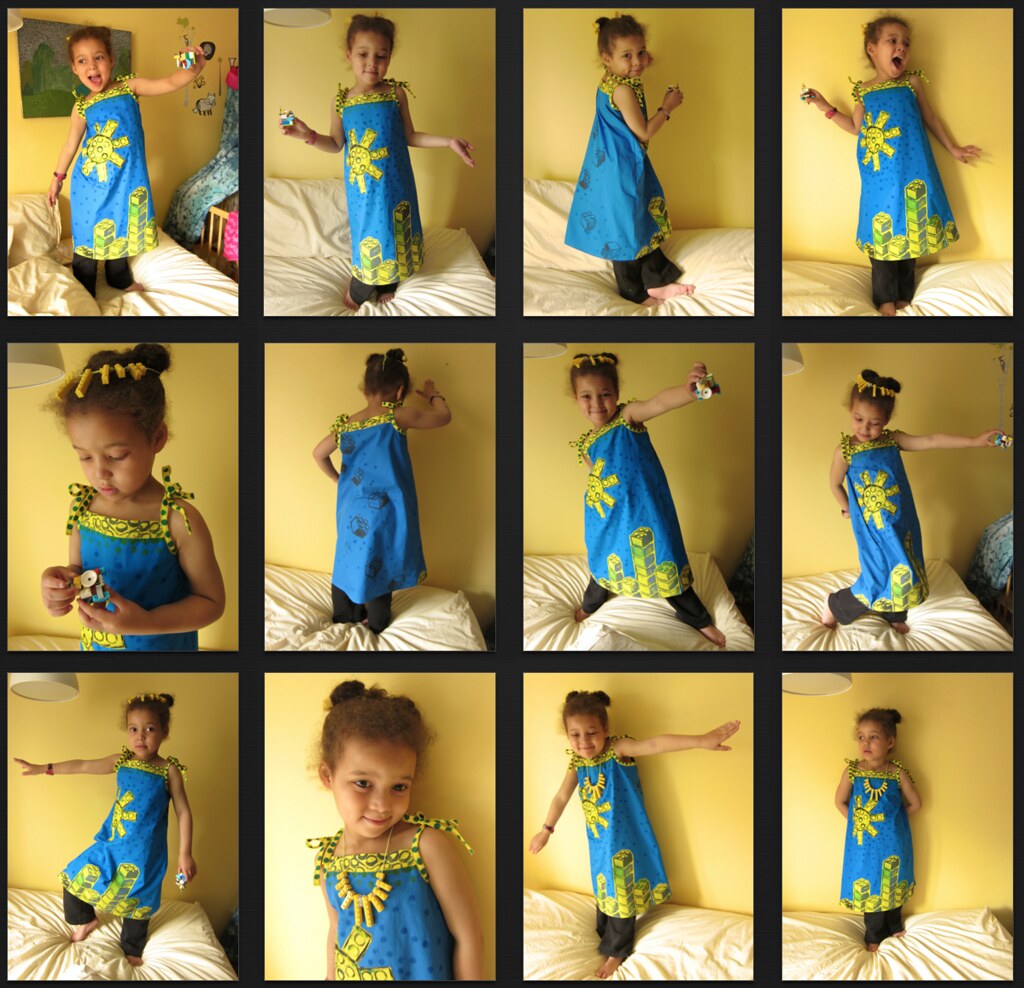
Block-Printed Lego Cityscapes Dress (Oliver +  S Popover Sundress)

Backstory: As some of you may recall, about a year ago, I had a little "Lego Dress Showdown" to choose which blocks-themed dress idea to make for my daughter's Lego-themed fourth birthday party.

Can't Decide: Lego Dress Ideas for My Daughter's 4th Birthday Party

The cityscape design with the sun (which was partly inspired by this Oliver + S tutorial on raw edge appliqué) was by far the most popular, but alas, I was so tired and nauseous from my pregnancy it never happened. And her Lego birthday party was a disaster — shortly before the other kids showed up, little Z started throwing up EVERYWHERE. It was too late to cancel the party (which was in the lobby of our building) but she was so sick she didn't even eat a single bite of the amazing allergy-free Lego cake my mom made for her (no dairy, eggs or nuts):
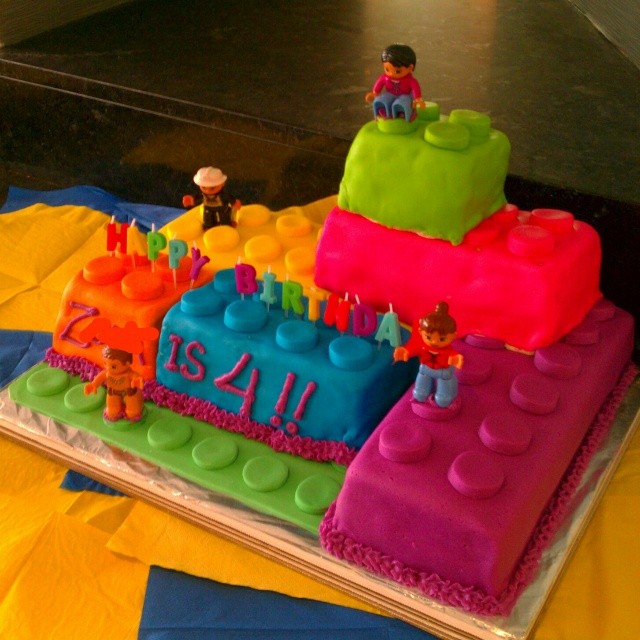
The #allergyfree #Lego cake awaits the birthday party guests... #dairyfree #eggfree #nutfree #sesamefree and more #foodallergy

The other kids came and played with all the Duplos and games we had set up, and we recorded a video of them singing happy birthday to her and wishing her well. She recovered by the evening but is still sad about missing her birthday party to this day.

But I digress. Back to the dress!

Block-Printed Lego Cityscapes Dress (Oliver +  S Popover Sundress)

Lego dress basics:

The pattern: The Oliver + S patterns free Popover Sundress pattern. I actually own a bunch of not-free-at-all Oliver + S dress patterns, but I went with this free shoulder-tie dress because it is so simple — the plain front makes a great blank canvas for embellishment. It was a fun and quick sew, and the directions are just as great and detailed as with their paid patterns. My only quibble is that there isn't much ease across the tummy; if I make it again, I'll add some width and gather or pleat the dress front to the yoke.

Sizing: I made the size 7 (probably about two sizes too big) as I'd like her to be able to wear it for a good long while.

Fabric: Bright blue and yellow broadcloth from Tru-Mart Discount Fabrics (a crowded little store over by FIT that has some great deals sometimes).

Notions & tools, etc: Steam-A-Seam Lite 2 (for the appliqué). Fabric paint (Jacquard Neopaque nontoxic paints, which I already had around because I am a craft supplies semi-hoarder), Speedball Lino Cutters, Tee Juice Classic fabric markers (for the dots), some Blick EZ Cut block printing material, a foam brayer and foam brushes.

Blockprinting references used: I already had Lotta Jansdotter's Lotta Prints: How to Print With Anything From Potatoes to Linoleum... which is very inspiring, but slightly vague on the technical info and handholding needed to get good results. Luckily my local library had a more nitty-gritty detail book available, Fabric Printing at Home by Julie Booth.

Techniques used: Mock French seams (my first time trying this), homemade bias binding (for the straps) with a Clover 1" bias tape maker.

It took a lot of experimenting to get my DIY rubber blocks to print clearly on my fabric. Deepika has a cool tutorial on the Pattern Review blog using wood blocks but I wasn't about to start wood (or lino) carving, so I used E-Z Cut Printing blocks:

Trying #blockprinting on fabric for the 1st time to make clothes for the kids for #kidsclothesweek & #SHBsewalong but it's not going well... I carved a stamp from EZ Cut & it works fine on paper, but...

After I got the impressions looking fairly good, I blockprinted the Lego towers and sun onto the yellow fabric, and the yokes. (It's all the same block, I just painted different parts of it before stamping to get some partial impressions). I heat set them (oh goodness, it takes FOREVER to heatset with an iron on so much fabric!), used fusible web to stitck them to the dress front, then stitched them down with a zig zag for extra security:
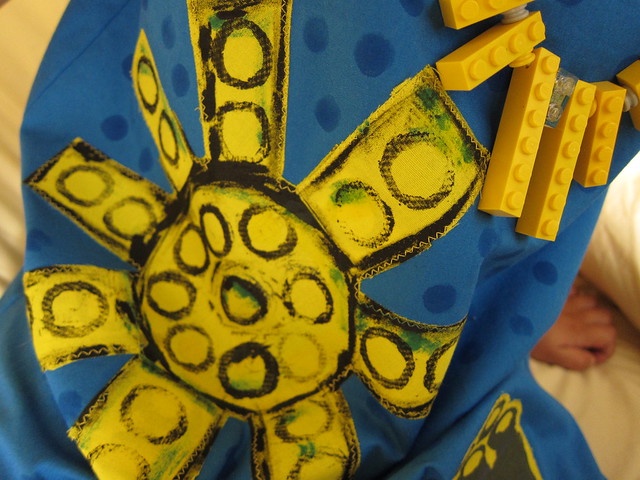
Block-Printed Lego Cityscapes Dress (Oliver +  S Popover Sundress)

For the back I decided to make it look like the blocks were tumbling down:
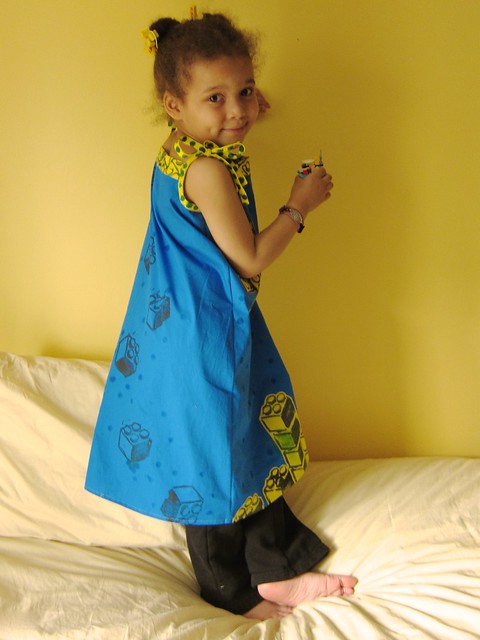
Block-Printed Lego Cityscapes Dress (Oliver +  S Popover Sundress)

I had a moment of panic when she tried it on and declared it resembled an IKEA apron (the yellow and blue?) but once I added the dark green polka dots with a Tee Juice marker, the resemblance faded.

Z wore the dress on a walk to our local branch of the Brooklyn Public Library (doesn't it look cute peeking out as a skirt?)...
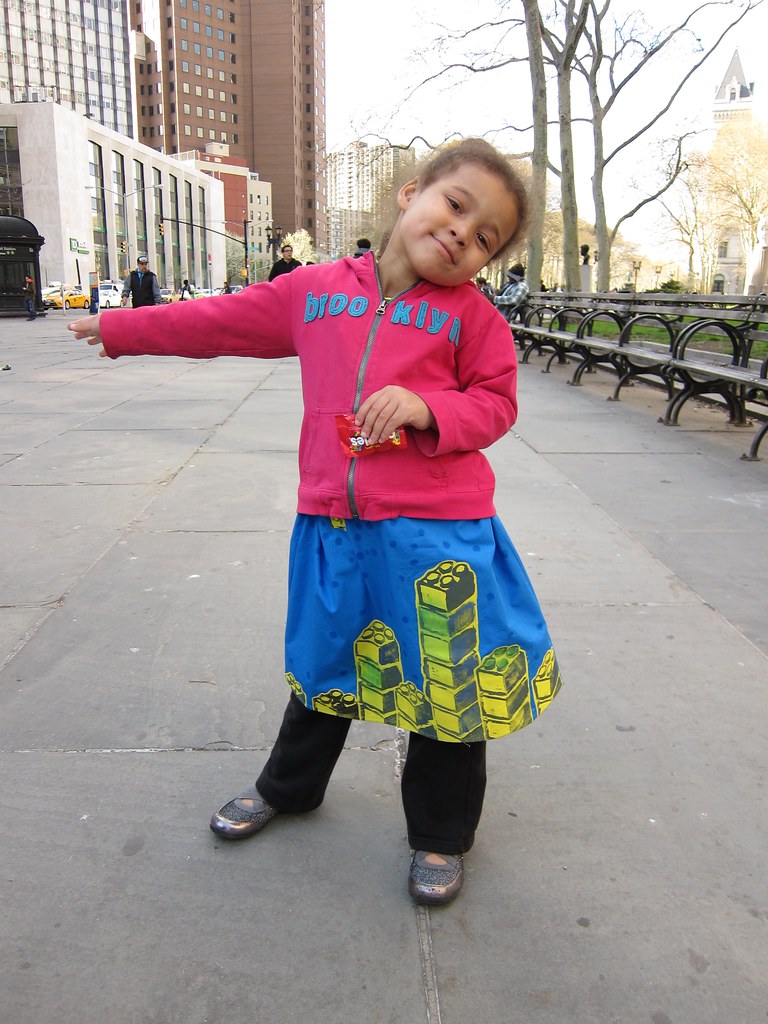
Block-Printed Lego Cityscapes Dress (Oliver +  S Popover Sundress)

The librarians loved it and invited her to the monthly Lego Club.
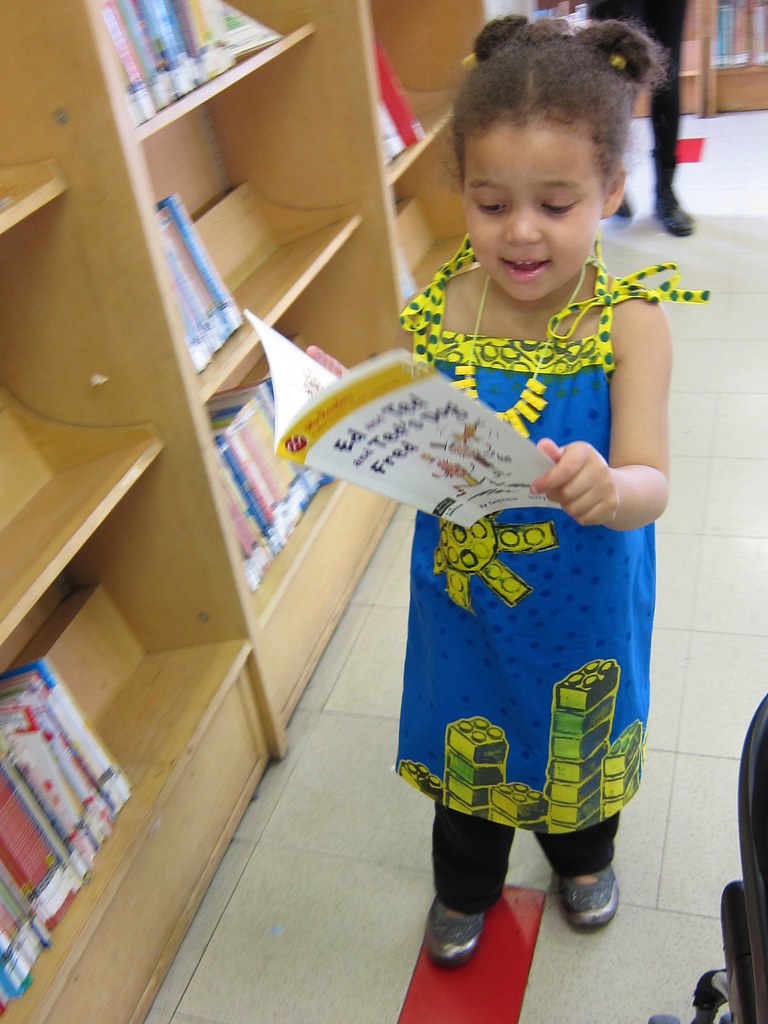
Block-Printed Lego Cityscapes Dress (Oliver +  S Popover Sundress)

She had a blast building a "Flying House Pirate Ship" with some mermaids and wizards on it).
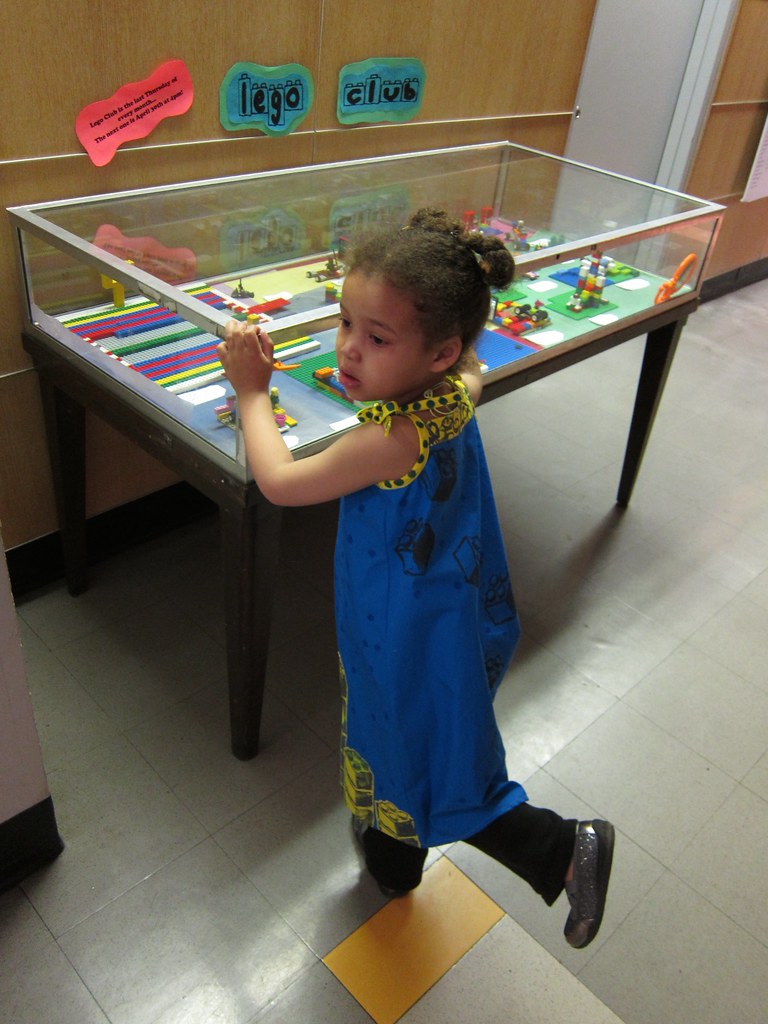
Block-Printed Lego Cityscapes Dress (Oliver +  S Popover Sundress)

While I had the paints and block out, I decided to make a blocks onesie for the little guy as well using my Kwik Sew 2433 baby layette pattern and some random knit scraps left over from other projects. I made the 9-12 month size, so it's HUGE on my 3-month old, but he's growing fast.
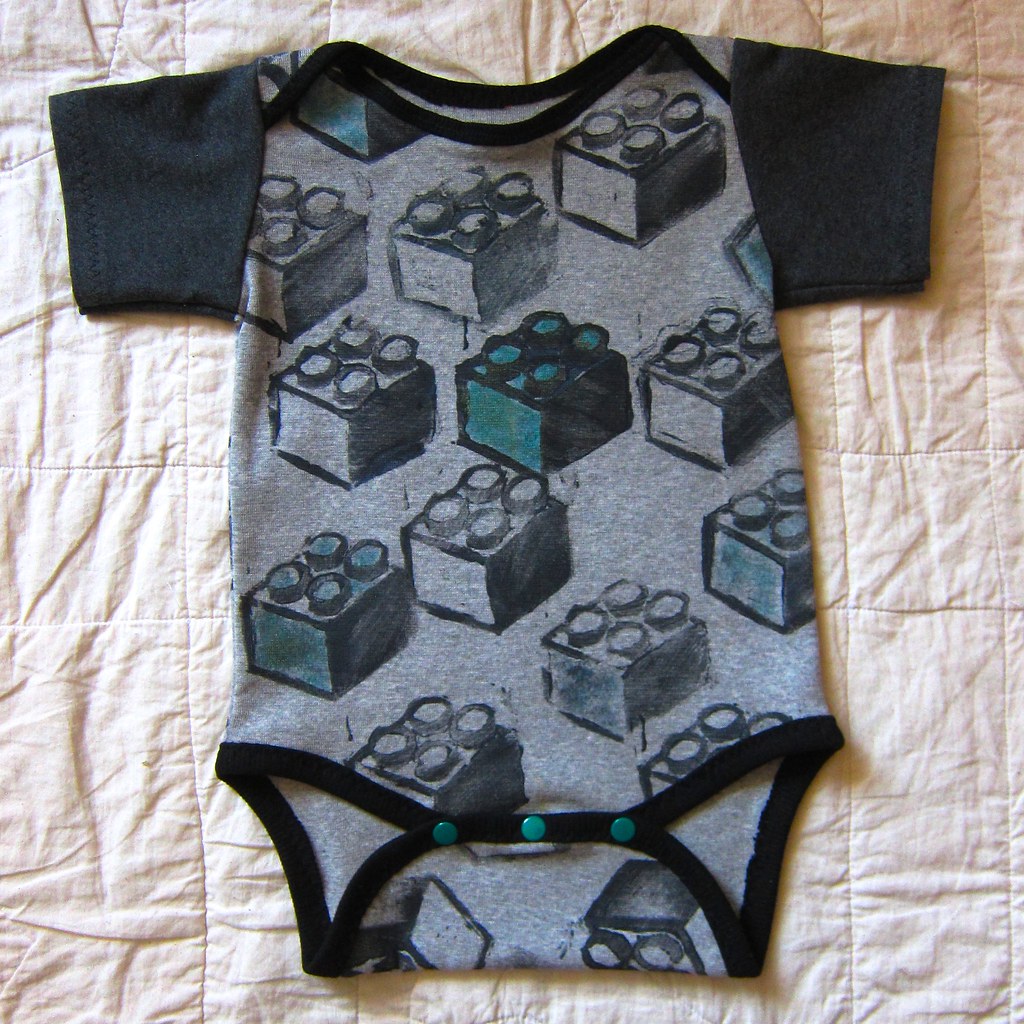
Block-printed Lego Blocks Onesie/Bodyshirt

Big Sis tried to give him some building tips using her old Green Toys "My First Blocks" but he was skeptical:
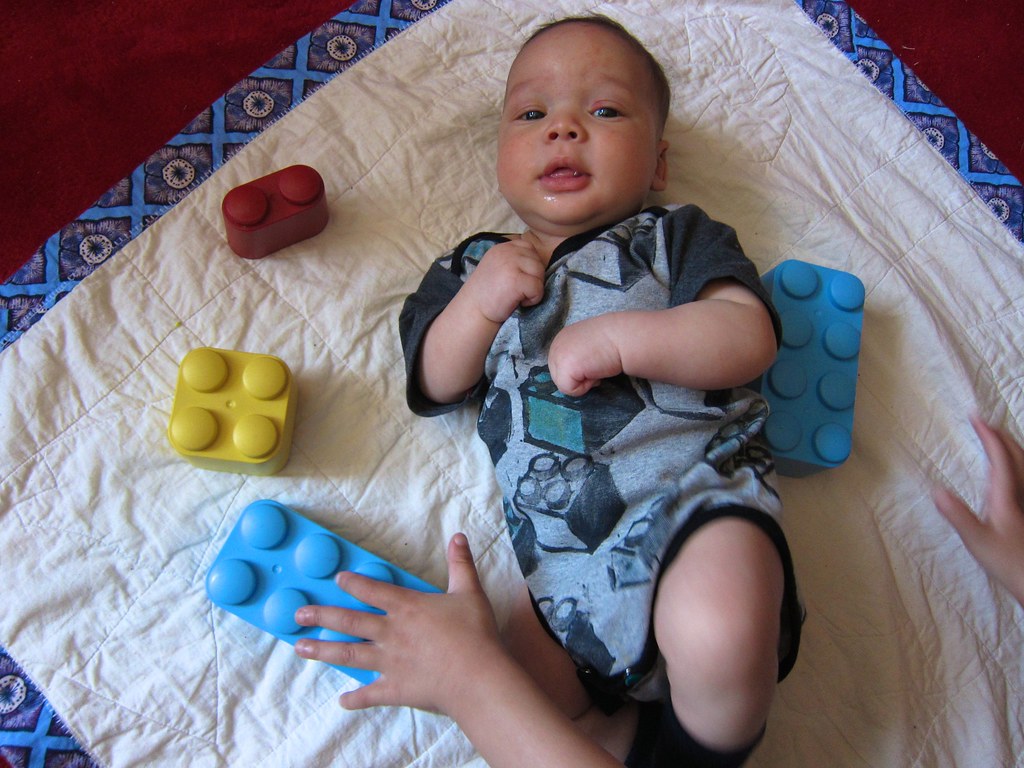
Block-printed Lego Blocks Onesie/Bodyshirt

So she gave up and played with the blocks herself:
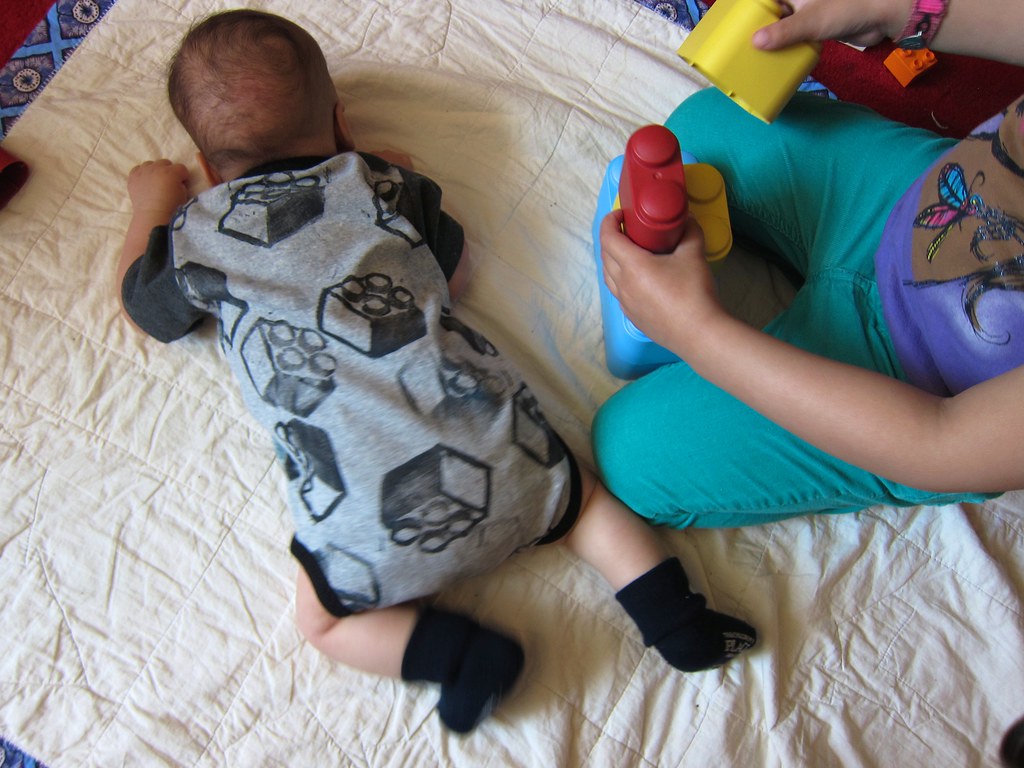
Block-printed Lego Blocks Onesie/Bodyshirt

For the necklace, my husband drilled holes in some Legos and Z and I arranged them until we got something we liked. Hers:
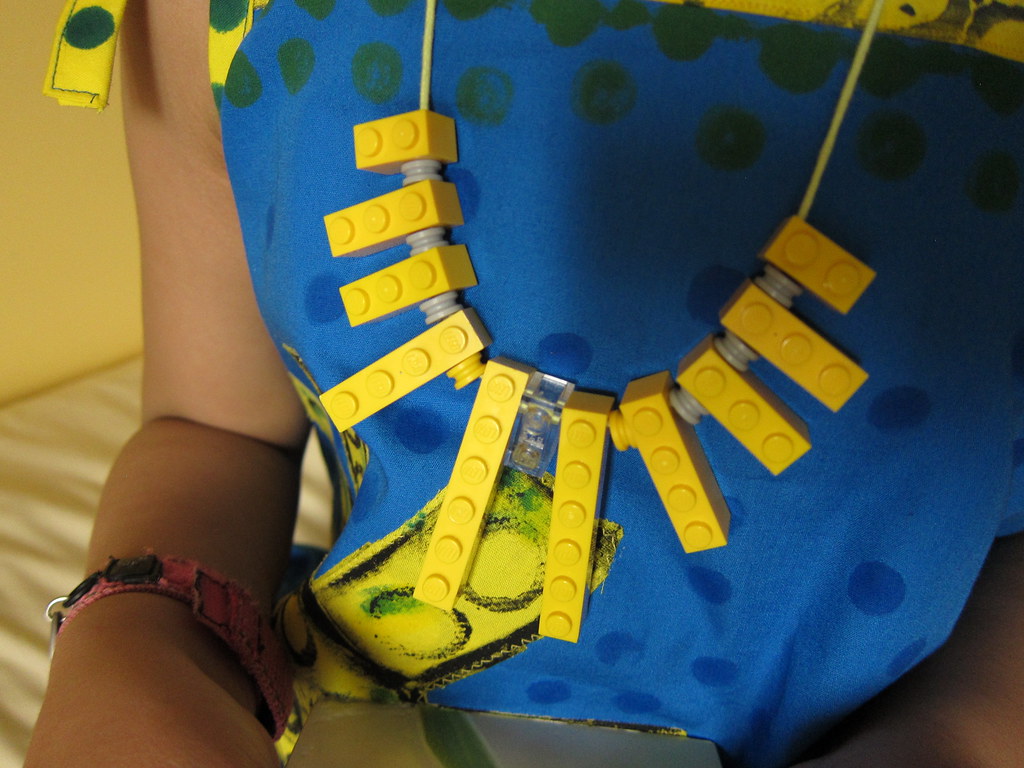
Block-Printed Lego Cityscapes Dress (Oliver +  S Popover Sundress)

And mine (shown here on the day of her ill-fated party):
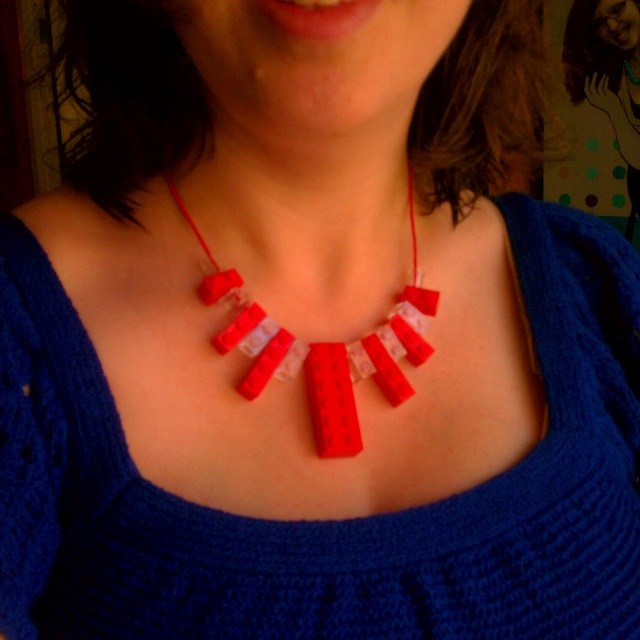
Been sick for a few weeks and didn't get to sew special #Lego dresses for Z's birthday party today but I did make matching mother/daughter Lego necklaces.

Conclusion: Neither garment is perfect (but whatever, perfect is the enemy of good, etc), but I had a lot of fun and feel like I learned a lot in my block printing experiments and am now a bit obsessed with thinking about how I can decorate my own fabrics. While at the library I also picked up A Field Guide to Fabric Design: Design, Print & Sell Your Own Fabric (Traditional & Digital Techniques) by Kim Kight (formerly of True Up blog, now a fabric designer for Cotton and Steel) and it made me want to experiment more with Spoonflower again. (We'll see if that actually happens).

In the meantime, Z is loving her Lego dress, and I am thrilled that I finally finished it.
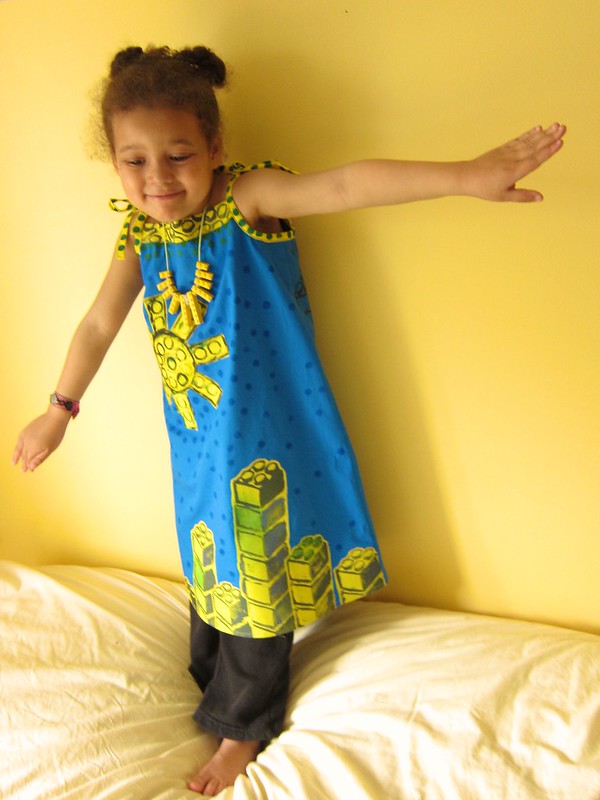
Block-Printed Lego Cityscapes Dress (Oliver +  S Popover Sundress)

**Disclosure: Actions you take from hyperlinks within this blog post may yield commissions for polkadotoverload.com (quite likely to be spent on yarn or fabric or possibly diapers).

Monday, December 22, 2014

How old were you when you first used a sewing machine? (with poll)

First time operating the sewing machine all by herself (with very close supervision from Mommy) to make a gift for her one-year-old cousin. Age 4 1/2. She was extremely careful.#sewing #sewingwithkids (tagging @fireapplefarm )

After months of pleading from the four-year-old, last week I finally let her operate the sewing machine by herself —with extremely close and cautious supervision from me — to make a Christmas present for her baby cousin R. And it went great, actually! She was incredibly careful, sewed slowly and cautiously along a chalked seamline with a fairly even seam allowance, and didn't get her hands or fingers anywhere near the needle.

I think her favorite part was pressing the foot pedal, which I put up on a stool for her. (Or maybe it was using the different buttons on my computerized machine to select the stitch length and pattern—after sewing the plain seams, she went a little crazy with the built-in flowers and leaves and diamond embroidery stitches on my Viking).

The present she was making is a pattern for smiling stuffed coffee mug dolls and saucers. She picked it out of the adorable Japanese doll-making book Fun Dolls by Aranzi Aranzo (last used when Z and her older cousin T made "Eyelash Bunny" dolls together). Here's a shot right before she sewed the pieces together—we just cut the pieces out of an extra soft cotton flannel baby blanket, and I appliquéd on eyes cut from an old black T-shirt:

While Daddy was off protesting, Z decided stuffed coffee mug dolls would make ideal holiday presents. She scanned the pattern into the computer, printed it (with my help) & cut out the pieces & I let her press the foot pedal too. (from the book Fun Dolls

She has been hand-sewing, embroidering and helping cut out patterns since she was three (which I wrote about last year in the post "I want my kid to be able to make or fix anything!") and slowly working her way up to using the machine over the past year. I started by letting her press the buttons to select stitches for me, and then eventually let her use the foot pedal while I steered the fabric, or sit in my lap and help me seal the fabric.

She knows how to attach a button (by hand) or a snap (with a hammer), the basic parts of the sewing machine, the difference between knit and woven fabric (she likes to play a game of guessing which clothes she has are woven, and which are knit), and what stabilizers and appliqués are.

I think teaching her to sew and watching her have so much fun with it might be even more fun than sewing myself. It's hard to believe I'm about to have a new little baby who will have no sense of danger and responsibility and whom I will have to keep far, far away from all sewing supplies! It also brought back fun memories of when my mom taught ME to sew on her machine when I was a kid. Here's the first skirt I made (with Mom's help), at age five:

My first skirt!

Of course all that sewing is hard work... she passed out on the couch halfway through stuffing the first doll:

Sewing is hard work! Napping on the couch with her coffee cup doll in progress. #sewing #sewingwithkids

Finished object pictures soon. They really turned out cute, and she's been running around pretending to drink tea or coffee out of them.

So: how old were you when you used a sewing machine for the first time? Did you learn as a kid or come to it as a teen or adult?

Meanwhile... we somehow managed to corral her and get a semi-serious Chanukah/Christmas/New Year's holiday photo out of her! (After about 40 tries with the self-timer):

Holiday Family Photo 2014

Most of the pictures were more like this:

Holiday Family Photo 2014--goofy

Boy is that baby belly huge! 35 weeks and counting... Happy holidays everyone!

Tuesday, December 2, 2014

The Story of Luna, the Black Mermaid Fairy Superhero Doll with Purple Dreadlocks! (Pt. 1)

Z's Mermaid Fairy Superhero doll is done!

Meet Luna, the Mermaid Fairy Superhero. Like any proper superhero, she has an origin story:

Once upon a time there was a four-year-old girl named Z who loved all things fantastical and science fictional: mermaids, fairies, superheroes, robots, witches, unicorns, vampires and rocketships. Z would sit for hours and draw pictures of everything from time machines and flying ponies to Harry Potter:

Last night Z and I watched Harry Potter & today she surprises me w/ this drawing of Harry catching the Snitch and Hermione and Ron brewing potions. #kidart

One fine summer day, Ms. Z and her mommy and daddy visited the Brooklyn Aquarium. Z was excited to see the many soft little snuggly mermaid cloth dolls for sale at the gift shop ... but sad that not ONE of them had brown skin or curly hair like her. She settled for a pale mermaid dolly with straight brown hair but asked her mommy -- where can I find one that looks more like me?

And so little Z and her mommy set out on a quest. They searched far and wide across the land and internet, but nothing was quite right. There was a brown-skinned mermaid Barbie, but she had straight hair and was made of plastic. There were soft snuggly brown-skinned cloth dolls, but they had no magic powers or mermaid tails. One day they journeyed to all four toy stores in their neighborhood: the first three had no black dolls at all; the fourth had beautiful handmade Waldorf cloth dolls with many skin colors and hair styles, but they were $100-$200 each and had no magical qualities.

By now little Z and her mommy were feeling quite cranky, but luckily they had a magic power of their own: sewing.

So they sketched their ideas:

doll ideas

Made a simple pattern...

Z's design (with help from mommy): Mermaid Superhero Fairy doll with Afro in progress...

Gathered up some fabric scraps and curly bouclé yarn, and got to work... Cutting:

Cutting her pattern

Pinning...

Pinning her fabric

Pinning together...

Sewing, embroidering and stuffing...

Dollmaking adventures: Mermaid Superhero Fairy doll with Afro in progress...

At first the mommy sewed most of the doll by hand because her machine was in the shop, but then a friend lent her a vintage Featherweight and things sped up:

Snuggling with the almost-finished doll

Finally, Luna was done!

Z's Mermaid Fairy Superhero doll is done!

She was just what the little girl wanted: a mermaid fairy superhero with brown skin, curly (purple) dreadlocked hair, sparkly fairy wings, plus a crown and magic wand.

Z's Mermaid Fairy Superhero doll is done!

Z's Mermaid Fairy Superhero doll is done!

And the little girl and her mommy were very, very happy. THE END.

Z's Mermaid Fairy Superhero doll is done!

... or is it?

P.S. I am going to also (if I can find time) do a little post this week with the (free) PDF for the pattern plus some basic construction details and a list of all the supplies required and doll-making resources, etc. Just in case you want one of your own...

Tuesday, November 25, 2014

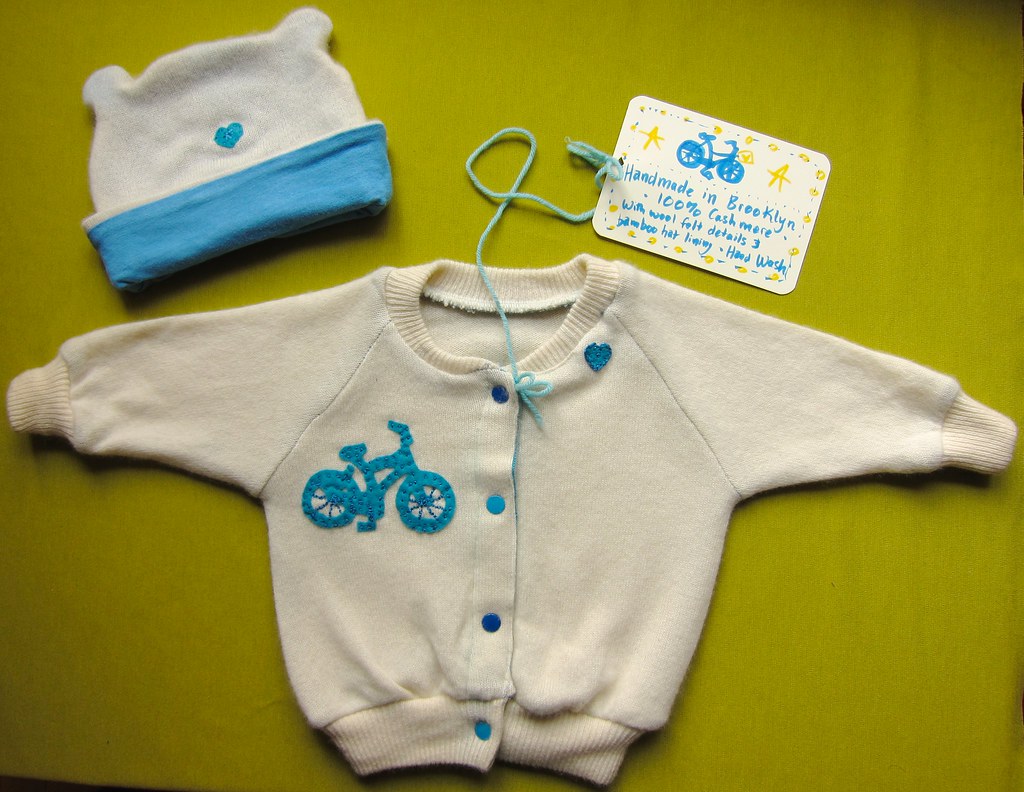
Done: Bicycle appliqué cashmere cardigan with matching hat refashion

Cashmere Baby Cardigan with Bike Appliqué and Matching Hat

Four years ago I picked up two lovely, soft — and totally shapeless — cashmere cardigans at a thrift store for a few dollars each, with the vague dream of refashioning/upcycling them into warm and snuggly baby leggings for my then-tiny daughter.

Those snuggly leggings never came to be... but I thought a cashmere cardigan and matching hat would make a perfect baby gift for a bicycle-loving knitterly (i.e. unafraid of handwashing) friend of mine who had her baby girl last week, and so here we are:

Cashmere Baby Cardigan with Bike Appliqué and Matching Hat

The basics

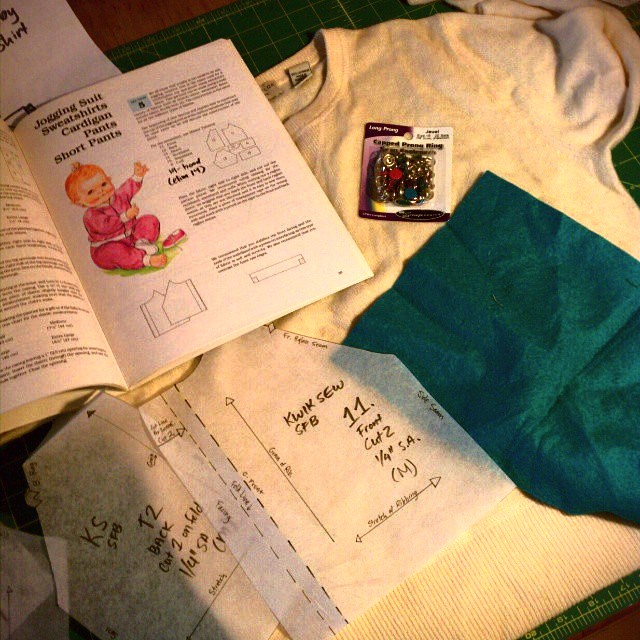
Patterns:

Fabric: A cut-up thrifted Lord and Taylor two-ply cashmere pullover sweater, plus some scraps of blue bamboo knit and some turquoise wool felt for the appliqué. Much better than buying actual cashmere yardage, since I could repurpose the ribbing as well.

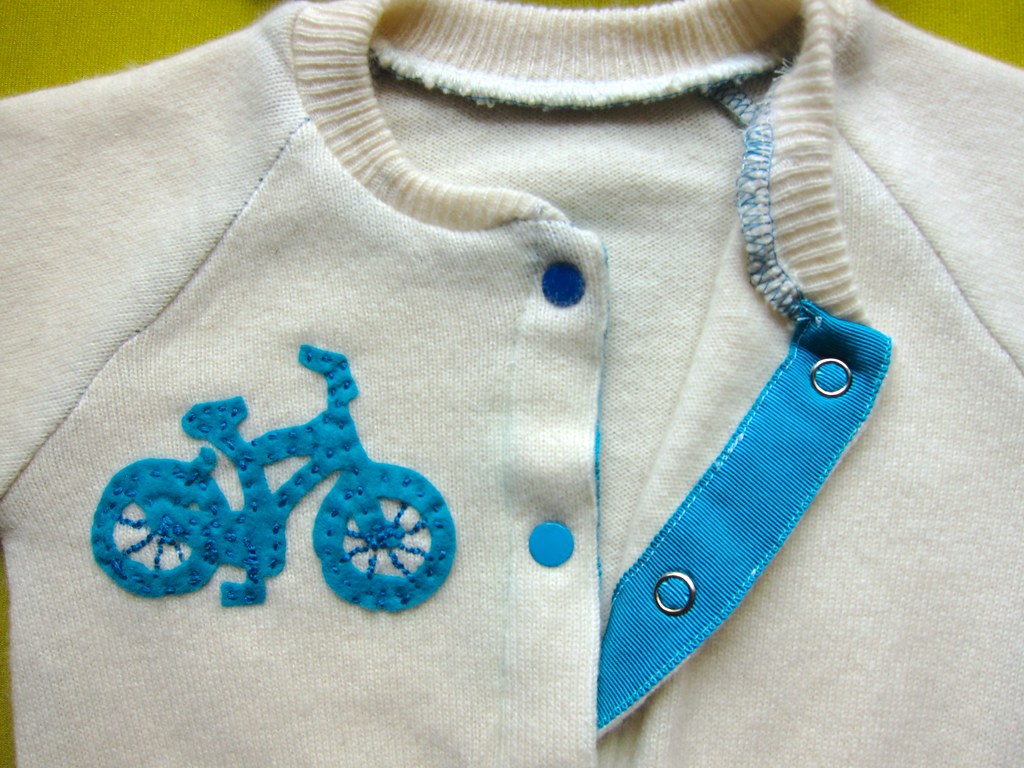
Notions: Embroidery floss, fusible webbing (part of my dwindling Lite Steam-a-Seam 2 packet), colorful snaps from Sew Baby, petersham ribbon from Pacific Trimming.

Size: Medium (3-6 months) for the sweater, and I just eyeballed the hat size to match.

Here's what the adult sweater looked like before I cut into it:

First #sewcation project: appliquéd cashmere baby jackets from repurposed adult-size sweaters. #sewingforbabies #sewing

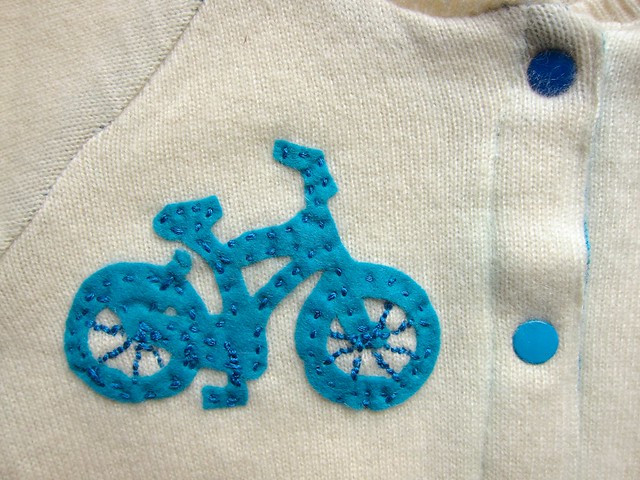
Inspiration: I knew the gift had to be bicycle-themed, because my friend and her husband are the kind of people who manage to squeeze five bikes into their 1-bedroom Brooklyn apartment. (All of which they ride, frequently). I cut my appliqué design out freehand based on this cute little T-shirt from Mini Boden:

Modifications: No modifications, but I'm embarrassed at how much unpicking was involved in both of these items—somehow I managed to attach the collar wrong twice, and the ribbed hem too.

Construction notes: The cardigan is simple, if you actually pay close attention to the instructions, which I apparently did not. SO. MUCH. UNPICKING. OF. SERGER. THREADS. I did 90 percent of this project on the serger, reasoning that would keep the fine-knit cashmere from unraveling better than the machine.

The embroidery bit was super fun—I fused the little wool felt shapes to the cardigan with fusible webbing, then just played around with some back stitches and running stitches.

Cashmere Baby Cardigan with Bike Appliqué and Matching Hat

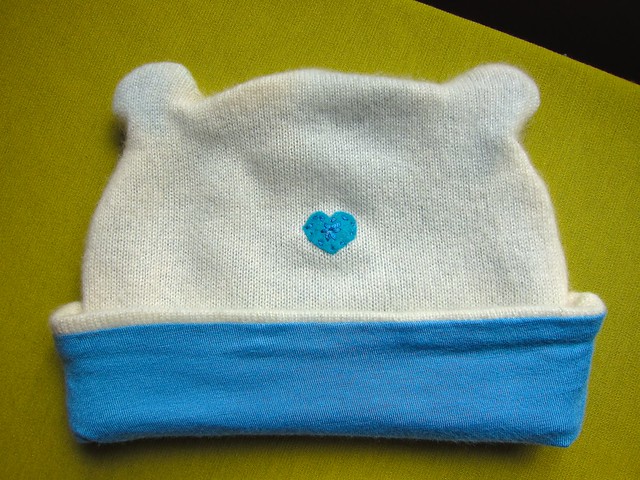
I initially put a bike wheel on the hat, but it looked odd and I replaced it with a heart:

Cashmere Baby Cardigan with Bike Appliqué and Matching Hat

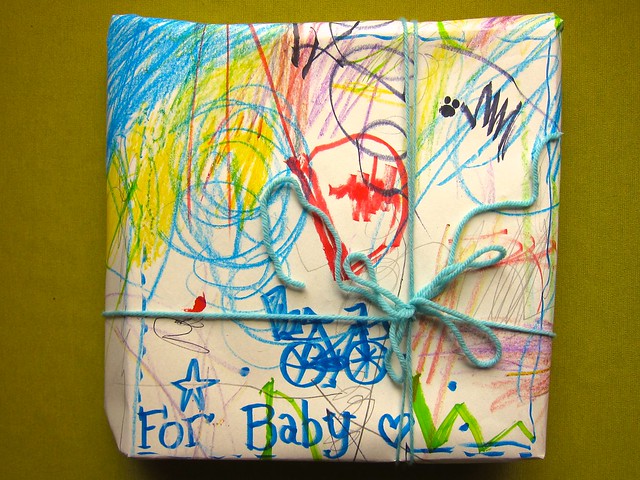
Finally, I wrapped the wee soft things in some of my daughter's extra artwork (with her permission), and tied them with a bit of leftover yarn—so much more fun than commercial wrapping paper and ribbon, am I right?

Cashmere Baby Cardigan with Bike Appliqué and Matching Hat

Hmmm... I kinda want to make a matching set for my baby-to-be now with the remaining cardigan, a nice red cabled knit — they could wear them when they play together.

P.S. I am happy to report that my daughter's scheme for a handmade mermaid fairy superhero doll with a big curly purple Afro is well underway—we designed the pattern together and she's mostly sewn and stuffed—all she needs now are a few finishing details. More to come soon!

Monday, May 26, 2014

Double Wax Print Impulse Sewing (based on free tutorials - Made by Rae Baby Sunsuit, Oliver + S Lazy Days Skirt)

Matching wax print cousins outfits: Made by Rae Baby Sunsuit as top, Oliver + S Lazy Days skirt

The impulse sewing bug strikes again! We were at my mom's house in Massachusetts this weekend and I wandered into her sewing room looking for a darning needle for my Hetty cardigan. Her fabric stash was sitting right there, so I just decided to look through it, out of you know, curiosity. And I saw this wax print fabric and I thought "Why don't I make Z and her baby cousin R some simple matching elastic-waist skirts?" So I did.

Matching wax print cousins outfits: Made by Rae Baby Sunsuit as top, Oliver + S Lazy Days skirt

And then after the kids were in bed I saw my mom had some elastic thread and I thought "Why don't I make matching shirred tops?"

Presto! Instant matching wax print cuteness.

Of course, by the time I had both outfits ready for a photo shoot, six-month-old Baby R had fallen asleep for a nap. So I mostly got photos of Z running around in her new favorite outfit (plus a matching headband my mom threw together with her heavy-duty snap attaching machine):

Matching wax print cousins outfits: Made by Rae Baby Sunsuit as top, Oliver + S Lazy Days skirt

The basics

Pattern: I used two free tutorials I'd been eyeing for a while — the Made by Rae Baby Sunsuit (to make the shirred tops—I just left off the bottom part) and the Oliver + S Lazy Days skirt. Both are just constructed from simple rectangles — the skirt is a full width of fabric gathered by an elastic waistband and trimmed with a ribbon hem, and the top is a rectangle with some elastic shirring and straps.

Fabric: "Veritable" Dutch wax print cotton borrowed from my mom's stash. She got it from my beloved Sew-Fisticated Discount Fabrics in Boston (see my review).

Size: I just went by the girls' waist measurements, and made the tops and skirts a bit long on them so they could wear for a while yet.

Matching wax print cousins outfits: Made by Rae Baby Sunsuit as top, Oliver + S Lazy Days skirt

I remember the first time I realized it was possible to make simple items like skirts without (gasp!) an actual pattern—that many garments were nothing but rectangles or circles gathered up in different ways. At the time I went a little crazy and sewed like, six elastic-waist full skirts before I realized it wasn't always the most flattering look for me. But it works really well on these little girls!

Instructions: Both tutorials/patterns had excellent, clear, detailed instructions.

Construction notes: I added two extra rows of shirring on Z's top since she is so much bigger than R. And I added extra snaps to make the tops adjustable.

Matching wax print cousins outfits: Made by Rae Baby Sunsuit as top, Oliver + S Lazy Days skirt

My favorite details are the ribbon hems...

Matching wax print cousins outfits: Made by Rae Baby Sunsuit as top, Oliver + S Lazy Days skirt

(Can you believe the cuteness of those toes? GAH!)

And the purple snaps:

Matching wax print cousins outfits: Made by Rae Baby Sunsuit as top, Oliver + S Lazy Days skirt

The stripes on this fabric are not even vaguely on-grain, so there's a bit of a jumbled tilted effect, especially in back:

Matching wax print cousins outfits: Made by Rae Baby Sunsuit as top, Oliver + S Lazy Days skirt

All in all, an impulse sewing win!

Matching wax print cousins outfits: Made by Rae Baby Sunsuit as top, Oliver + S Lazy Days skirt

A perfect outfit for running around and playing all summer long:

Matching wax print cousins outfits: Made by Rae Baby Sunsuit as top, Oliver + S Lazy Days skirt

And for snuggling with cousins, of course:

Matching wax print cousins outfits: Made by Rae Baby Sunsuit as top, Oliver + S Lazy Days skirt

Sewing doesn't always have to be complicated. Even simple shapes can look awesome in a bright, fun fabric and with the right details. (Cute models don't hurt, either.)

So: Do you ever make simple garments from rectangles or sew from tutorials? Or are you all about using actual pattern pieces?

LinkWithin

Related Posts Plugin for WordPress, Blogger...